Waterblock manufacturers are already offering blocks for water-cooling Nvidia’s latest GeForce RTX 4080 and RTX 4090 Founders Edition gaming GPUs, and in this guide, we’ll show you how to water-cool an RTX 4090 Founders Edition with an EK Quantum Vector² waterblock. The same steps also apply to the RTX 4080 model, as well as similar partner cards.
At Custom PC, we’ve been water-cooling PCs since the early days in 2003, giving us loads of experience in the art of attaching waterblocks, making custom loops, and ensuring it all works properly. We know exactly what tools you need and which methods work best.
Water-cooling Nvidia’s RTX 3000-series Founders Edition cards was an involved job, with you having to deal with all sorts of cables, screws, magnetic covers, and tiny latches in order to remove the stock cooler, and while the process is less involved with these new cards, it’s still quite fiddly. There are, of course, thermal benefits to cooling these top-end gaming GPUs with water, but the biggest boon is getting rid of the enormous cooler, meaning the card takes up far less space.
1. Unlock the backplate
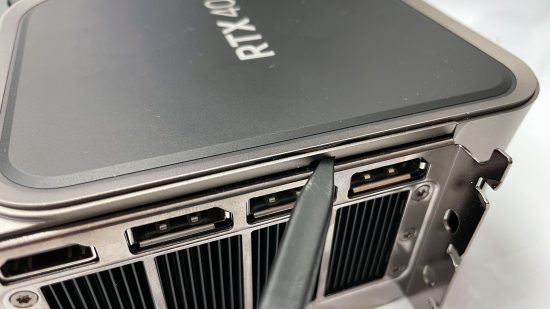
The backplate secures using a single locking mechanism, which is released using a latch at the end of the graphics card. We’ve inserted a point-tip plastic pry tool into the hole to release the backplate. This will prevent you from scratching the cooler.
2. Lift the backplate
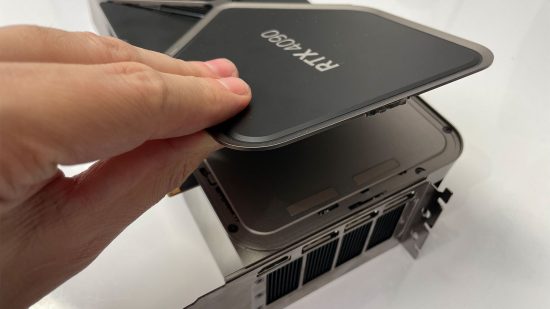
The first part of the backplate will now lift up. Do this gently and take care not to bend it, as inner sections will be held in place using pins towards the fan. Lift it gently and allow these sections to release.
3. Put screws in a container
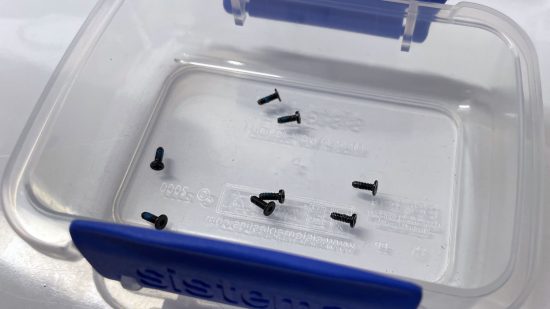
Before you start removing screws, grab a container to ensure they don’t get lost. You may well want to reinstall the cooler at some point so it’s essential to keep these screws safe.
4. Remove crosshead screws
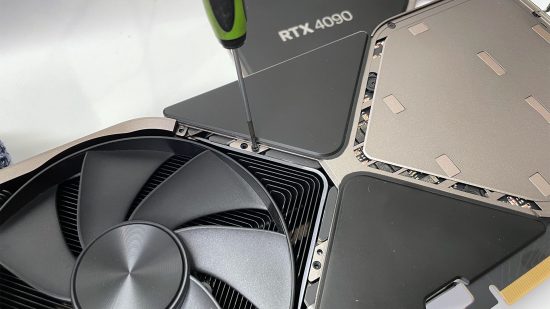
You need to deal with three different types of screws, so you’ll need a mini screwdriver set that includes all the bits you need. Start with a crosshead bit, which you can use to remove the four screws next to the backplate fan.
5. Remove Torx head screws
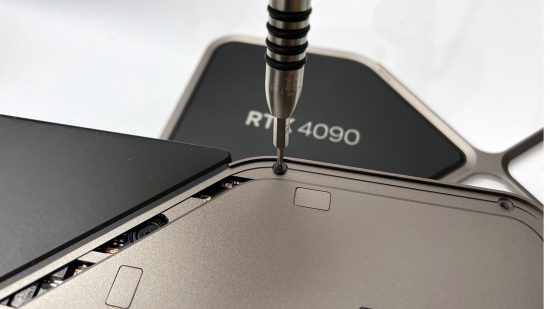
You’ll need a T5 Torx bit for the next set of screws. These are located around the lighter area of the backplate next to the expansion slot bracket. Once you’ve removed these screws, place them in your container.
6. Remove the backplate
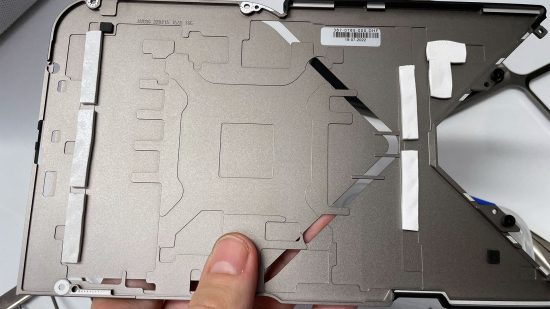
The backplate should now lift away easily, but it does have thermal pads underneath it that could be a little sticky. Remove the backplate carefully, so you don’t tear these pads – you’ll need the pads intact if you ever want to refit the stock cooler in the future.
7. Lift cable latch
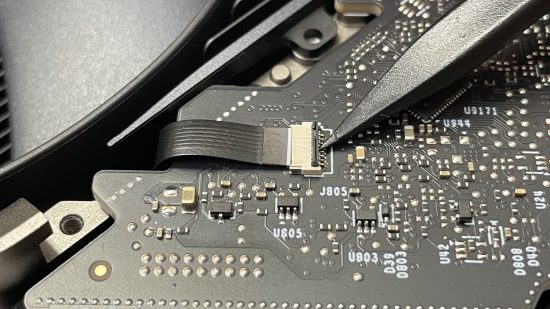
There are two small ribbon cables on the rear of the PCB, which need to be detached. This can be done using the small pointed end of the plastic pry tool, lifting the end of the black plastic latch upwards.
8. Remove the ribbon cable
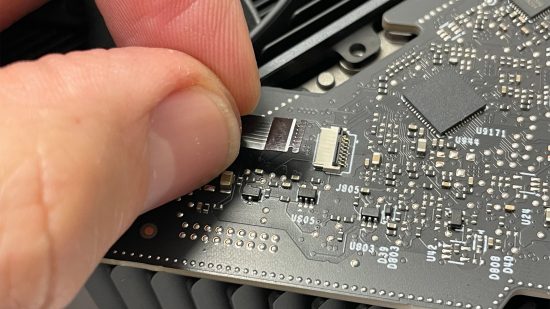
The ribbon cable should now pull out easily. Don’t force it out as it can tear easily. If it refuses to come away, try raising and lowering the latch again, then wiggling the cable from side to side.
9. Open connector cap
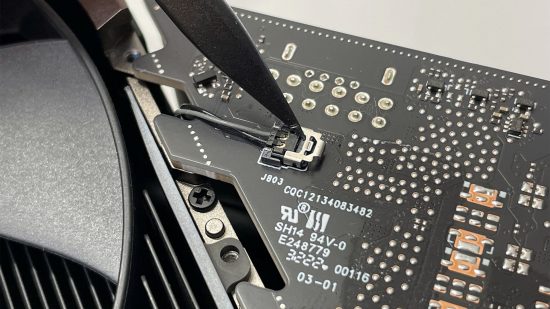
With the two ribbon cables removed, it’s time to deal with the last connector. This has a small metal cap that you need to slide away from the connector. Again, you can use the pointy end of the plastic pry tool for this job. The black connector will then be fully revealed.
10. Remove the connector
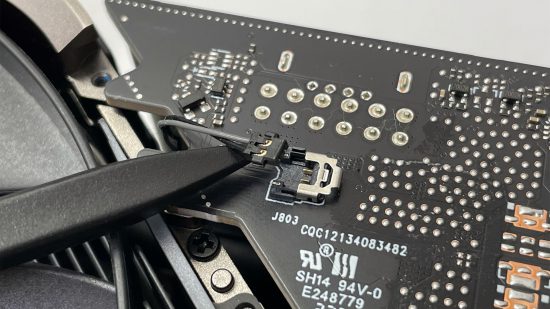
The connector will lift out vertically, and you can again use the pointy end of the plastic pry tool to lift it from the end with the cables protruding. This job needs very little force.
11. Remove core screws
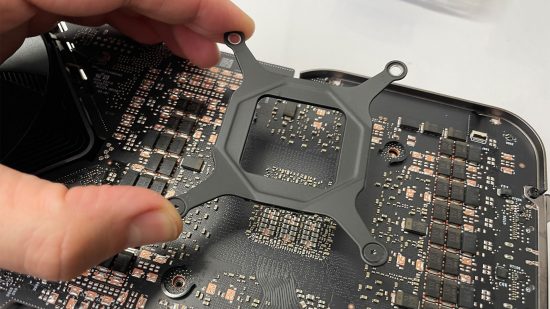
The four screws surrounding the GPU core have T6 Torx heads so use the correct bit to remove them. Start by loosening each screw by three turns, then fully remove them and lift away the metal bracket.
12. Remove bracket screws
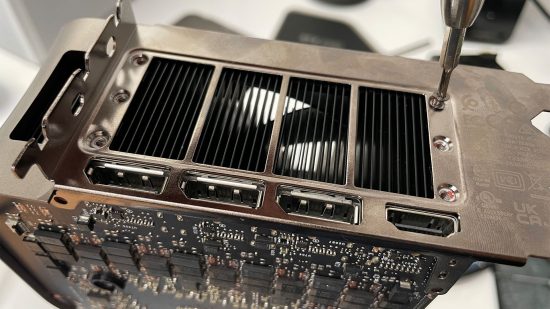
There are seven Torx screws securing the expansion slot bracket, one of which is at the end of the PCB. These screws require a T7 Torx bit this time, which is larger than before. Remove the screw on the PCB then deal with the six screws at the end of the card above the output ports.
13. Remove the bracket
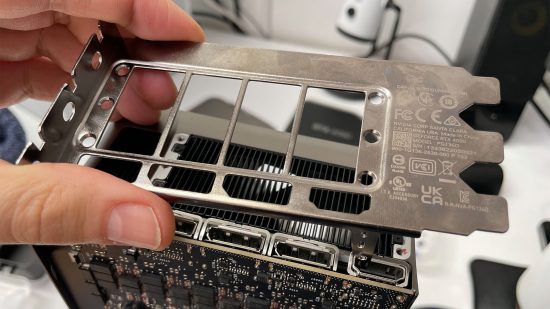
You will now be able to remove the expansion slot bracket, which will pull out from the end of the card. If it doesn’t, check that all seven Torx screws have been removed, along with the screws on the PCB.
14. Remove PCB
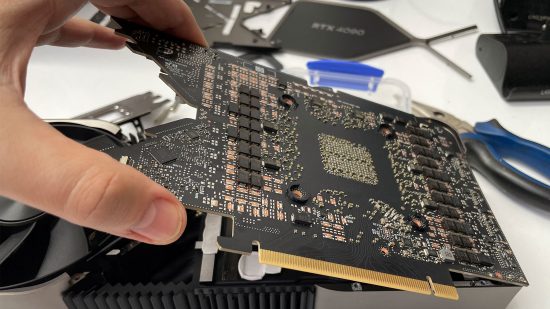
The PCB should now lift up from the fan end of the card. It may need some persuasion, as the thermal paste and thermal pads underneath will have sat between the PCB and heatsink.
15. Remove stock thermal pads
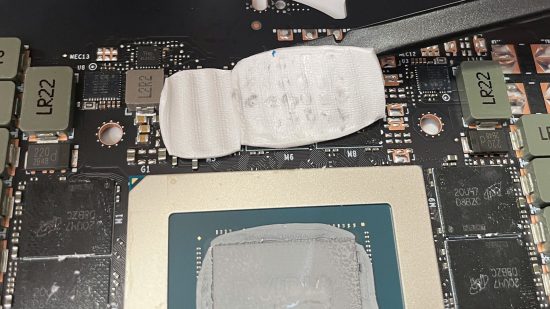
If any thermal pads get left behind here, or on the rear of the card, use the flat end of the plastic pry tool to lift them carefully off the PCB, then replace them back onto the heatsink.
16. Remove the cardboard insert
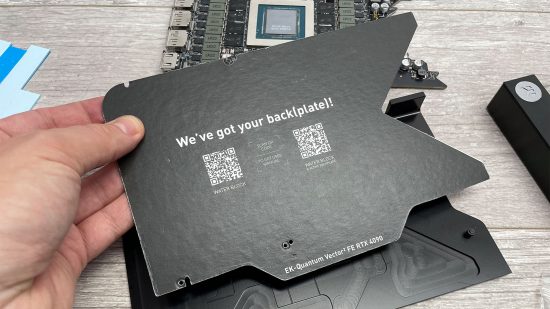
The waterblock includes a cardboard section that needs to be removed before you fit it. Unscrew any screws holding it in place, remove the card, and then replace those fittings afterwards. The card also provides a QR code you can use to grab the latest instructions for the waterblock.
17. Apply thermal pads and paste
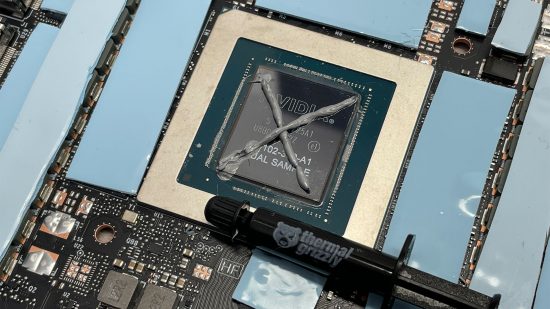
Apply a thin cross-shape of thermal paste to the GPU core, then follow the instructions for applying the thermal pads to the PCB on both sides. You need to deal with three thicknesses of pads. Installing them is a simple process if you follow the instructions – you just need a pair of scissors to cut them to size.
18. Secure PCB to waterblock
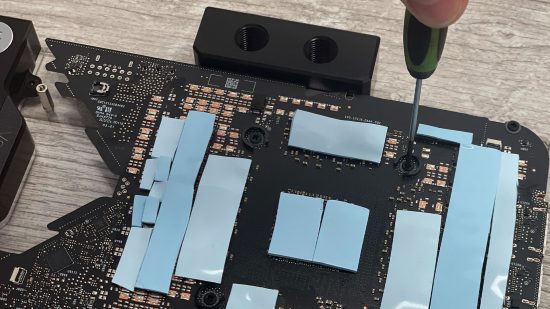
Place the waterblock so the underside is facing up, then place the PCB with the GPU core facing downwards. You can then secure the PCB to the waterblock according to the instructions using the included crosshead screws.
19. Fit expansion slot bracket
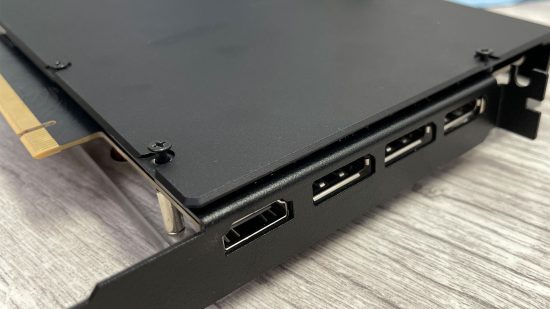
The waterblock includes a single-slot expansion slot bracket that you’ll need to put in place. You can then lay the new backplate down on top of the PCB.
20. Secure backplate
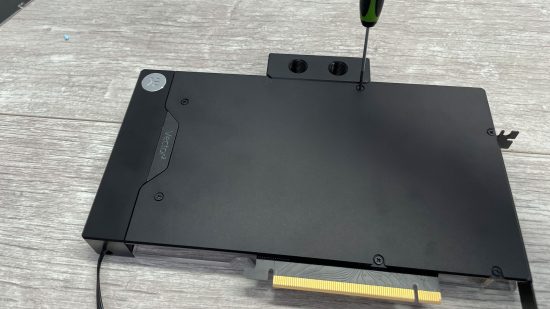
Ensure that all six backplate screws have corresponding threaded nuts on the waterblock, as they can occasionally come loose. Each backplate screw needs a plastic washer on it too. Secure the backplate with a crosshead screwdriver, tightening each screw three turns before moving around the plate until they’re all fully tightened.
21. Attach blanking plugs
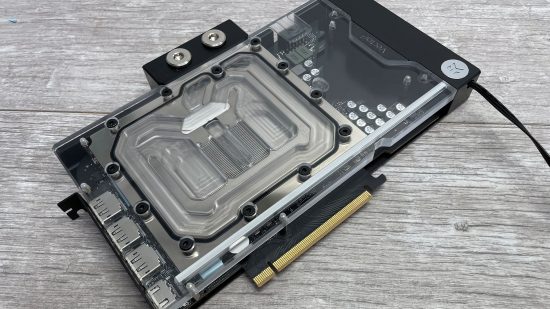
With the waterblock and backplate secured you now just need to attach blanking plugs to the ports on the waterblock before plumbing it into your loop.
Dismantling Nvidia’s Founders Edition cards requires precision and patience, so well done if you’ve managed to attach a waterblock to your new RTX 4080 or 4090 Founders Edition card – you can now enjoy cooler GPU temperatures, while also having plenty more room in your PC case.
Check out our reviews of Nvidia’s GeForce RTX 4080 and RTX 4090 for more information about these gaming GPUs. For a range of alternative gaming GPU options, make sure you also read our best graphics card guide. If you’re planning a new build, then you’ll also want to read our full guide on how to build a gaming PC, which covers every step of the process.
