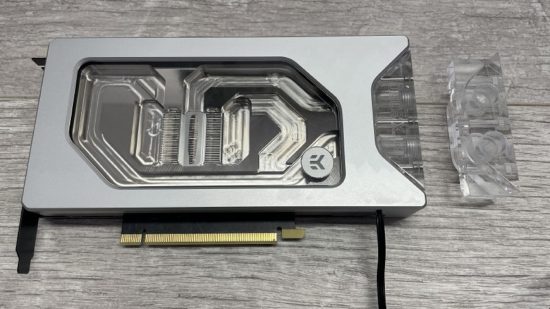
The Nvidia GeForce RTX 3080 Founders Edition cards are certainly unique-looking with their flow-through fans and distinctive coolers, but under all the luscious exterior lies a very odd-shaped PCB that has posed a challenge to water-cooling manufacturers.
What’s more, Nvidia’s cooler design for its own RTX 3000-series cards isn’t straightforward when it comes to fitting waterblocks. This month we’re taking a look at the RTX 3080 Founders Edition waterblock from EKWB and how to install it. It’s undoubtedly the most complicated GPU waterblock and stock cooler we’ve ever used, but we have some handy tips and tricks for you.
1. Choose waterblock
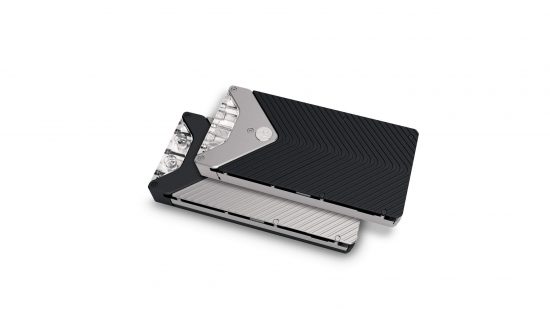
There’s a few waterblocks available for the RTX 3080 Founders Edition, but always check compatibility first. There are waterblocks available for partner cards as well, but we’ve picked the Founders Edition model from EKWB.
2. Remove magnetic screw covers
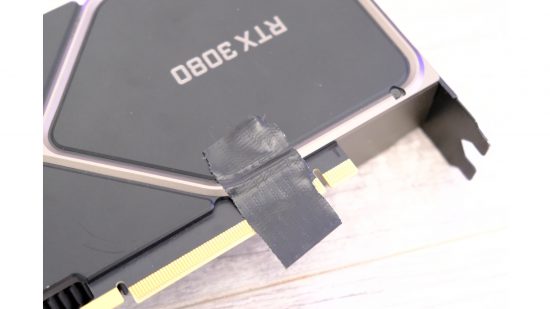
The RTX 3080 Founders Edition isn’t an easy card to disassemble. The fun begins with the removal of magnetic covers that hide screws securing the backplate to the cooler. There are several ways to do this, and the first to try is pressing duct tape onto them.
3. Remove duct tape
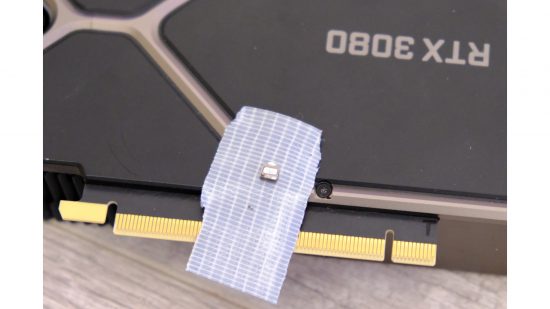
The duct tape should lift the cover out of the recess. If it doesn’t work first time, give it a few more tries from different angles with fresh pieces, and press firmly onto the covers first. The cover is a small section of plastic that looks like this.
4. Use a magnet
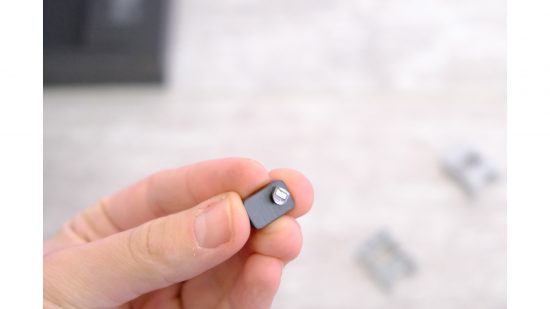
Using a strong magnet can also work. You’ll need a neodymium magnet for this job. Identify the right polarity to stick to the cover and gently lift it out of the recess.
5. Use a scalpel
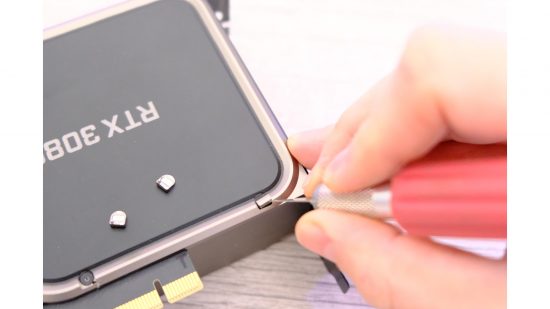
If duct tape and magnets fail, then you’ll need to physically pry the cover out of the screw. This is a last resort, as you can potentially scratch the cover, but it works well if you’re careful. Place the side of the blade into the gap between the cover and GPU shroud, then lift the cover using the blade.
6. Use a part container
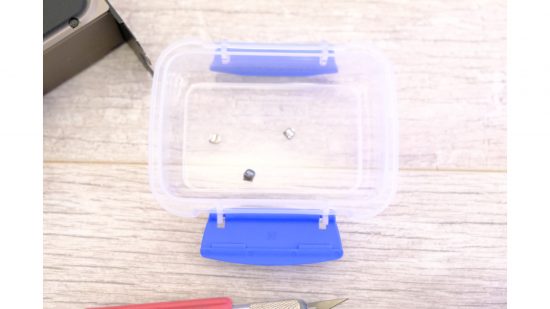
There’s a large number of screws to keep safe if you ever need to refit the cooler, so use a small sealed container to house them.
7. Remove backplate screws
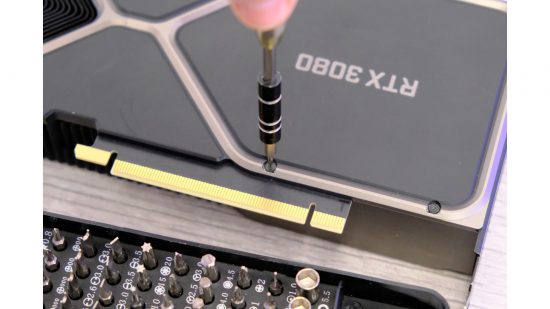
Now go ahead and remove the four screws that were under the covers. There’s a variety of screw sizes and heads here, so you’ll need a set of micro screwdrivers to deal with them all.
8. Lift centre section
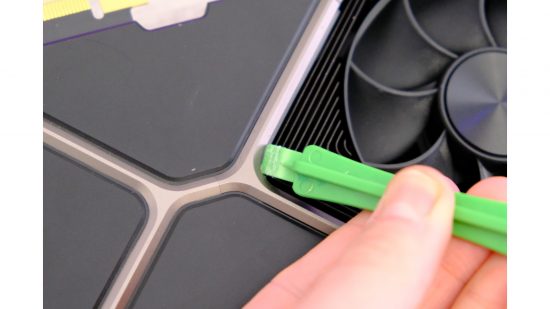
The next step is to remove a centre section of the shroud near the flow-through fan. Use a plastic pick to lift this section away from the pointed end.
9. Remove centre section
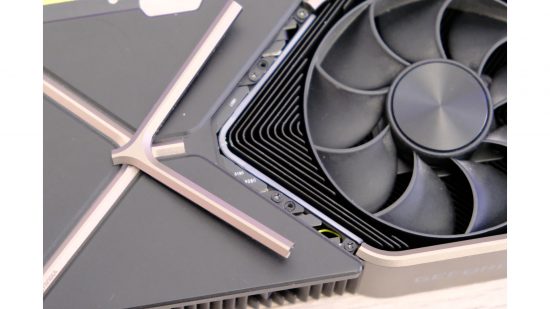
The section will lift, but is held in place with a push fitting. You’ll need to lift it the rest of it away with your hand, taking care to lift it evenly and not at an angle.
10. Remove screws
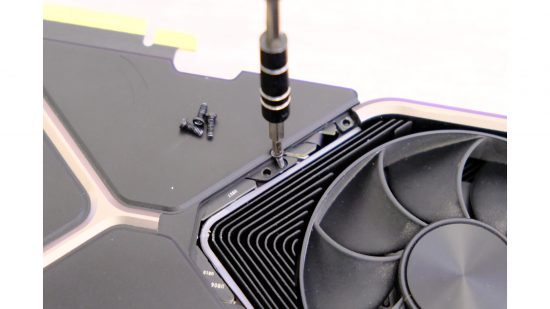
The centre section hides yet more screws that you’ll need to remove. You’ll need a small crosshead screwdriver to deal with them.
11. Lift away backplate
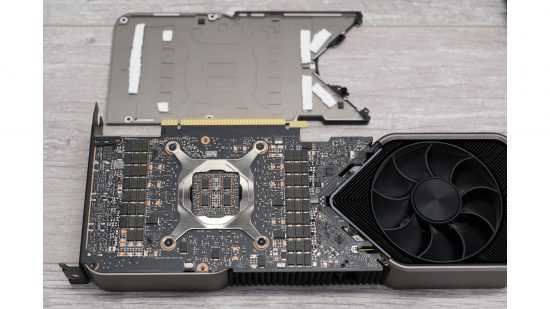
The stock backplate can now be removed. To do this, lift it gently from one end. There are only a few small thermal pads holding it in place, so it should lift easily.
12. Remove core screws
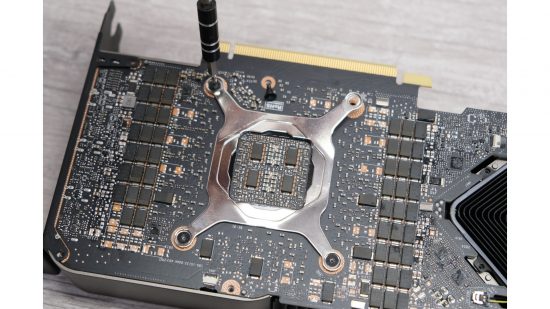
There are four screws around the GPU located in a metal brace. Remove these screws using the appropriate star tool from your micro screwdriver set.
13. Lift ribbon cable latches
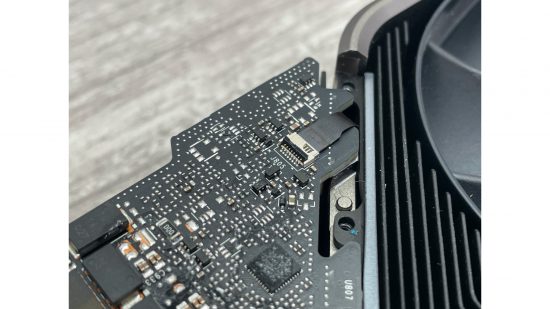
There are two ribbon cables that you’ll need to remove before you can lift out the PCB. These look like the one shown and you’ll need to use a small flat-blade screwdriver to gently lift the black latch at the rear of the clip vertically.
14 . Remove ribbon cable
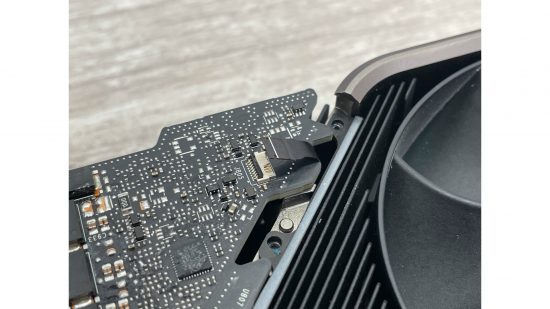
Now use a small pick to pry out the ribbon cable. You need to be extremely careful here, so you don’t damage the cable. Don’t bend it too much – just lift it out of the container for now.
15. Remove second connector
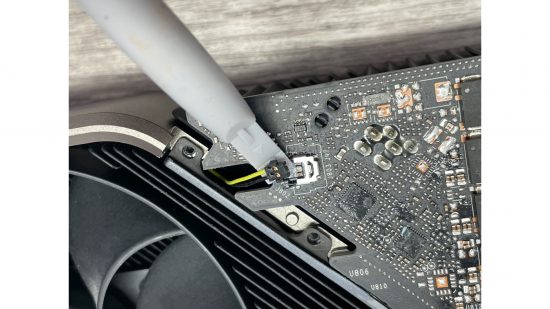
Next there’s another small connector to unplug. This has yellow and black cables, and is located near the fan as shown. There’s a small centre section that you can pry out backwards away from the metal shroud.
16. Remove PCI-E bracket
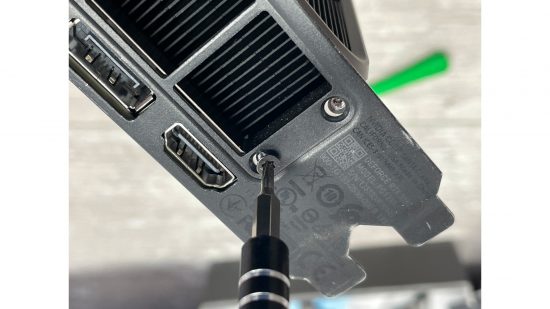
EKWB includes a single-slot bracket with the waterblock, and you’ll need to remove the stock bracket to fit it, and also to let you remove the stock cooler. You need to deal with a few screws here, and you’ll need the appropriate star tool to remove them.
17. Lift PCB away from cooler
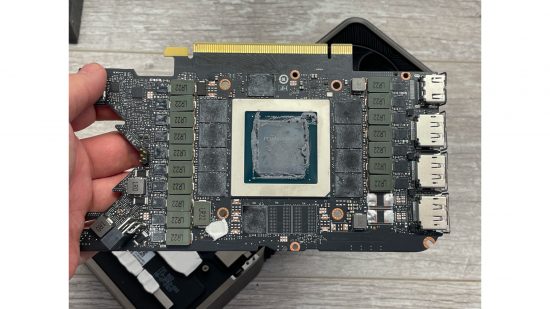
Finally, you should be able to lift the PCB away from the cooler, but double-check that all the aforementioned screws and ribbon cables are detached, especially if you feel any resistance.
18. Replace thermal pads
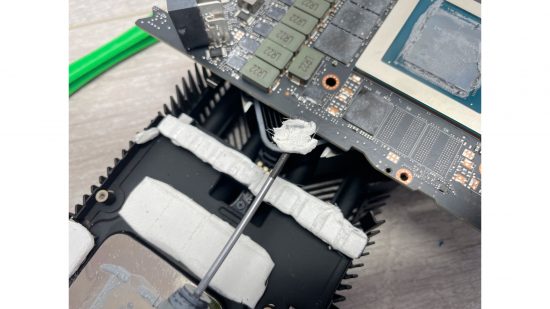
With both the backplate and cooler removed, if any thermal pads are left behind on the PCB, use a small tool to gently remove them and place them back onto the cooler or backplate, so you can reassemble the card later if necessary.
19. Clean GPU die
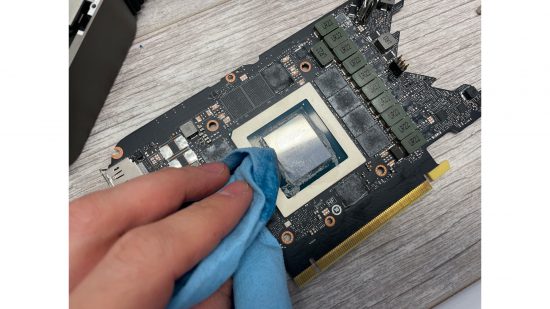
You’ll need to clean any old thermal paste off the GPU before you fit the new waterblock, so use isopropyl alcohol or TIM cleaner to remove it, along with a microfibre or dense disposable work cloth.
20. Fit memory pads
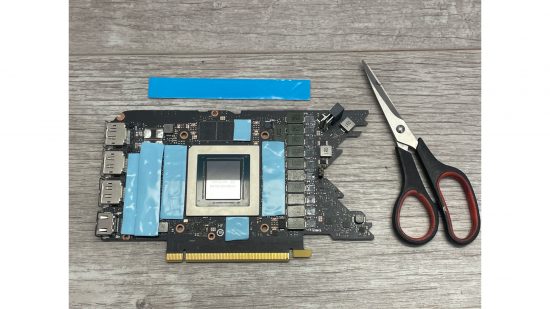
New thermal pads are included for the PCB in the waterblock box – start by using the waterblock’s manual to locate the memory modules and cut the thermal pads to size to cover them.
21. Install additional pads
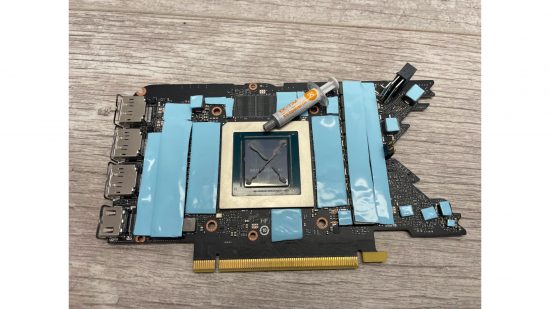
You’ll need to apply some other thermal pads to the top side of the PCB for the VRMs and other smaller hot spots, so you’ll need to use the scissors more often here to trim the pads to size according to the instructions.
22. Remove waterblock sections
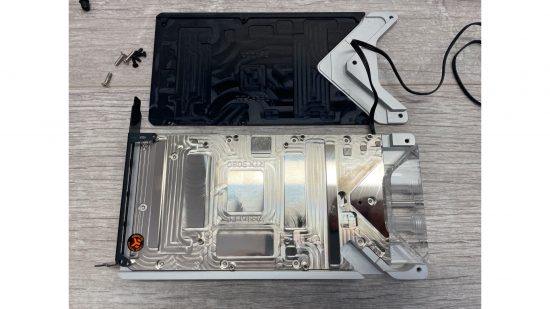
The waterblock is equipped with a two-section backplate, and these sections need to be removed before you install the PCB. Remove the seven screws holding them in place and remove both parts.
23. Install PCB
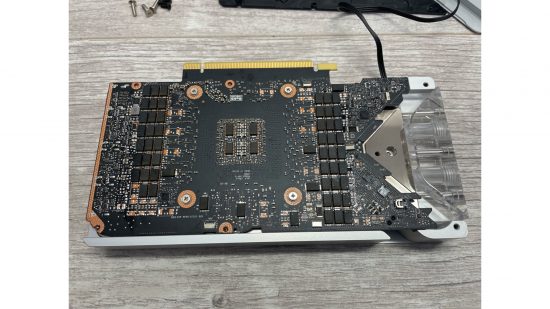
Place the PCB GPU-down into the main waterblock section, lining up the four main holes with those on the waterblock and checking the other holes line up too. Now go ahead and secure the four silver mounting screws and washers.
24. Add backplate pads
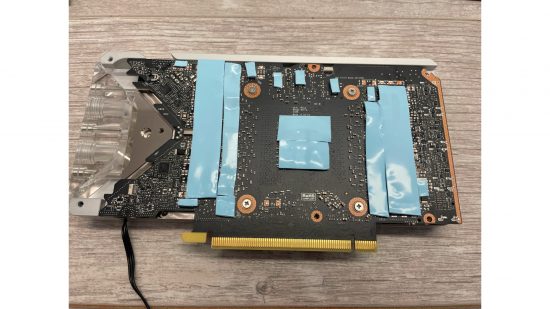
Sadly, you’re still not done with thermal pads yet, as the backplate requires them too. Follow the instructions to cut them to size, so they can deal with the hot spots that will be cooled by the backplate sections.
25. Attach new PCI-E bracket
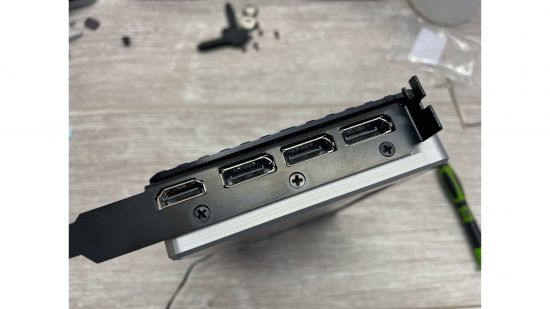
Locate the new PCI-E bracket in the box, and place it between the backplate and PCB. The screws you use to secure the backplate will also screw through the bracket to hold it in place.
26. Secure backplate
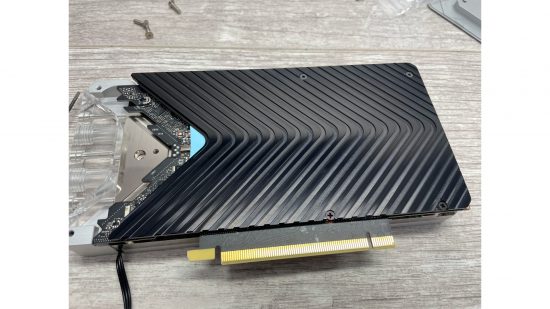
The backplate uses crosshead screws, two of which will need to pass through the PCI-E bracket as well, so take care to line up all the parts correctly. You can then install the final piece of the backplate.
27. Decide on port direction
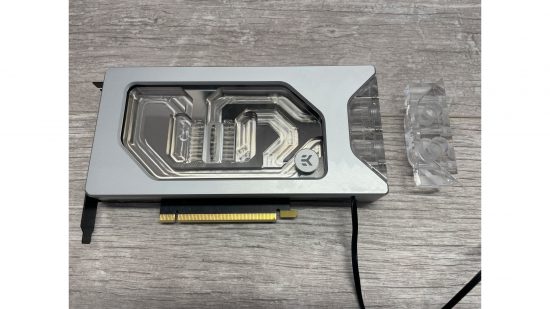
The waterblock uses rear-mounted ports, and you have the option of using the pre-fitted end piece with the ports facing the rear, or a second piece that allows you to point the ports at right angles. The choice here will depend on what works best for your specific cooling system, or indeed, the layout of your case.
With your new waterblock installed, all that’s left now is for you to enjoy your GeForce RTX 3080’s quieter running and lower temperatures. If you’re planning a new build, then you’ll also want to read our full guide on how to build a gaming PC, which covers every step of the process. If you’re new to the world of water-cooling, then make sure you also read our full guide on how to water-cool your PC.
