Do you have an old and tired gaming mouse with flaky paint, worn-out switches, or a broken cable? Or maybe you want to reduce the weight of your mouse. If so, this guide is the place to be as we explore the many options for how to mod your mouse.
Modders have long explored ways of repainting and visually modifying mice, but for most people the only time they’ll ever take apart their mouse is if a cable breaks or if the mouse has become so dirty that a full dismantling and deep clean is warranted. However, in recent years a whole community has built up around the idea of not just fixing and changing the look of mice, but also improving them.
Whether you’re looking to trim your mouse’s weight, change the feel of its switches, make it glide better, or replace its tired, overly stiff, or kinked cable, it’s now easy to get hold of all manner of replacement parts. We grabbed a handful of the most popular options, along with an old mouse – a much-used and much-loved Logitech G Pro Wireless – to see what upgrades are worth your time and money.
Upgrade your mouse feet, glidepads, and skates
One of the unfortunate design choices of many mice on the market is that the screws used to assemble them are hidden under the feet/pads/skates (there seems to be little consensus on what they’re called) that are used to keep your mouse sliding freely.
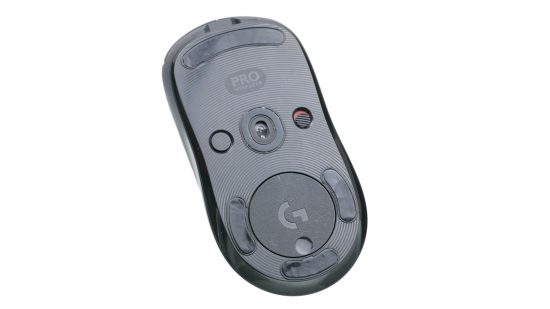
While the original pads can be stuck back onto the mouse, it’s almost impossible to get them to stick as strongly and remain as flat as they were originally – we’ve already taken our Logitech G Pro Wireless apart once before, so its feet are somewhat mangled. As such, whatever other mouse modifications you try, buying a set of replacement feet is essential.
Several companies, such as Endgame Gear and Glorious PC Gaming Race, sell their own replacements, which is great to see, but for most other mice you’ll have to seek out third-party options. Among the most popular brands are Corepad and Hyperglide, both of which offer feet for a range of mice from several different companies, including Finalmouse, Logitech, Razer, SteelSeries and Zowie – even the Microsoft Intellimouse is supported.
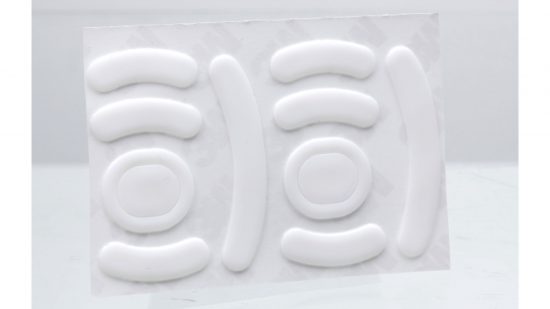
We grabbed a set of Corepad Skatez Pro 147 feet for our mouse, along with a set from Ghostglides, to try a couple of different options. They’re both made from pure PTFE (Teflon) with a thickness of 0.8mm, which is about 0.1mm thicker than the worn pads on our G Pro Wireless. We didn’t find this affected our mouse’s performance, but you may need to tweak your lift-off distance if your mouse has this option.
Application of the feet is easy but fiddly. Corepad provides a couple of isopropyl alcohol wipes for cleaning off the glue residue from the original feet, but we recommend having a bottle of the stuff on hand in case the wipes aren’t enough to get the area clean – cleanliness really is the key to ensuring that the new feet stick firm and flat.
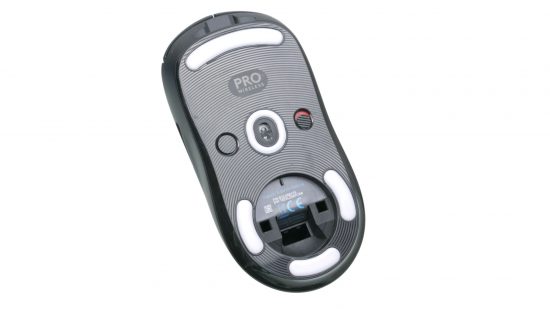
You then just need to line up each pad, ideally using tweezers to carefully lay them into place. The sticky pads should adhere instantly, but can be pulled off again if the pad and landing zone aren’t lining up properly. Just be aware that each time you remove the pad, you increase the likelihood of dirt getting into the hole and distorting the pad.
With our new pads fitted, our mouse glided smoother than ever before, making even more of a difference than we expected. It’s an upgrade we highly recommend.
Upgrade or replace mouse switches
Once you’ve prized off your precious pads, the entire rest of the mouse is at your disposal and the first change many users will want to make is to the microswitches that sit under each mouse button.
The reasons to upgrade could be a broken or faulty switch, a worn-out switch that doesn’t feel like it used to, or you just want a switch that feels slightly different. For instance, the Logitech G Pro Wireless has a notorious problem with its left and right buttons double-clicking when they shouldn’t.
Thankfully, replacing microswitches is generally easy, as long as you’re comfortable with basic soldering, and there is a vast range of options available from the likes of Kailh, Omron, and TTC.
There is a handful of key criteria to consider when choosing a mouse microswitch. The first is the operating or actuation force, which is the measure of how hard the switch needs to be pressed to activate, measured in gram force (gf) – with ratings generally sitting between 45gf and 70gf. Lifespan is another criterion, with premium switches offering gold or silver plating and lifespan ratings varying from as low as 10 million clicks up to 80 million clicks.
Along with the mechanical aspects of different switches, they can also make surprisingly different noises. The likes of the Kailh GM 4.0 Red are noticeably louder than many stock switches, for example. Combined with their heavier, snappier feel, this makes them popular for those that like tactile feedback.
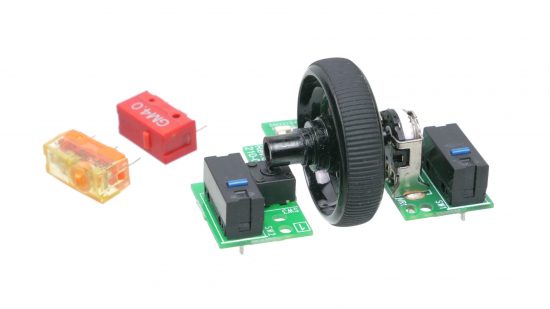
In many mice, it will only be the left and right buttons that use the same form factor switches as the ones we’re looking at here. For the side, scroll wheel, and other extra buttons, they may use an even smaller type of microswitch. These switches can still be replaced – as can the encoder of the scroll wheel, but it’s not quite as easy to find the parts and there are fewer established options.
For our mouse, we picked up a set of Kailh GM 4.0 Red, which are rated for a lifetime of 60 million clicks and have a 65gf operating force, and some TTC Gold 30M switches, which have a lifetime of 30 million clicks and a 45gf operating force. Thanks to the switches being so cheap, you can easily try a host of different options without breaking the bank.
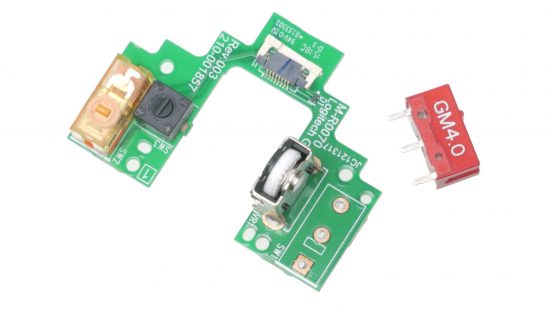
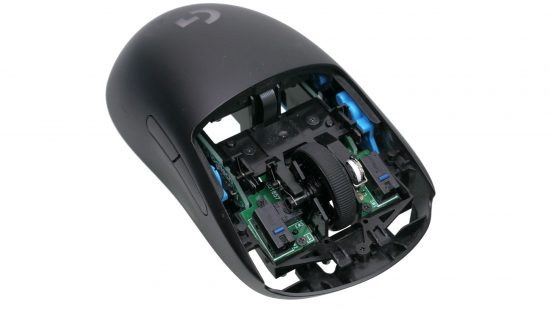
Accessing and initially de-soldering our mouse’s original Omron D2FC-F-K switches wasn’t too tricky, but actually prising them off their PCB was very difficult, requiring some brute force and slight damage to the copper PCB pads. Thankfully, though, we had no such issues fitting the new switches.
Ultimately, we came down on the side of the TTC Gold 30M switches to use in our mouse in the long term. We preferred the slightly quieter, lighter feel to the Kailh switches. Crucially, they also fixed the double-clicking problem that had plagued our Logitech mouse originally.
Upgrade your mouse cable
For those using a wired mouse, there are umpteen potential cable annoyances. They can get damaged, they can snag on other desk items, they can be overly stiff and they can also be heavy or just plain ugly. Thankfully, there are a handful of ways to alleviate your mouse cable woes.
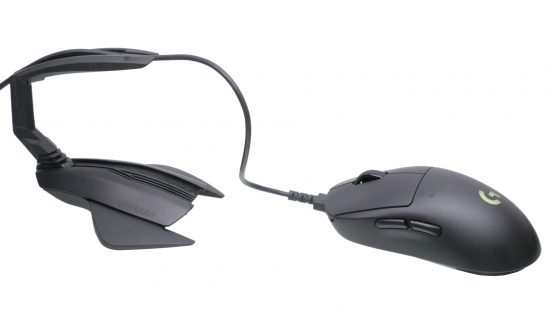
The first isn’t a mod but simply an accessory that really does work: a mouse bungee. These simple devices sit on your desktop and hold your mouse’s cable up in the air on a springy arm. They reduce cable drag, stop the cable snagging and generally keep your mouse’s cable under control. They’re widely available, with prices starting at under $10, and it’s well worth getting one.
There’s also a nifty trick you can try that gives you some of the same bungee benefits. Take two small cable ties and wrap one around your mouse cable just as it exits the front of the mouse, ensuring the zip tie tail faces up away from the desk.
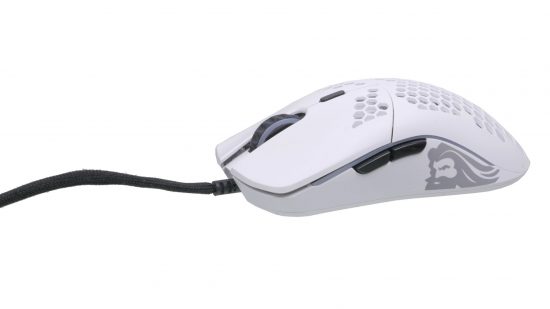
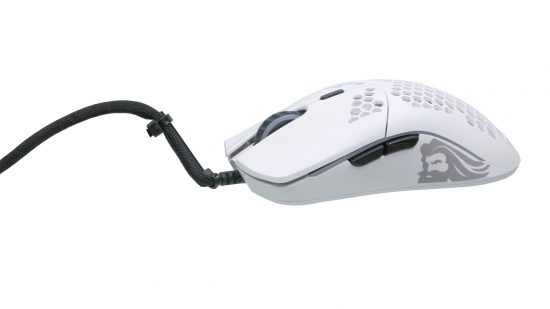
Then, wrap the second tie around the mouse cable and the tail of the first tie, about an inch further away from the mouse. Snip off the excess tails from the cable ties and you’ll create a mini mouse bungee effect on the front of your mouse. This will add a gram of weight but reduce cable drag and provide some of the same sprung cable affect as a bungee.
Moving onto cable upgrades, you have a number of options. For a start, if your mouse is one of the handful of new models to offer a detachable cable, such as the SteelSeries Aerox 3, then you can simply buy an alternative cable with the right plug on the end.
The likes of Dream-Cables.com or Paracablemods.co.uk offer a range of lightweight, paracord-wrapped cables in all sorts of lengths, patterns, and colors. They also offer a host of different device connectors on the end, so you can completely customize your cable to your needs.
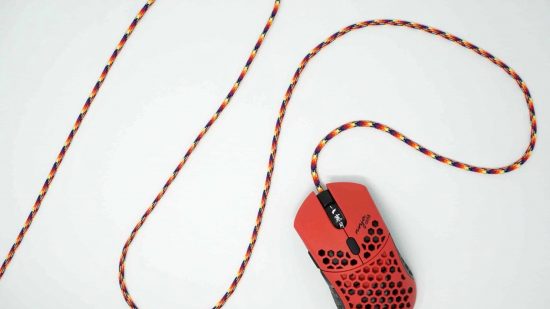
If your mouse doesn’t have the luxury of a detachable cable, you still have plenty of options. Some companies sell replacement cables for their own mice that plug into the internals of your mouse. You’ll need to pull off and replace the feet to access the innards, but there’s no soldering required.
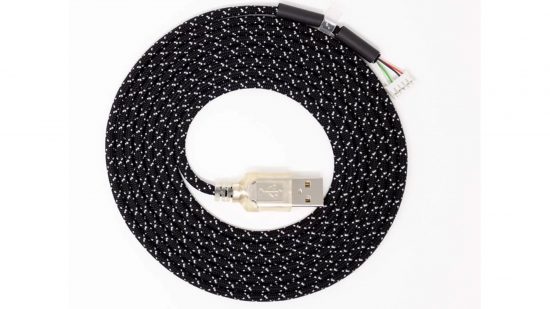
Otherwise, Dream Cables and Paracablemods will again have you covered. You can buy cables from them that terminate in a generic four-pin plug that will fit most mice internally, or you can specify the exact connection you need – both companies support a wide degree of customization. Both companies also offer the inclusion of a matching 3D-printed cable stress relief section for where the cable enters the front of your mouse, but mouse support for this feature is very limited. Prices typically range from $20-$30 for a cable from Dream Cables.
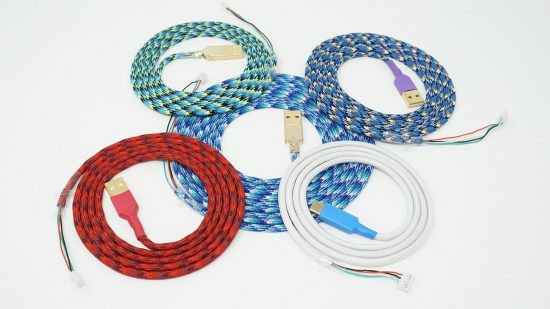
The final option is to take one of these new cables, snip off the plug and just solder it to the existing cable inside your mouse (or directly to the PCB). This is very tricky as the cables are very fine, but it’s doable if you’re a dab hand with a soldering iron.
Reduce your mouse weight
One of the biggest trends in gaming mice in recent years has been reducing weight as much as possible. In just a handful of years we’ve seen mice go from topping the scales at upwards of 150g to now, when any weight over 80g is considered heavy. Simply buying a light mouse in the first place and perhaps swapping out its cable for an ultralight one is as far as most people think you can go for keeping down mouse weight, but there are plenty of tweaks you can do yourself.
Let’s take our Logitech G Pro Wireless as an example. It has a slot on the underside of the mouse where you can stow the wireless dongle, and that slot has a magnetically attached cover. Ditch the cover when the mouse is in use and you’ve saved 2g. Open the mouse and you can also detach the magnets for that cover, which also double as contact points for the mouse’s charging dock, saving another 2g – we don’t have the dock anyway.
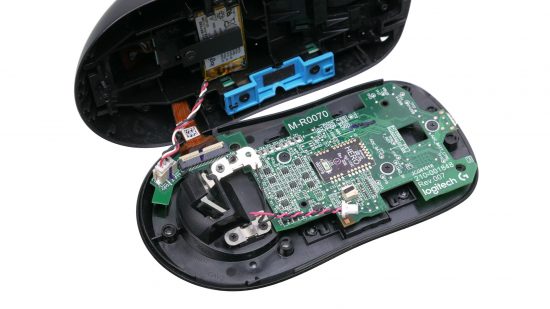
This mouse is also ambidextrous, with side buttons on both sides, and it uses a brilliant system of magnetically-attached plastic pieces to either enable or just cover up each of the buttons. However, if you know you’re never going to use those extra side buttons, rather than just blank them off, you can remove the covers (0.5g each) and even open the mouse and remove the switch mechanism itself. We removed the blue plastic part that sits between the outer buttons and the microswitches, saving us another 2g.
This mouse’s battery is a tiny custom lithium cell for which you’d be hard-pushed to find a smaller replacement. However, some wireless mice may use a larger generic battery. If your mouse uses an AA battery, you can buy an AAA battery and use a little converter to make it fit – this swap alone could save you over 10g.
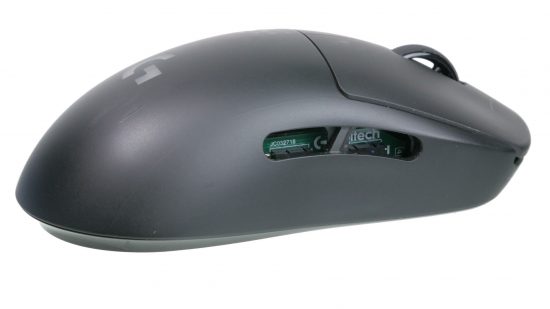
The final and most drastic weight-saving step is to start cutting pieces away from your mouse. Again, looking at our G Pro Wireless, an obvious place to start is to just chop out the entire USB dongle slot section, which saves 2-3g.
Meanwhile, in nearly all mice you’ll be able to find sections of plastic that can be snipped out, buttons that can be removed, and RGB LEDs that can be excised. You can even perform your own version of the modern trend of filling your mouse with holes to reduce weight. We’ve seen this done to G Pro Wireless models, bringing them down to as little as 57g. We shaved off a mere 8g by ditching those side buttons, the cover plate, and the charging points, to get ours down from 80g to 72g.
Paint your mouse or add grips
If your mouse has lost its soft-touch finish, its buttons have worn to a shine, you need some extra grip or you just want a change of color, there are a handful of options available for upgrading the exterior of your rodent.
If you’re after more grip, the best option is to slap some grip tape on your mouse. Lizardskins.com has become the go-to option for this purpose. Originally designed for baseball bat grips, the material has been repurposed for use on mice. You can get all manner of colors and patterns and you just need to cut the material to the shape you need and stick it on.
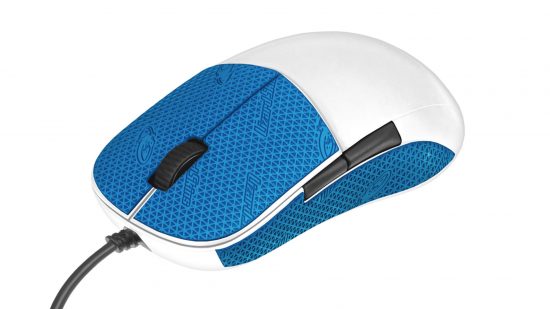
Other companies such as Glorious PC Gaming Race sell pre-cut grip tape that exactly matches their mice and even Razer sells generic pre-cut hexagonal grip tape. As with applying new glide pads, ensuring the surface of your mouse is squeaky clean by using isopropyl alcohol will ensure your grip tape stays stuck.
The other main external upgrade option is to repaint your mouse. Whether you’re after a colorful, glossy look or a rough and grippy rubberized paint, a fresh coat can transform a mouse.
As with any painting project, preparation is the key. Once you’ve dismantled your mouse into the constituent panels you’re going to paint, you’ll need to prepare all the surfaces. If your mouse already has a soft-touch finish, you’ll have to painstakingly remove it with a combination of isopropyl alcohol and a mild abrasive, such as a Scotch-Brite pad. The same is true for any old peeling paint, which will need either sanding off completely or sanding smooth and scuffing up to provide a purchase for the new paint. You’ll also need to clean the surface with alcohol once it’s sanded.
At this point, you can apply any finish or combination of finishes you require, as per your paint’s instructions. Generally, you’ll need to apply a coat of primer, a couple of coats of top coat then two or three coats of lacquer if you’re creating a gloss finish, but rubberized or matt paints will be different.
However, bear in mind that paint finishes will add a bit of weight to your mouse and they will fail eventually – if your fingers can wear a shiny patch into bare plastic, they can do so with paint too, so be prepared to repeat the process again in a few years.
If all that mouse modding work sounds like too much effort, why not check out our best gaming mouse guide for our choice of the best new mice you can buy.
Meanwhile, if you’ve modded your mouse, or are tempted to try, why not share your results or concerns with us via our Custom PC Facebook page, via Twitter, or join our Custom PC and Gaming Setup Facebook group and tap into the knowledge of our 375,000+ members.