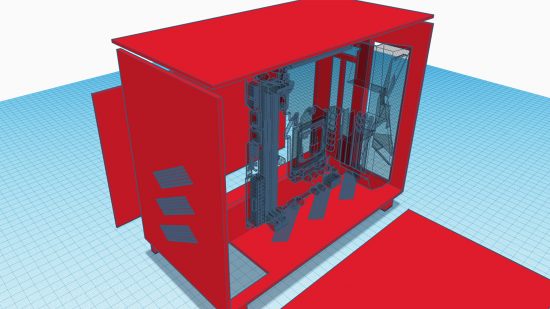
In this guide, we’ll show you how to 3D print a PC case with your very own design. We’ve looked at 3D printing numerous times over the years, but the steady progress of the technology, as well as falling printer prices, means it’s now possible to create and print an entire PC case without spending a fortune.
In fact, for just a few hundred dollars you can own a 3D printer that can print huge sections of a case in one go, so the main part of creating a custom rig is just designing it. Some CAD software is free to use, and 3D printing filament is affordable, so the only limits are the size of objects your printer can create. What’s more, you don’t even need a 3D printer – you can also send your CAD files to a 3D printing service, who will print your files for you.
It’s not all plain sailing, though, as you’ll need to ensure millimeter-level precision in many parts, while also thinking about cooling and mounting your hardware. We’ve teamed up with Dremel, which sent us its flagship 3D45 3D printer, to show you how to make your own PC case with a 3D printer.
1. Choose your printer
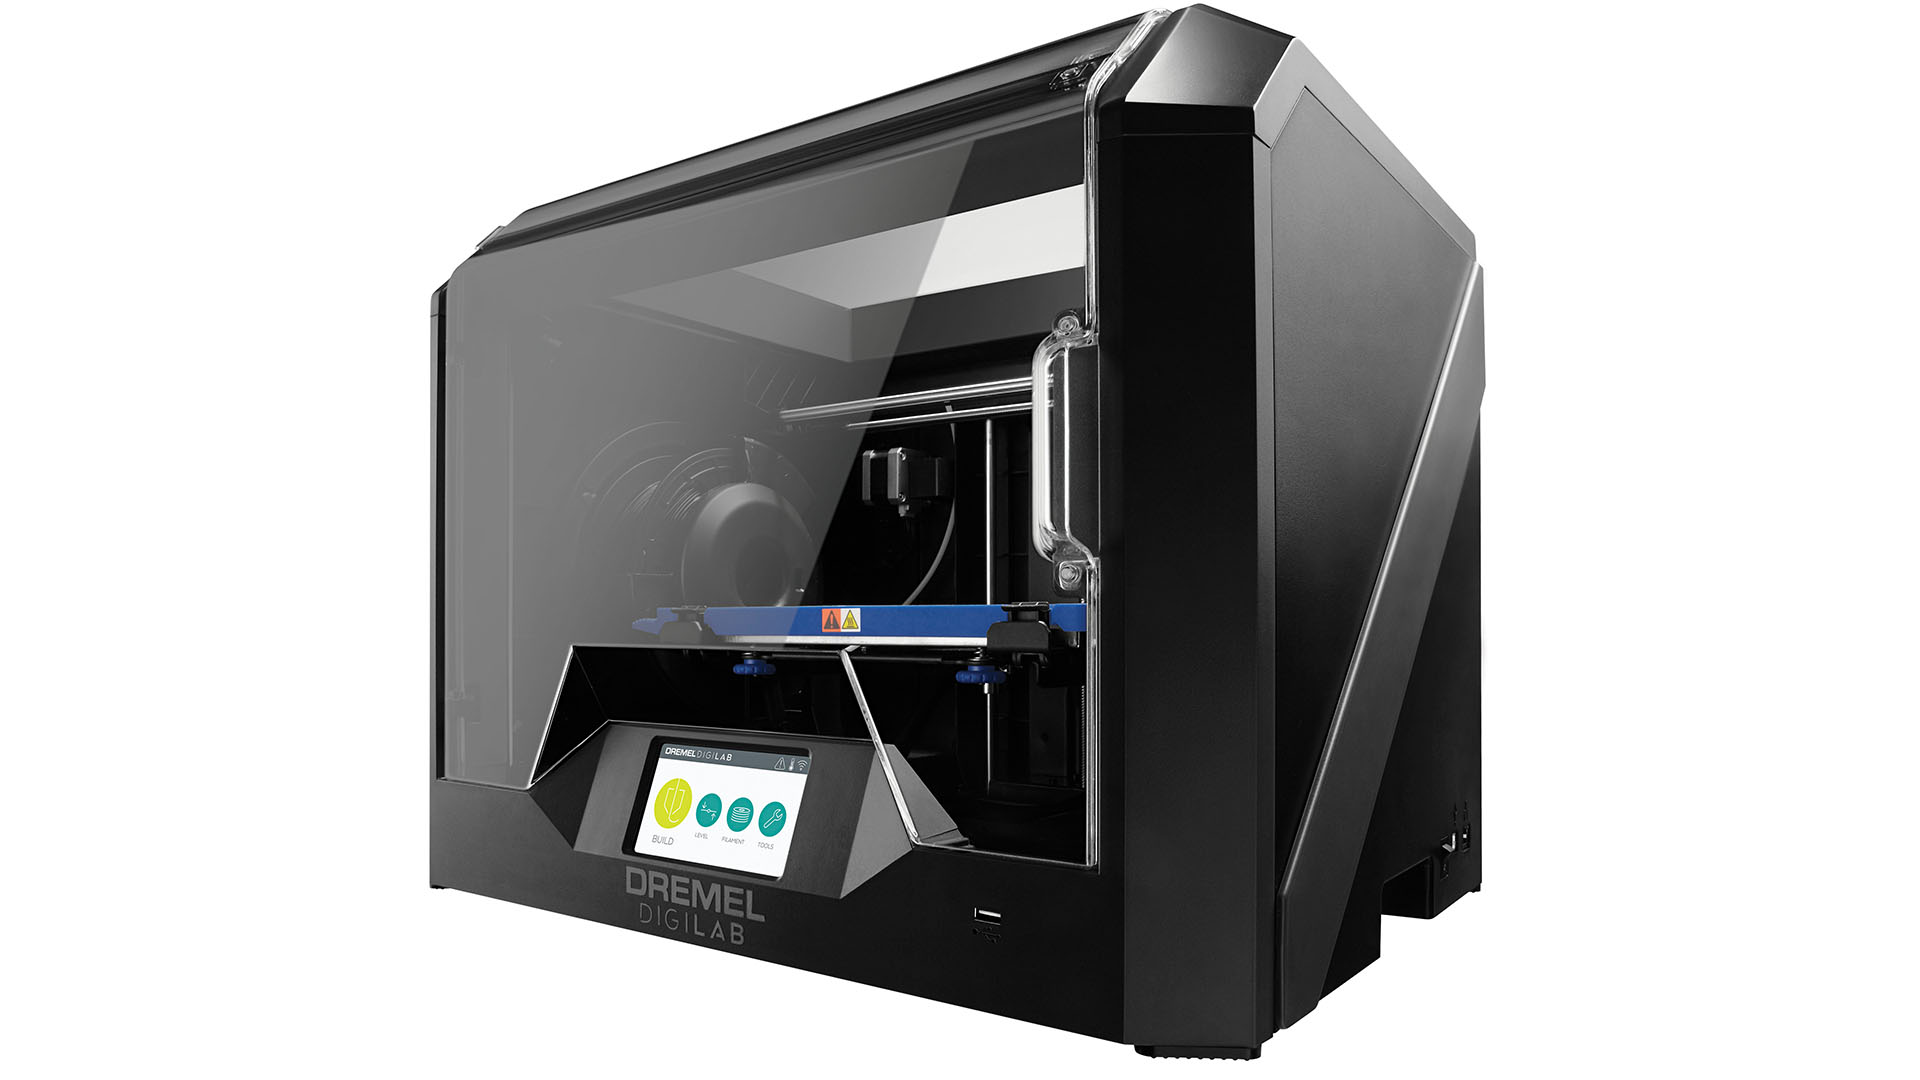
3D printers have differing print areas, so work out the minimum print size you need in order to create your PC case. To save on space, you might want to use an SFX PSU and mini-ITX motherboard.
2. Pick hardware orientation
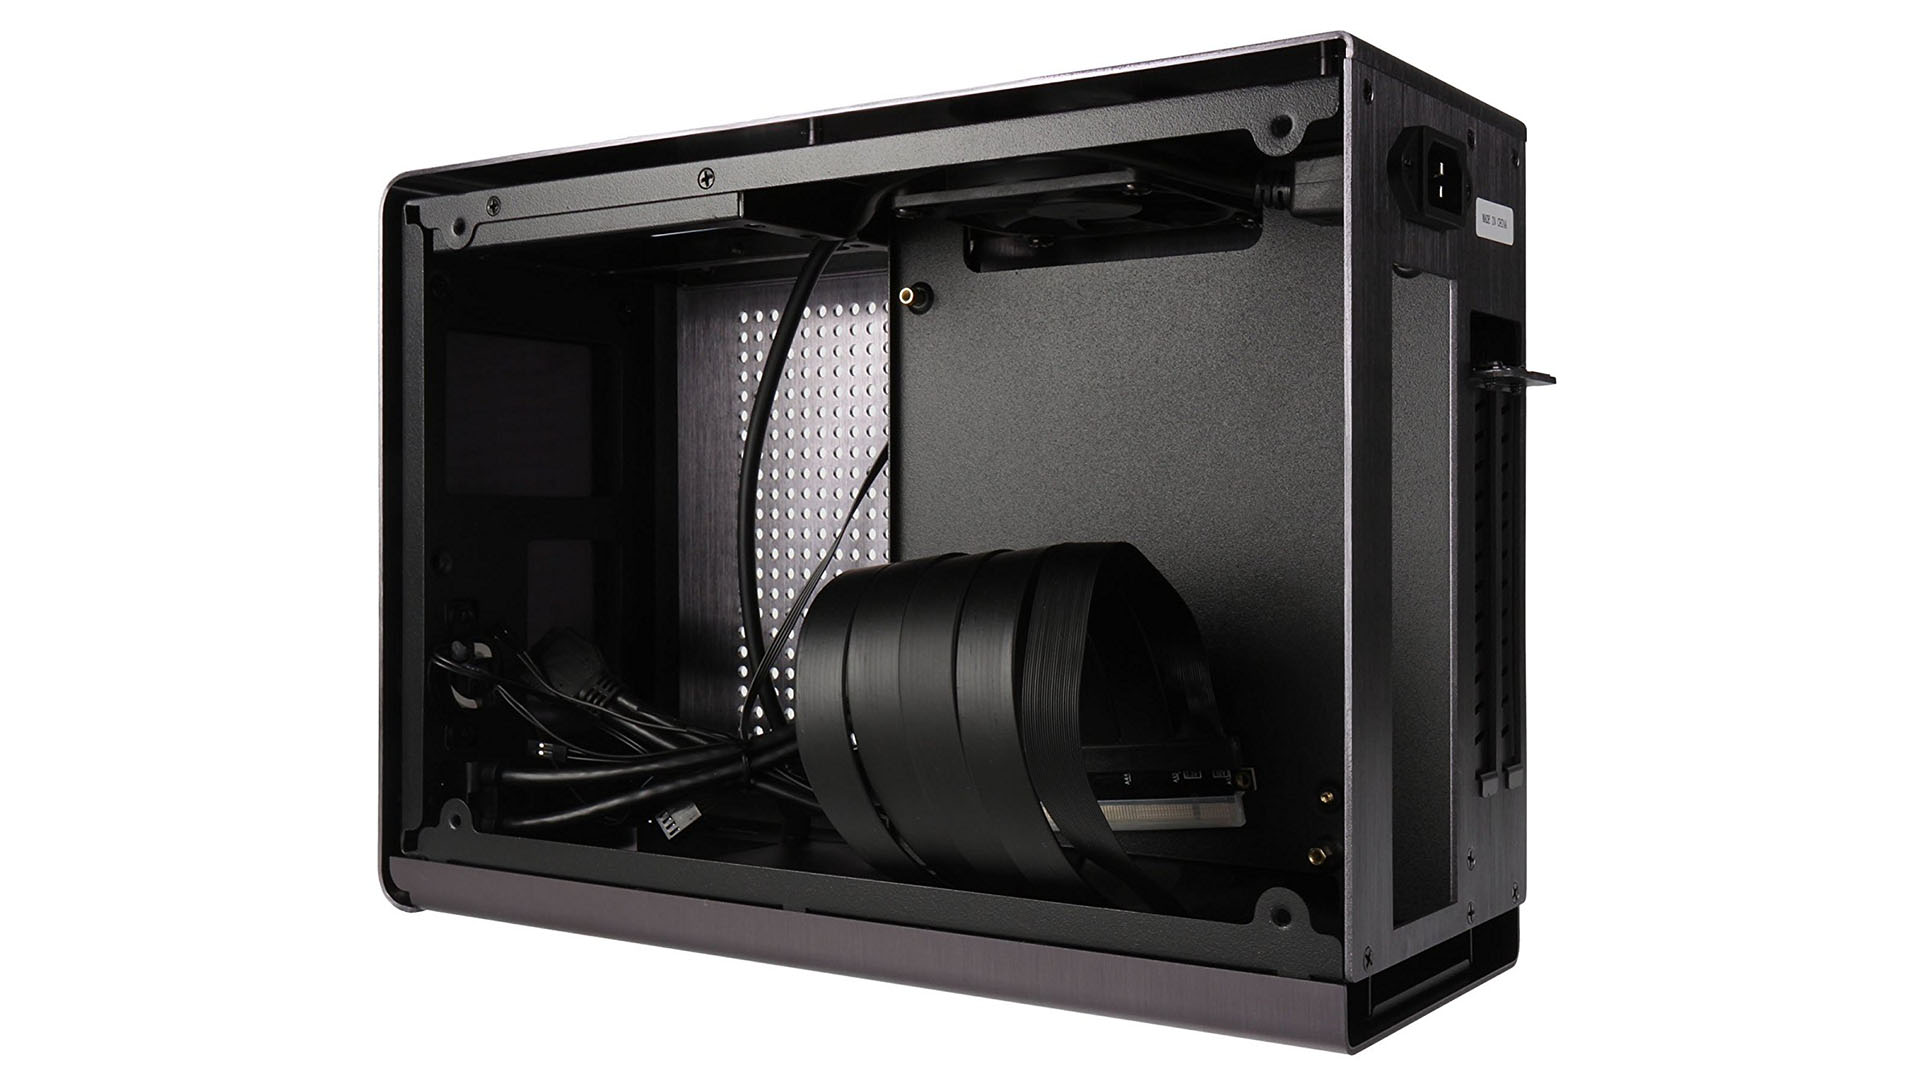
Some popular small 3D case designs position the motherboard on one side of the case, and the GPU on another, drawing in air through a side panel. These designs are easy to print and can allow for a range of cooling options, making them good options for a first try.
3. Lay out hardware
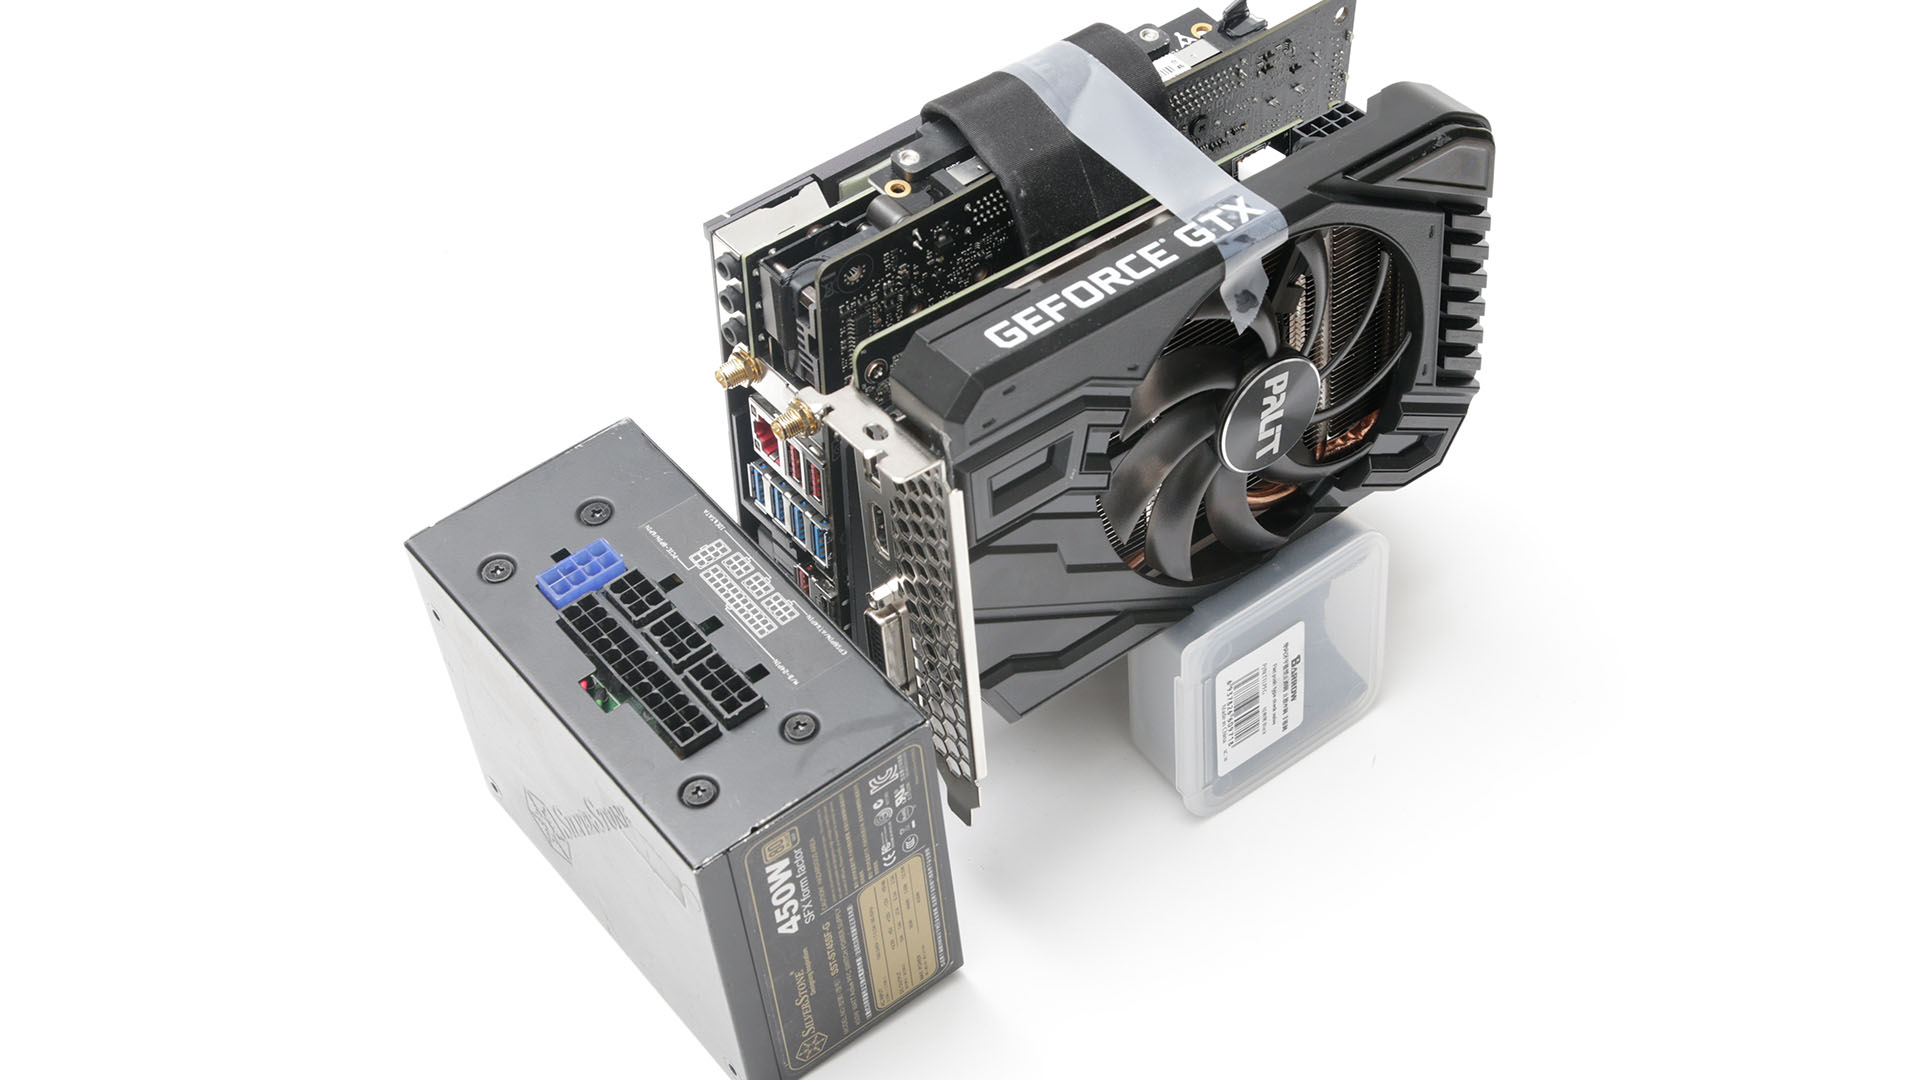
To get inspiration for design tweaks, lay out your hardware as you plan to position it in the case. This step can help when placing fan mounts, and working out how best to ventilate and cool your PC.
4. Choose 3D print material
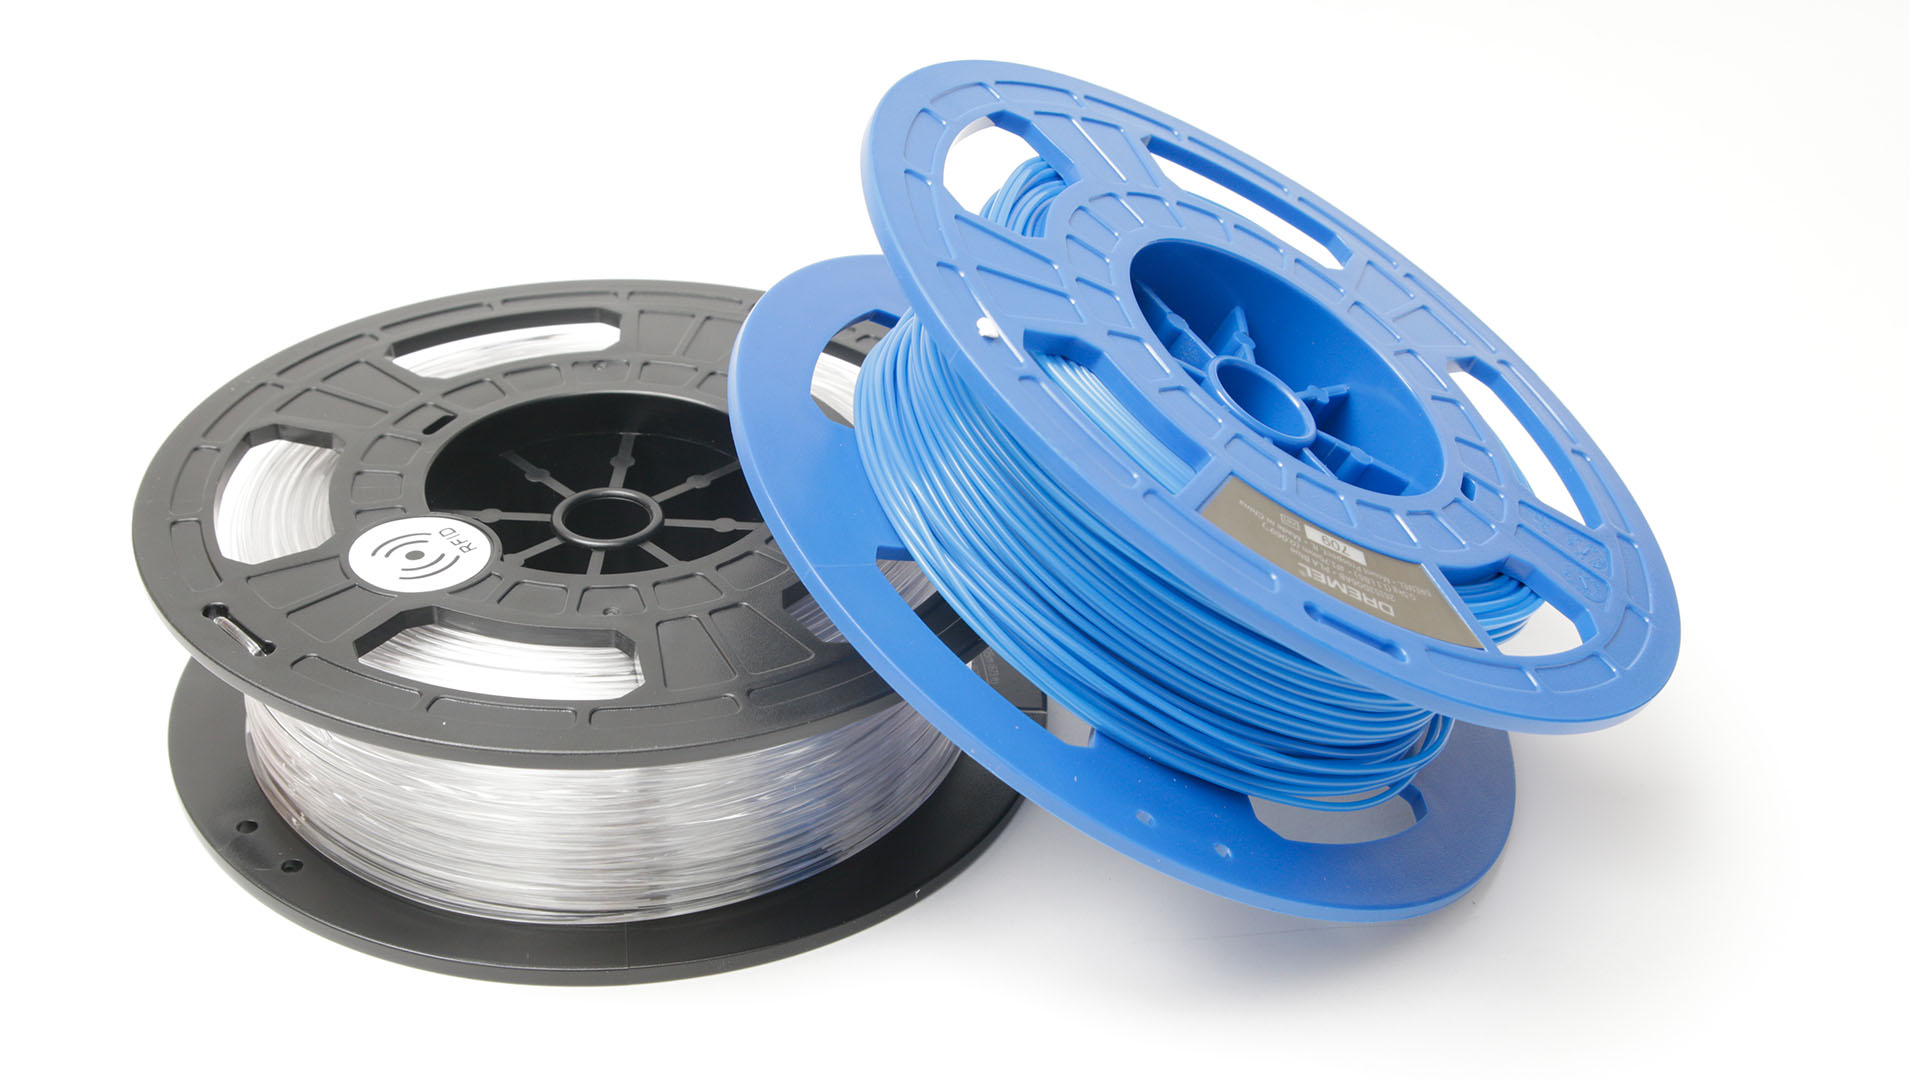
There’s a variety of 3D print materials available, including wood and metal effects. However, for some parts of the PC, it’s best to use strong materials such as nylon, especially for supports or construction cubes.
5. Learn 3D design software
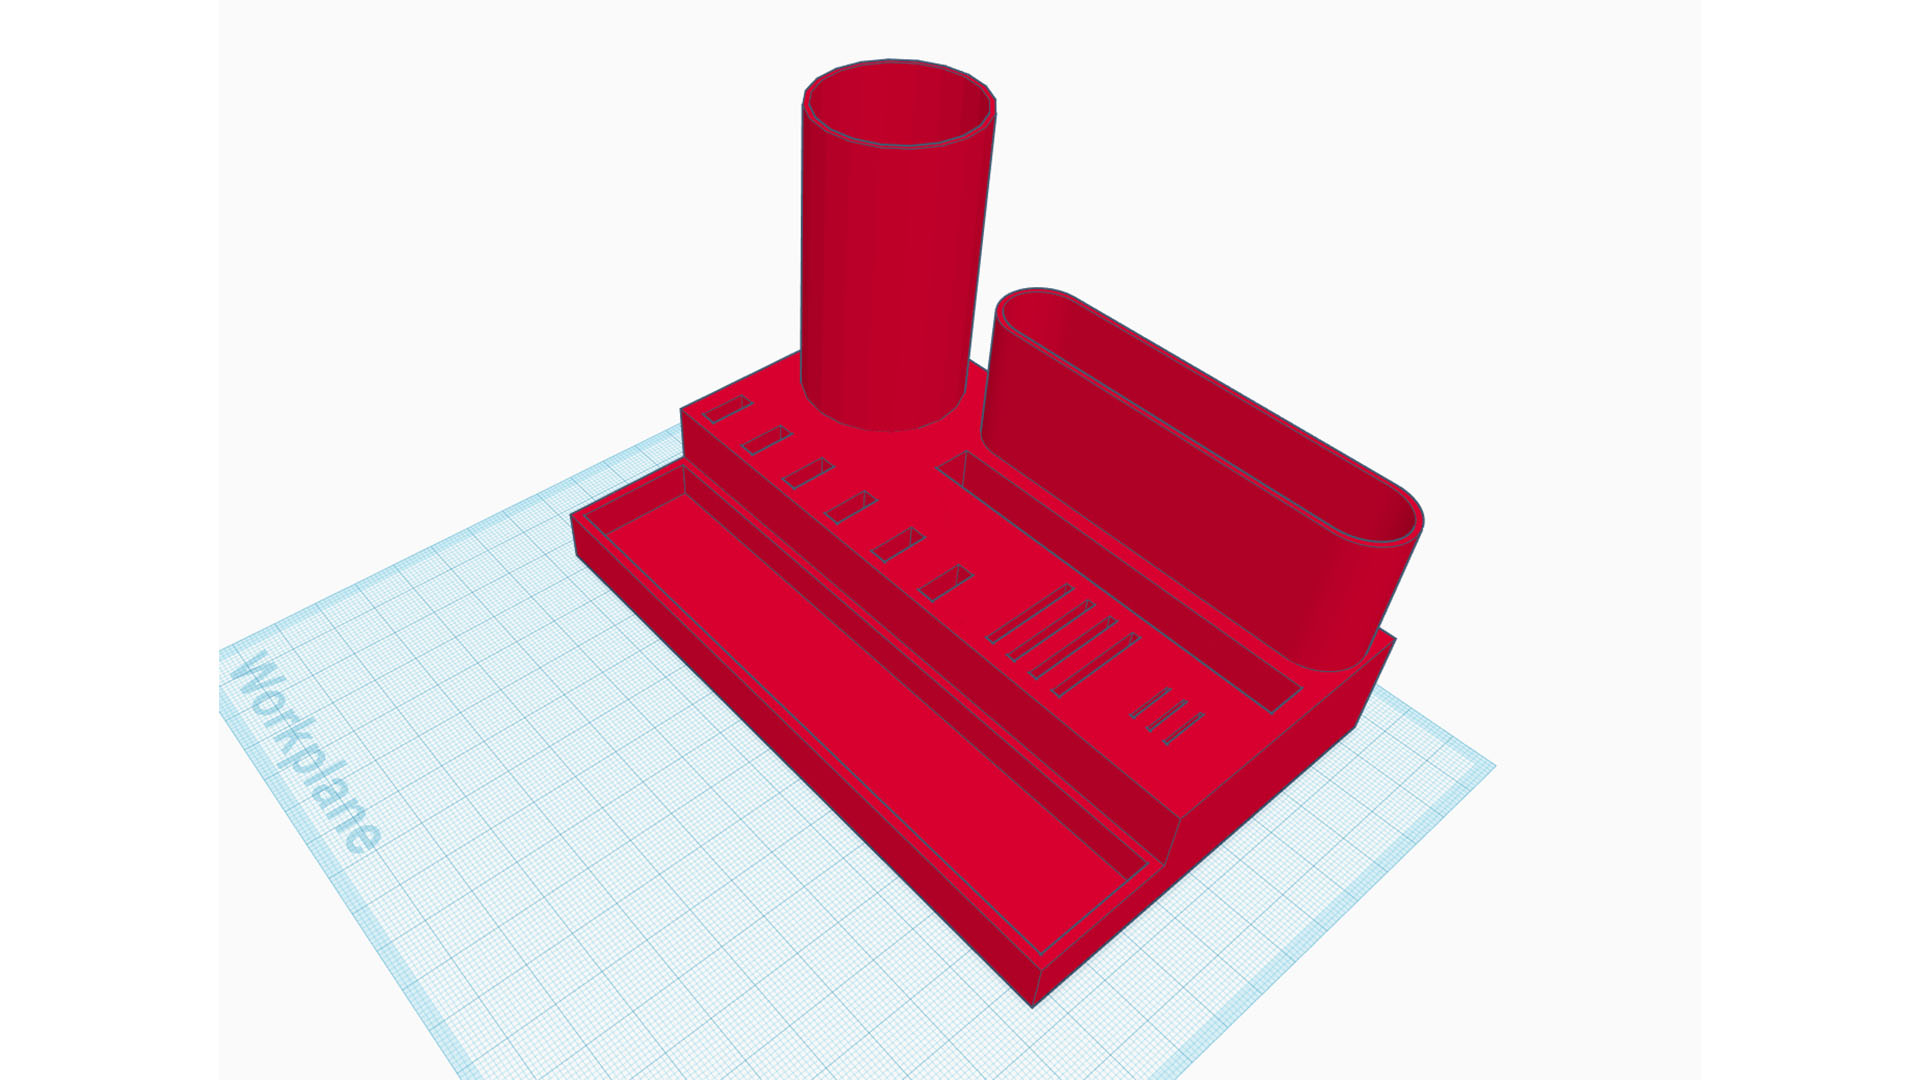
There’s a plethora of software available, both free and paid, that’s great for creating 3D-printable models. One of the best and simplest to use is TinkerCAD, which is an online app. You can design models down to a 0.1mm resolution with plenty of flexibility, and export your designs to STL files for use with 3D printers.
6. Consider slot-together design
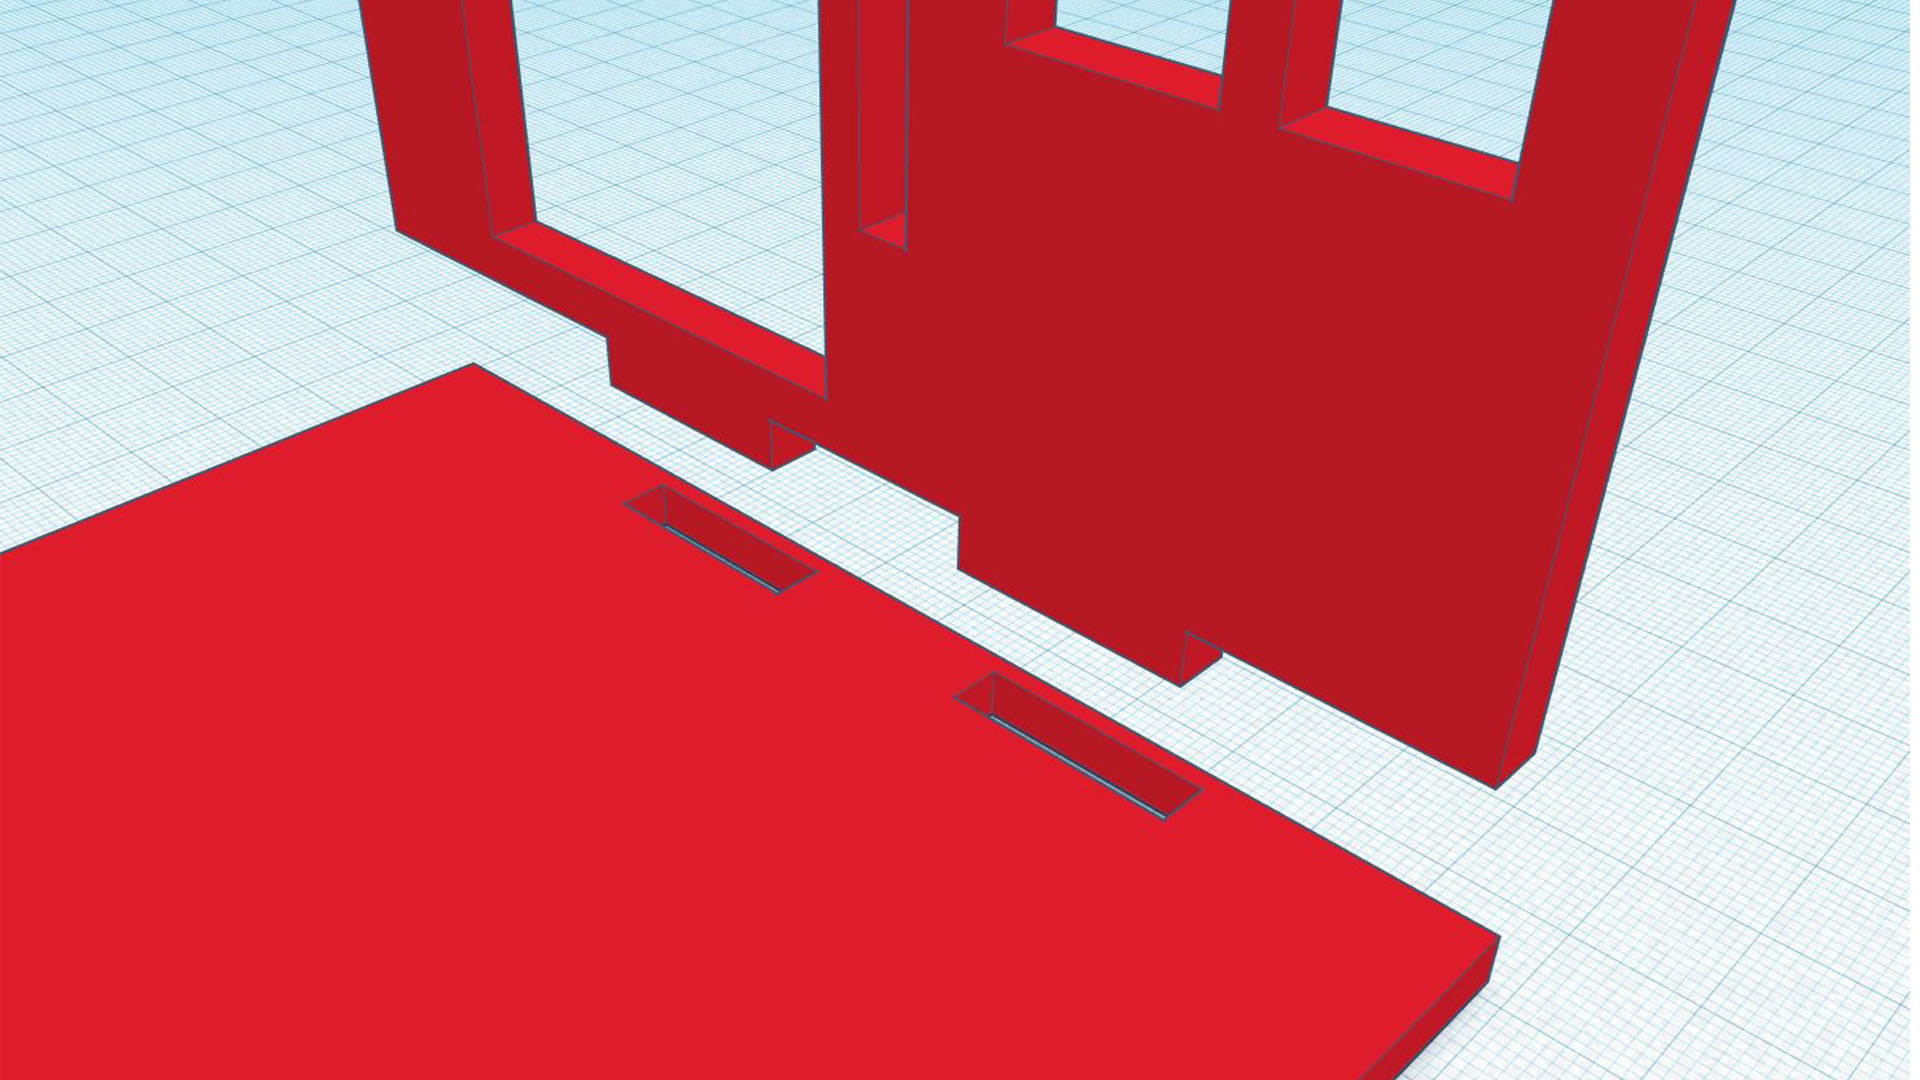
One way of constructing your case is to use flanges that slot into holes – in other words, a slot-together design. These designs require less time than construction cubes, but you’ll need to work with a high degree of accuracy to ensure that the parts fit neatly together.
7. Use modding cubes
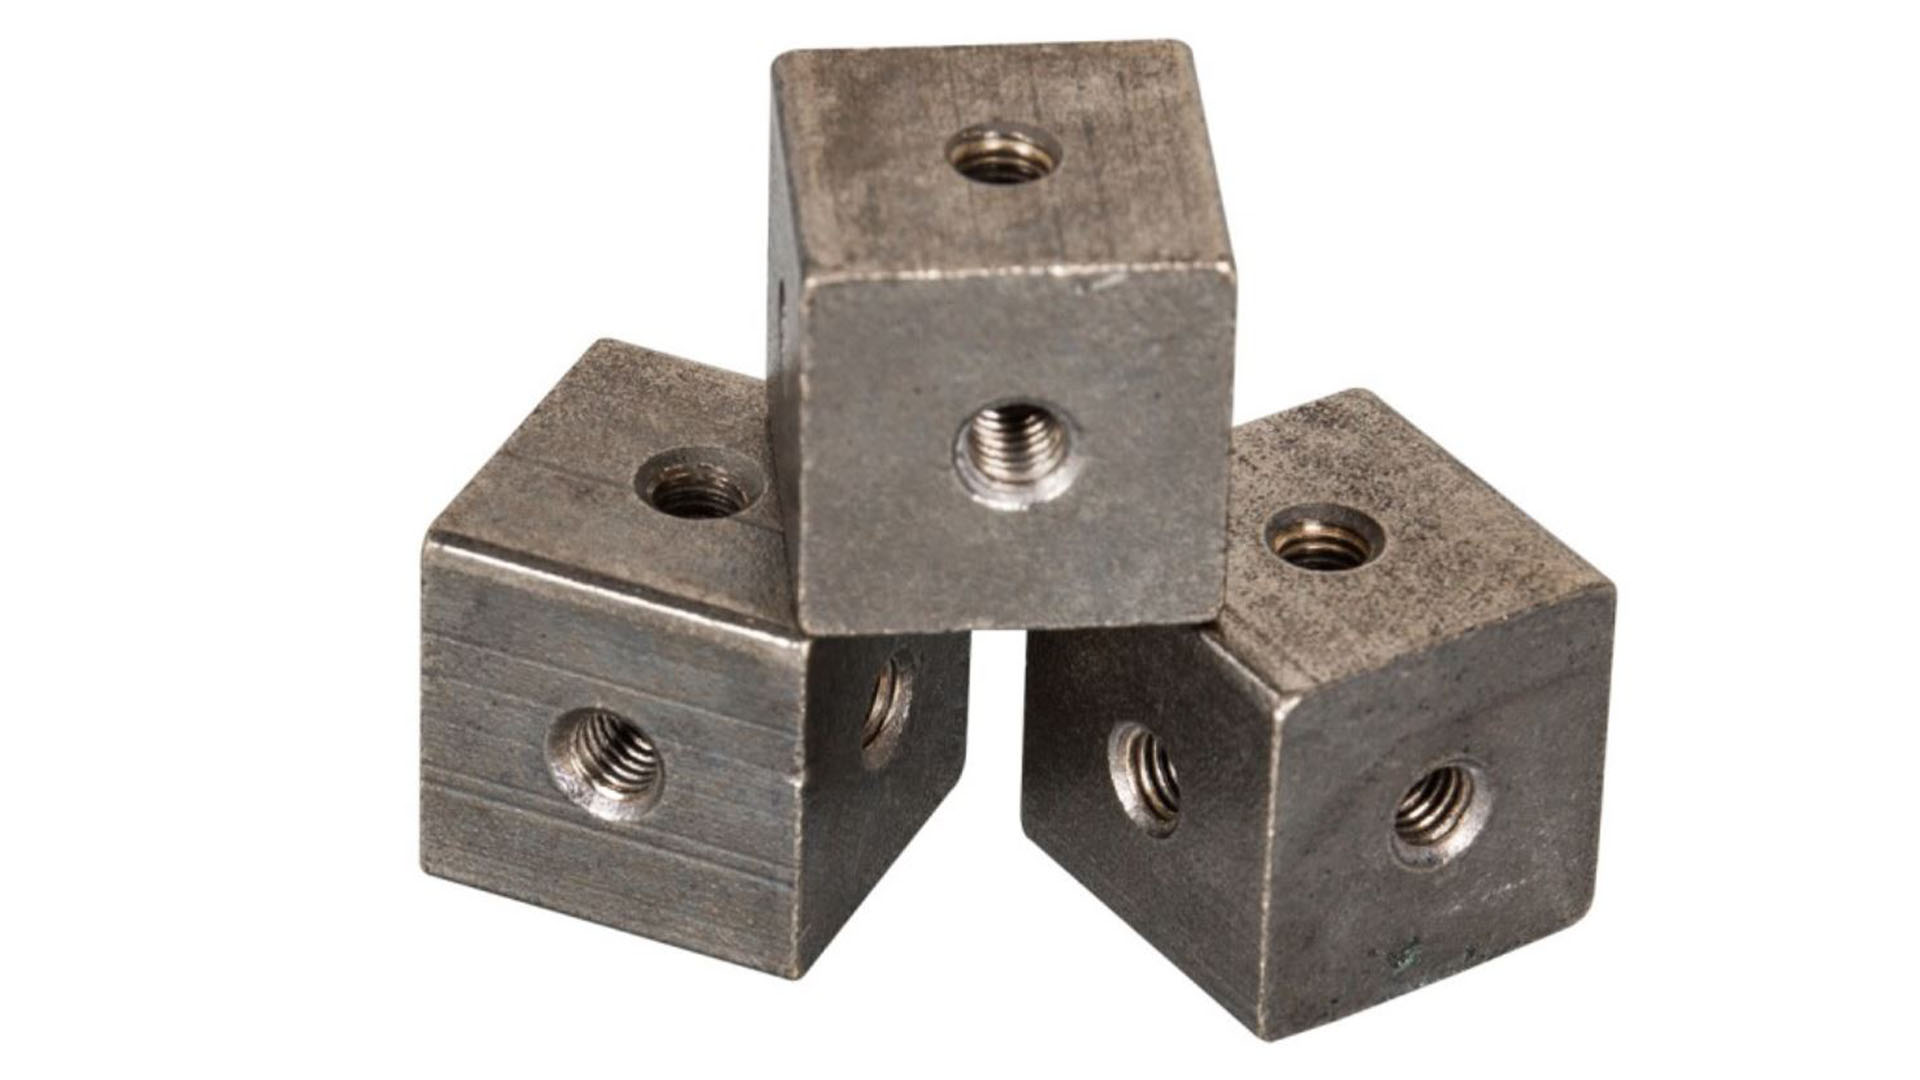
Companies such as Parvum Systems use modding or construction cubes to attach the various sections of case together. These cubes cost around $1 each and give some flexibility when it comes to mounting your components. Unfortunately, you can’t 3D-print them, as the screws will split the print layers.
8. Search for existing case parts
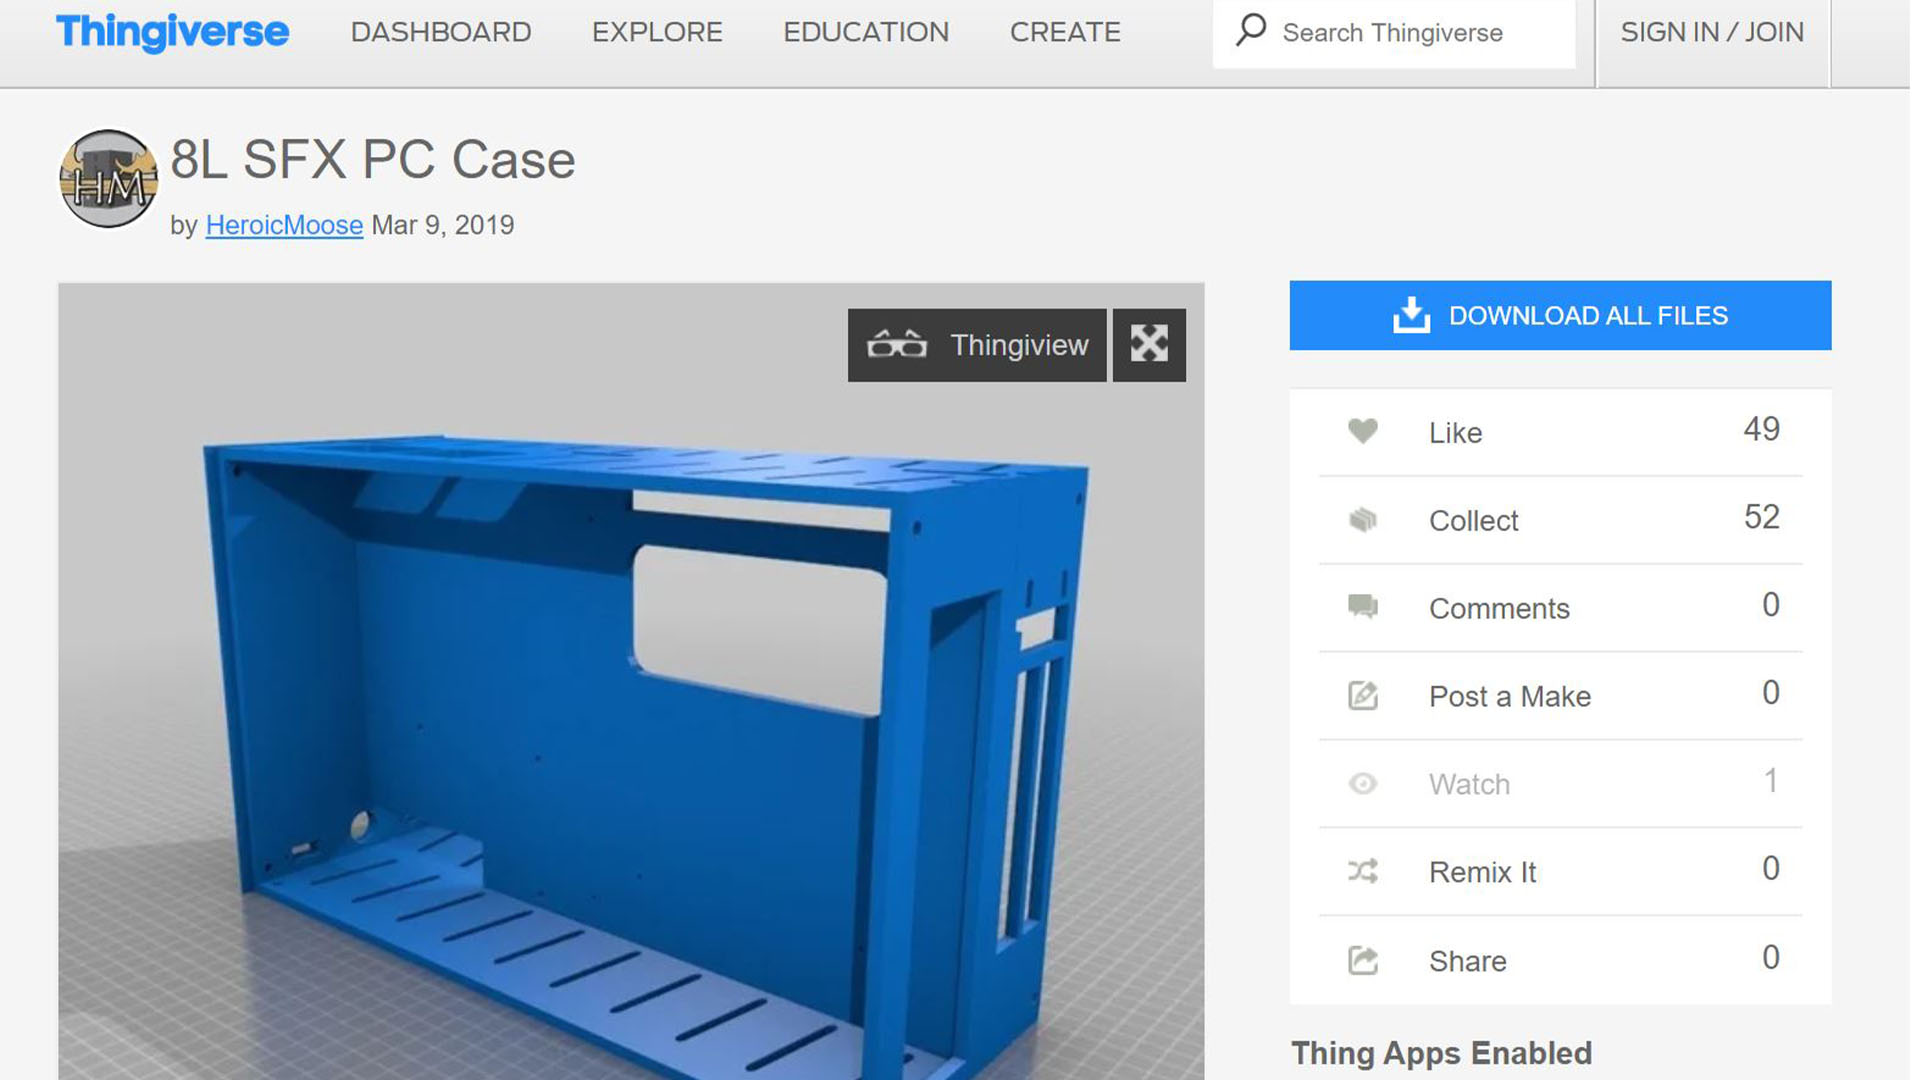
While creating an entire case yourself is rewarding, there are thousands of pre-rendered objects available that can save you time, so you can spend more time designing your case’s unique details. Motherboard trays, I/O panels and expansion slot brackets are all worth borrowing for your build.
9. Use a digital Vernier calliper
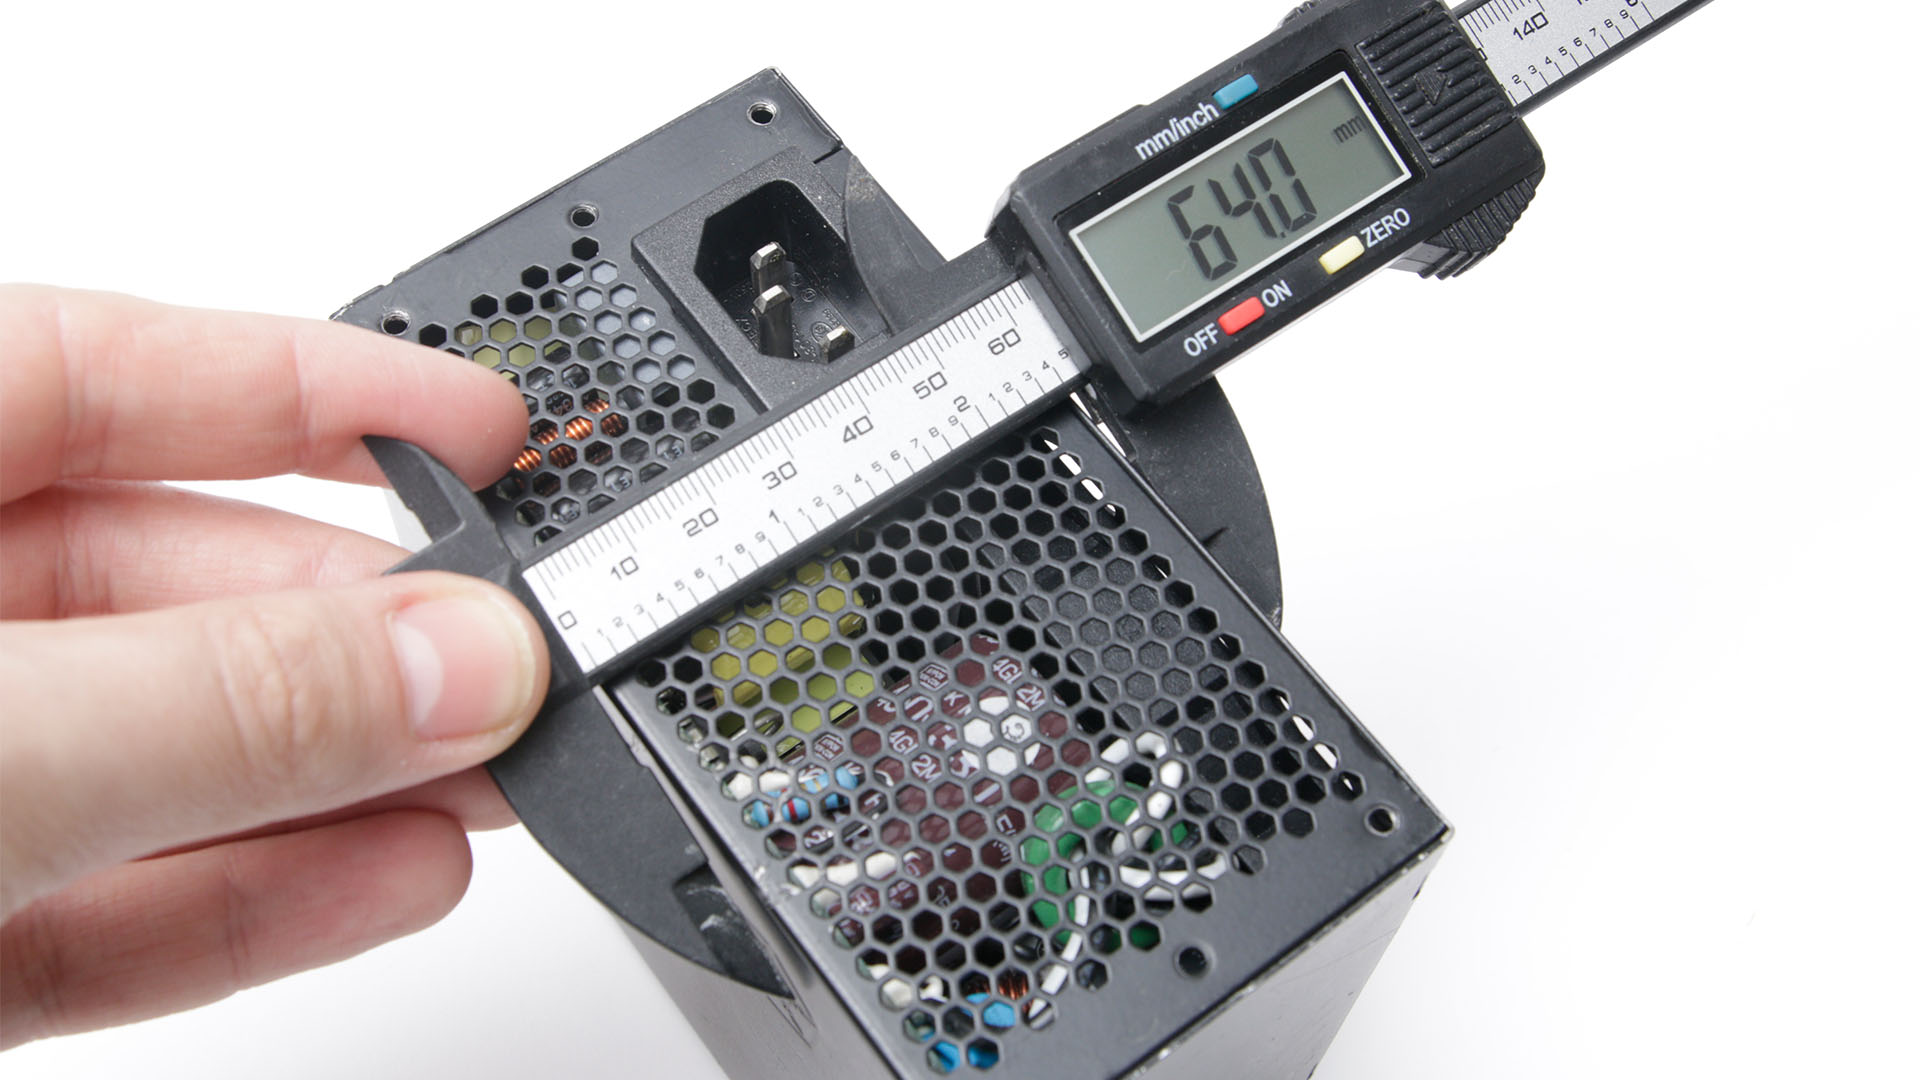
A digital Vernier caliper allows for very precise measurements of components. It can be very useful for modeling the fixtures, fittings and hardware, so you can accurately create your 3D case model.
10. Use 3D hardware models
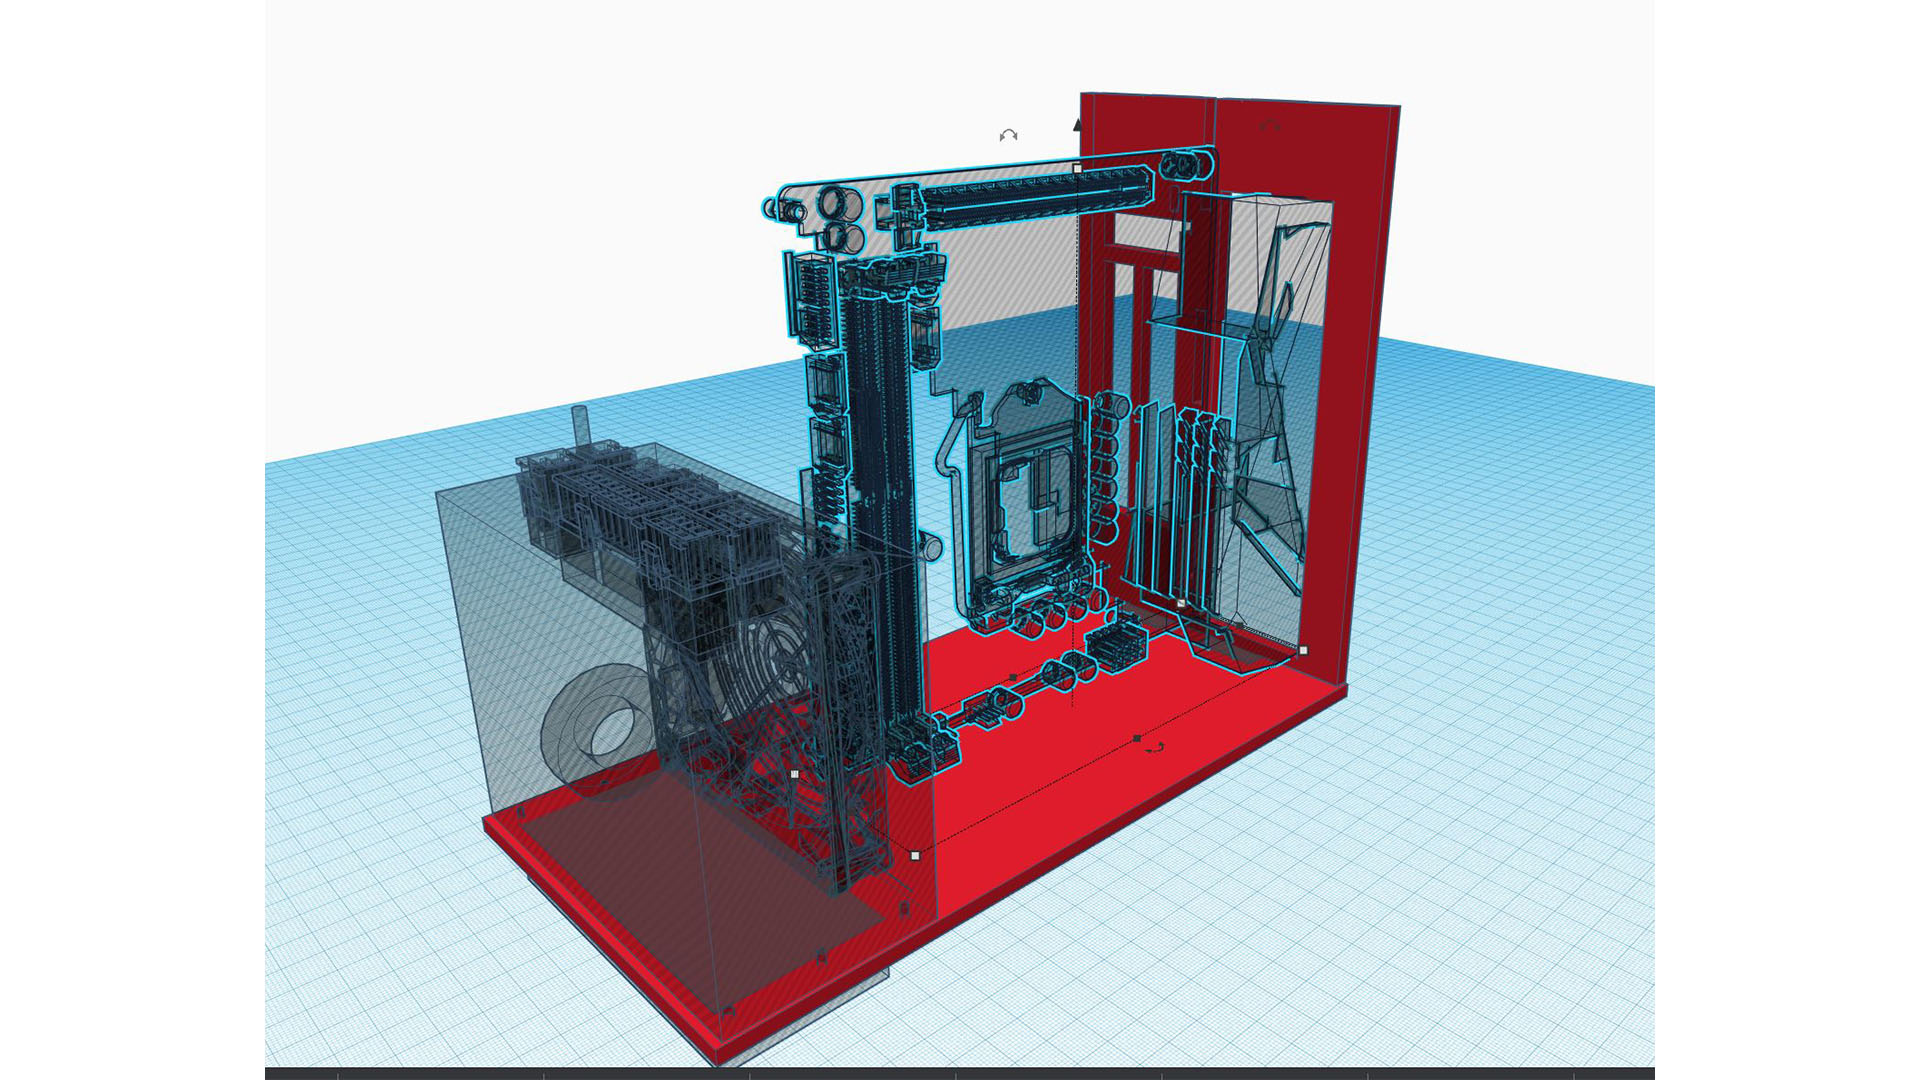
To aid the design process, plenty of websites, such as TinkerCAD, Thingiverse, and 3D Warehouse, have thousands of pre-rendered models available for you to download. However, you’ll need to ensure that they’ve been rendered accurately and that they’re the correct size.
11. Create holes
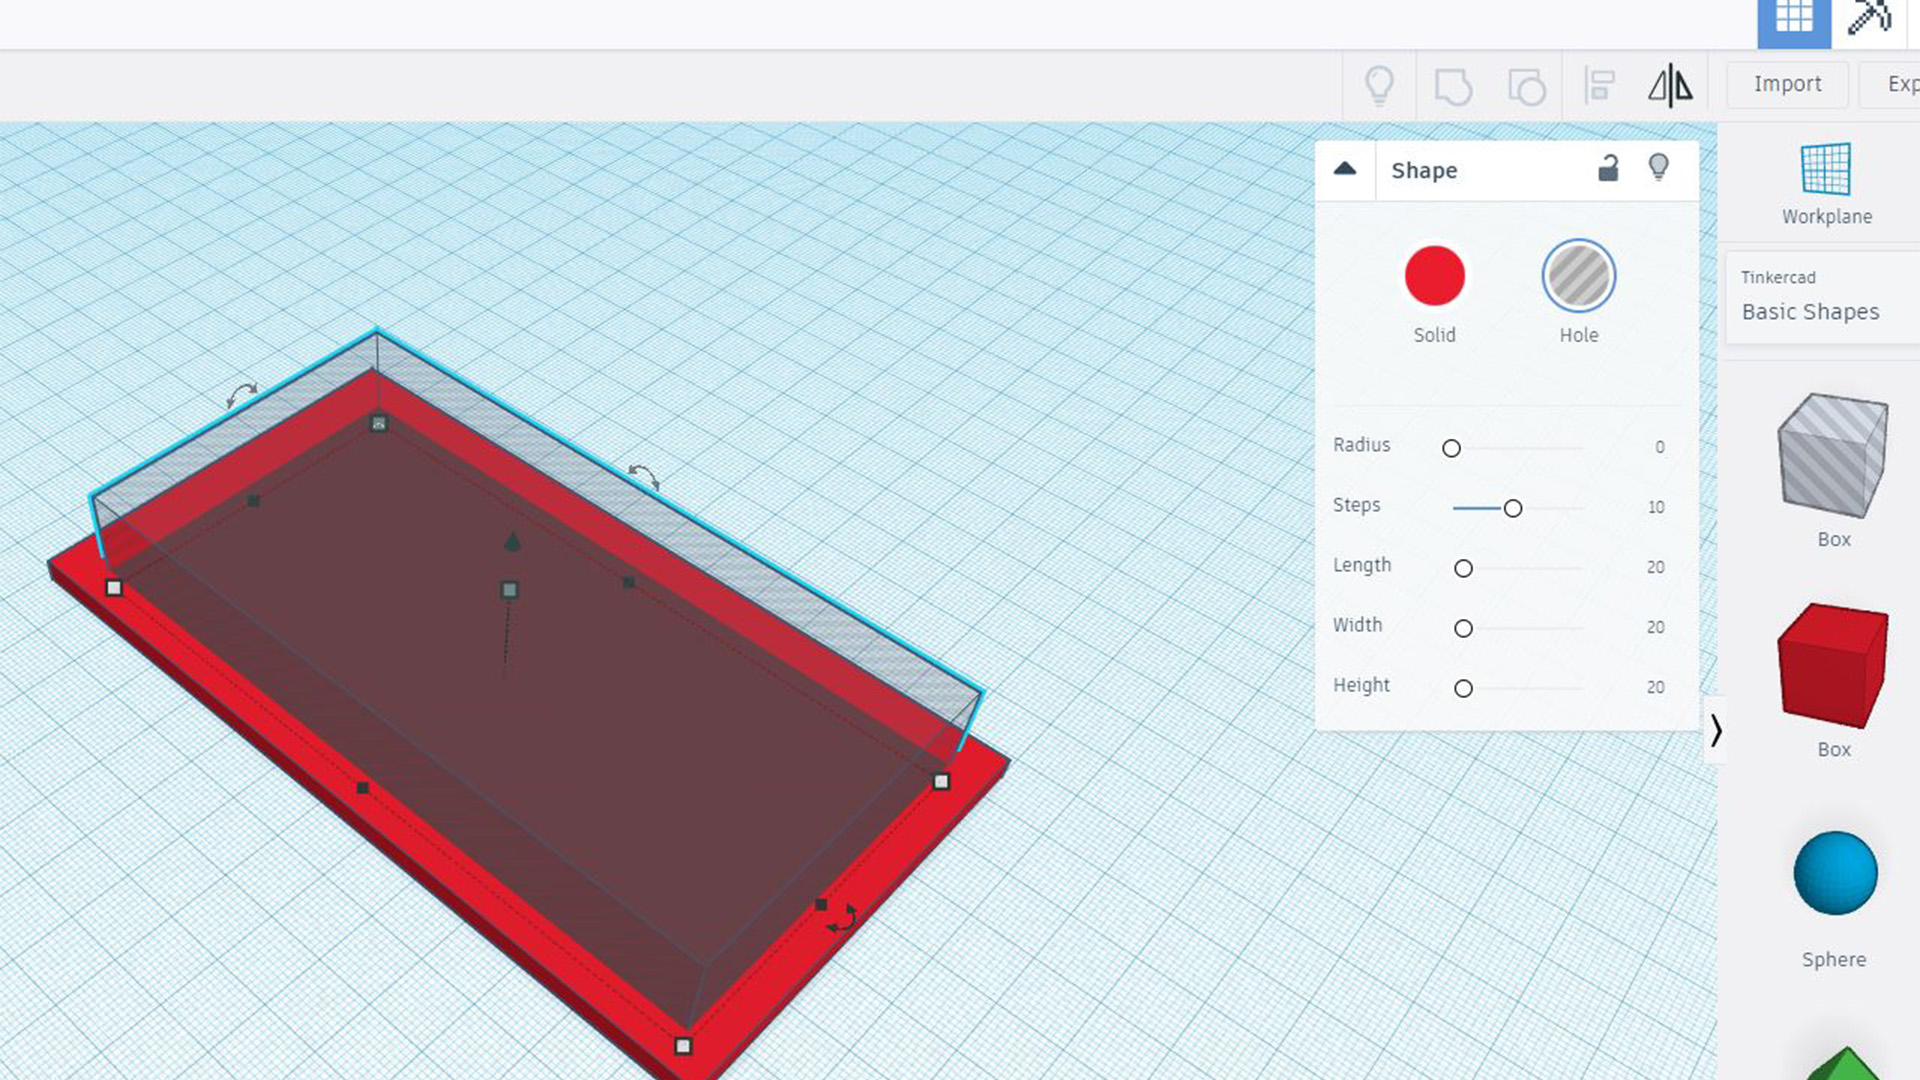
In TinkerCAD, you create holes in objects by making a shape with the size of hole you need, and turning that object into a ‘hole’ using the Shape tool. You can use this method to add screw holes and vents to your designs.
12. Create motherboard tray
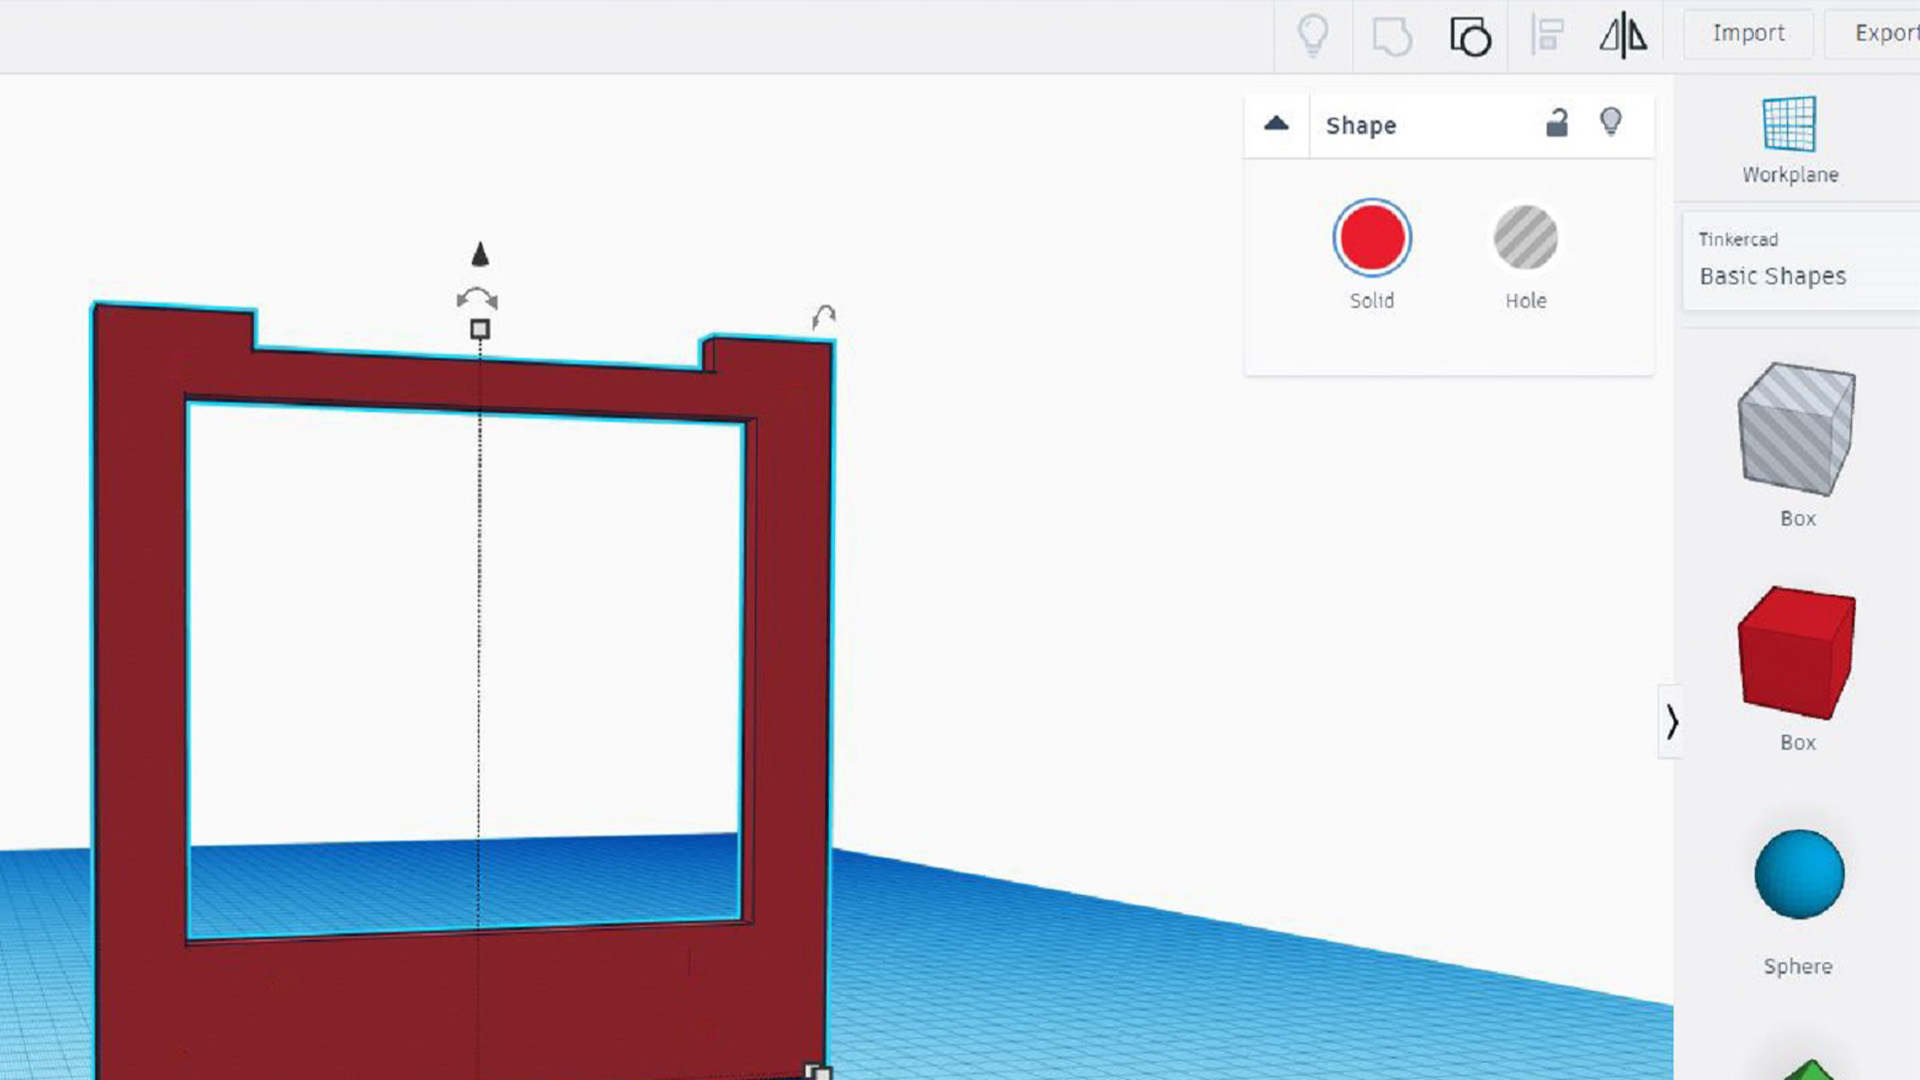
Start with the motherboard tray, which only has one job – to secure your motherboard. It doesn’t need to run the length of the case, and it’s usually easiest to add motherboard standoffs yourself after printing, rather than beforehand.
13. Create tray supports
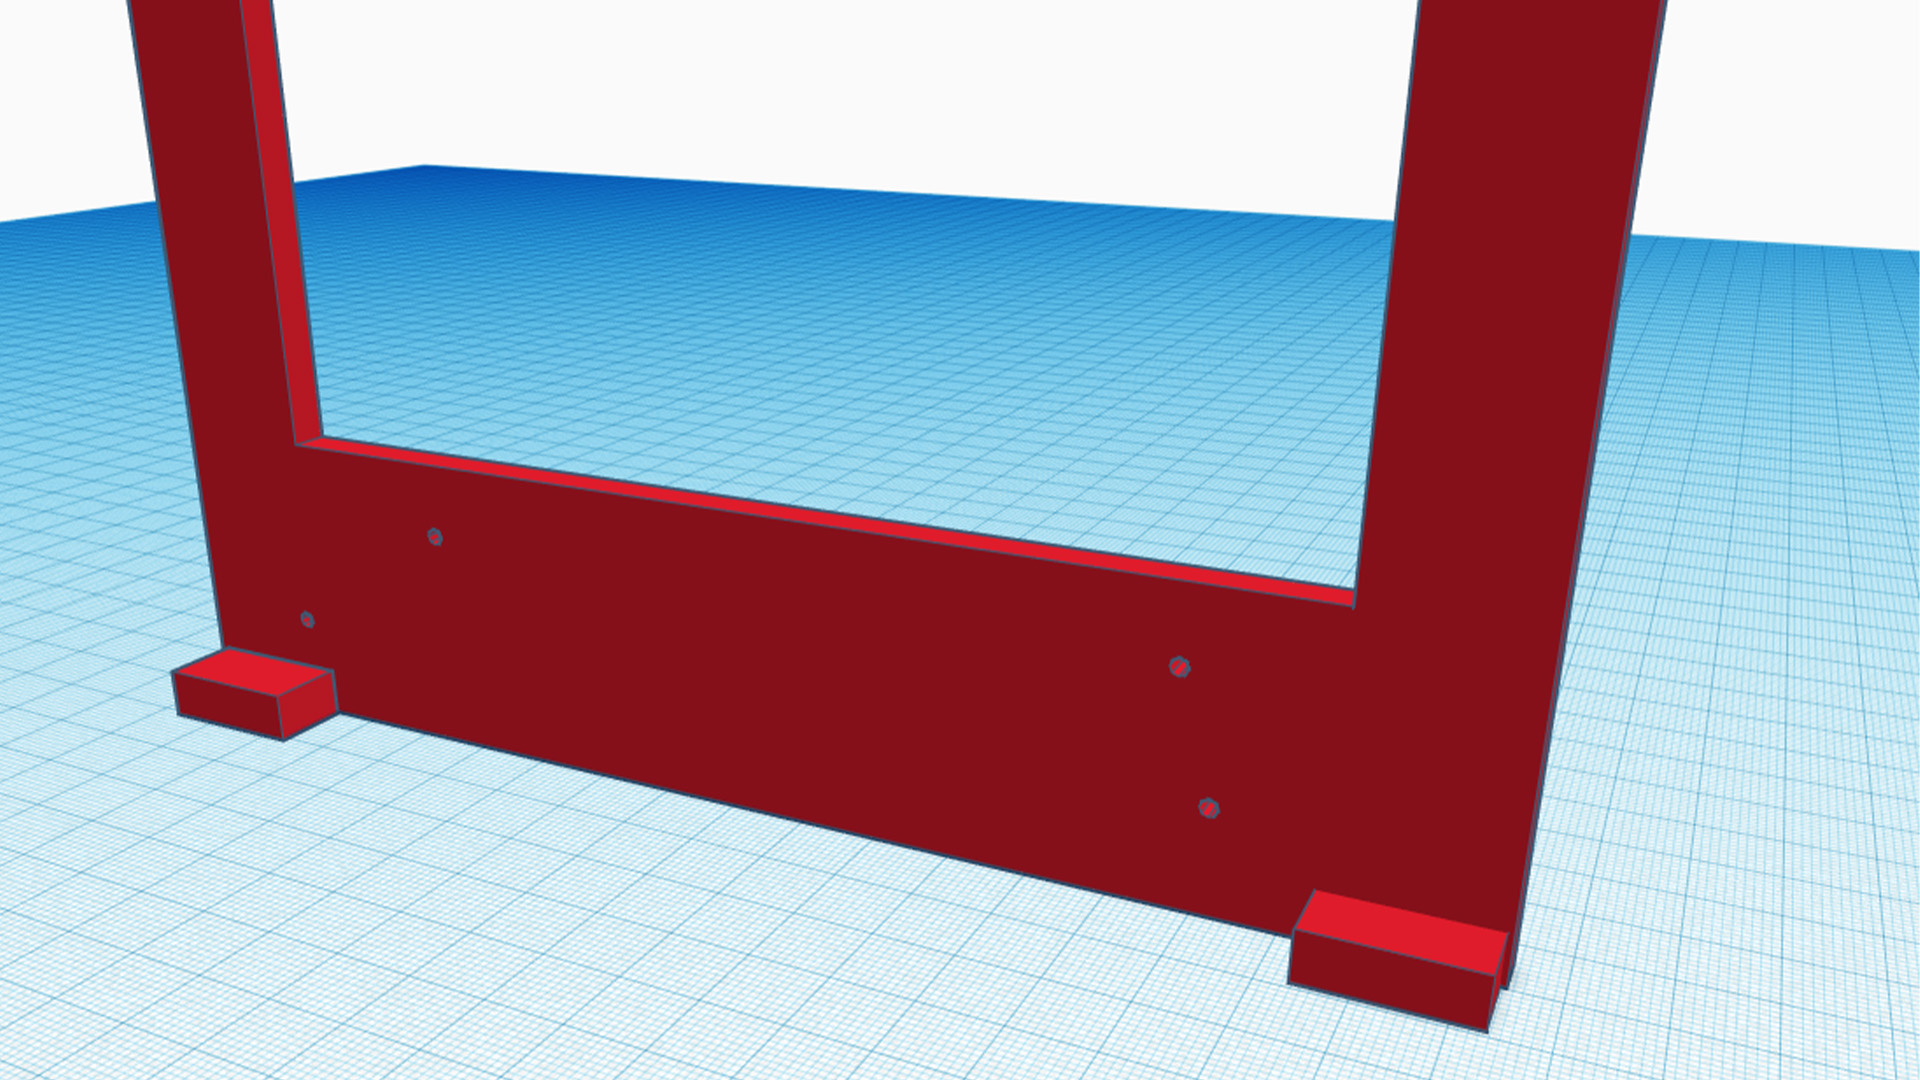
If you want to 3D-print the majority of the components, you can add large supporting feet to the motherboard tray, enabling you to secure it to the other panels in your case. Make sure these supports are large and thick enough to have holes drilled in them without breaking.
14. Create motherboard mounts
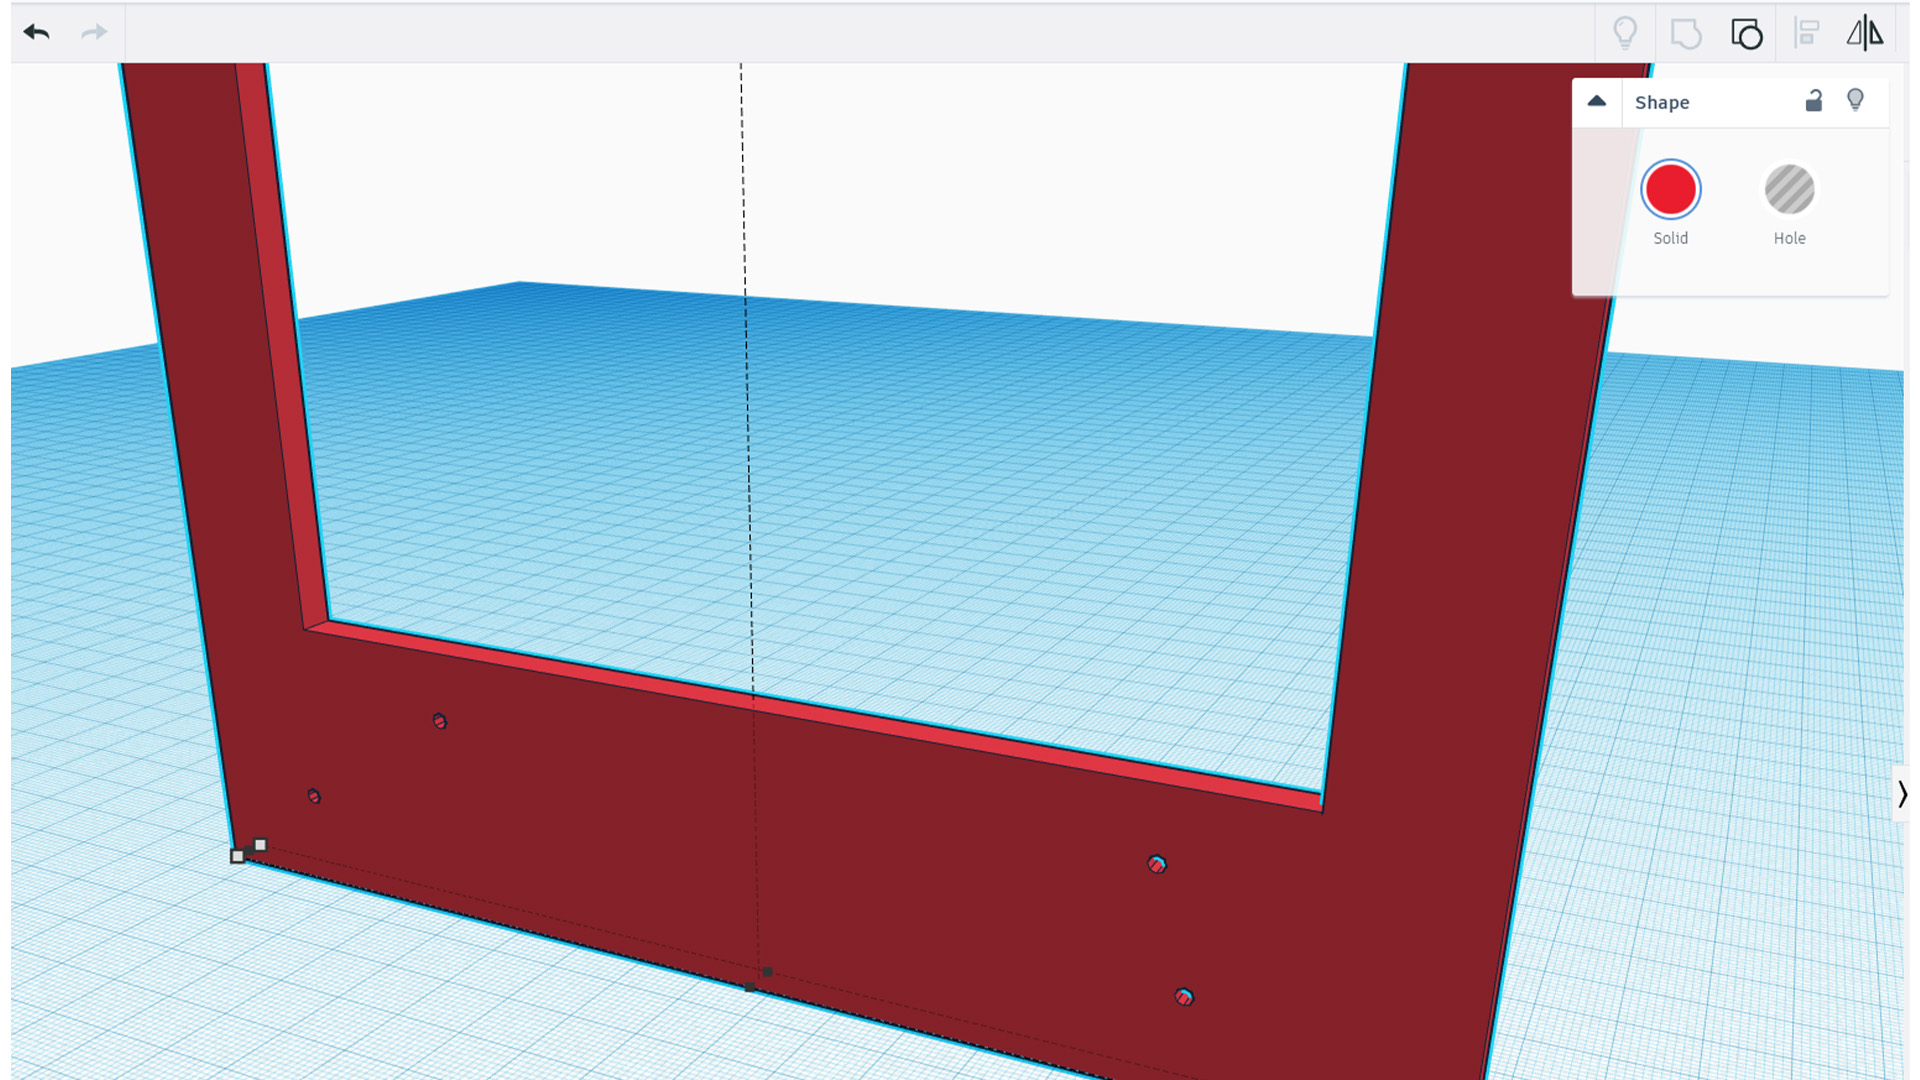
If you’re confident in your measurements, add the motherboard standoff holes, which for 6-32 screws need to be 3mm wide, using templates such as the ones available here. Alternatively, once you’ve printed the motherboard tray and rear panel, mark up the standoff holes and drill them.
15. Test-print
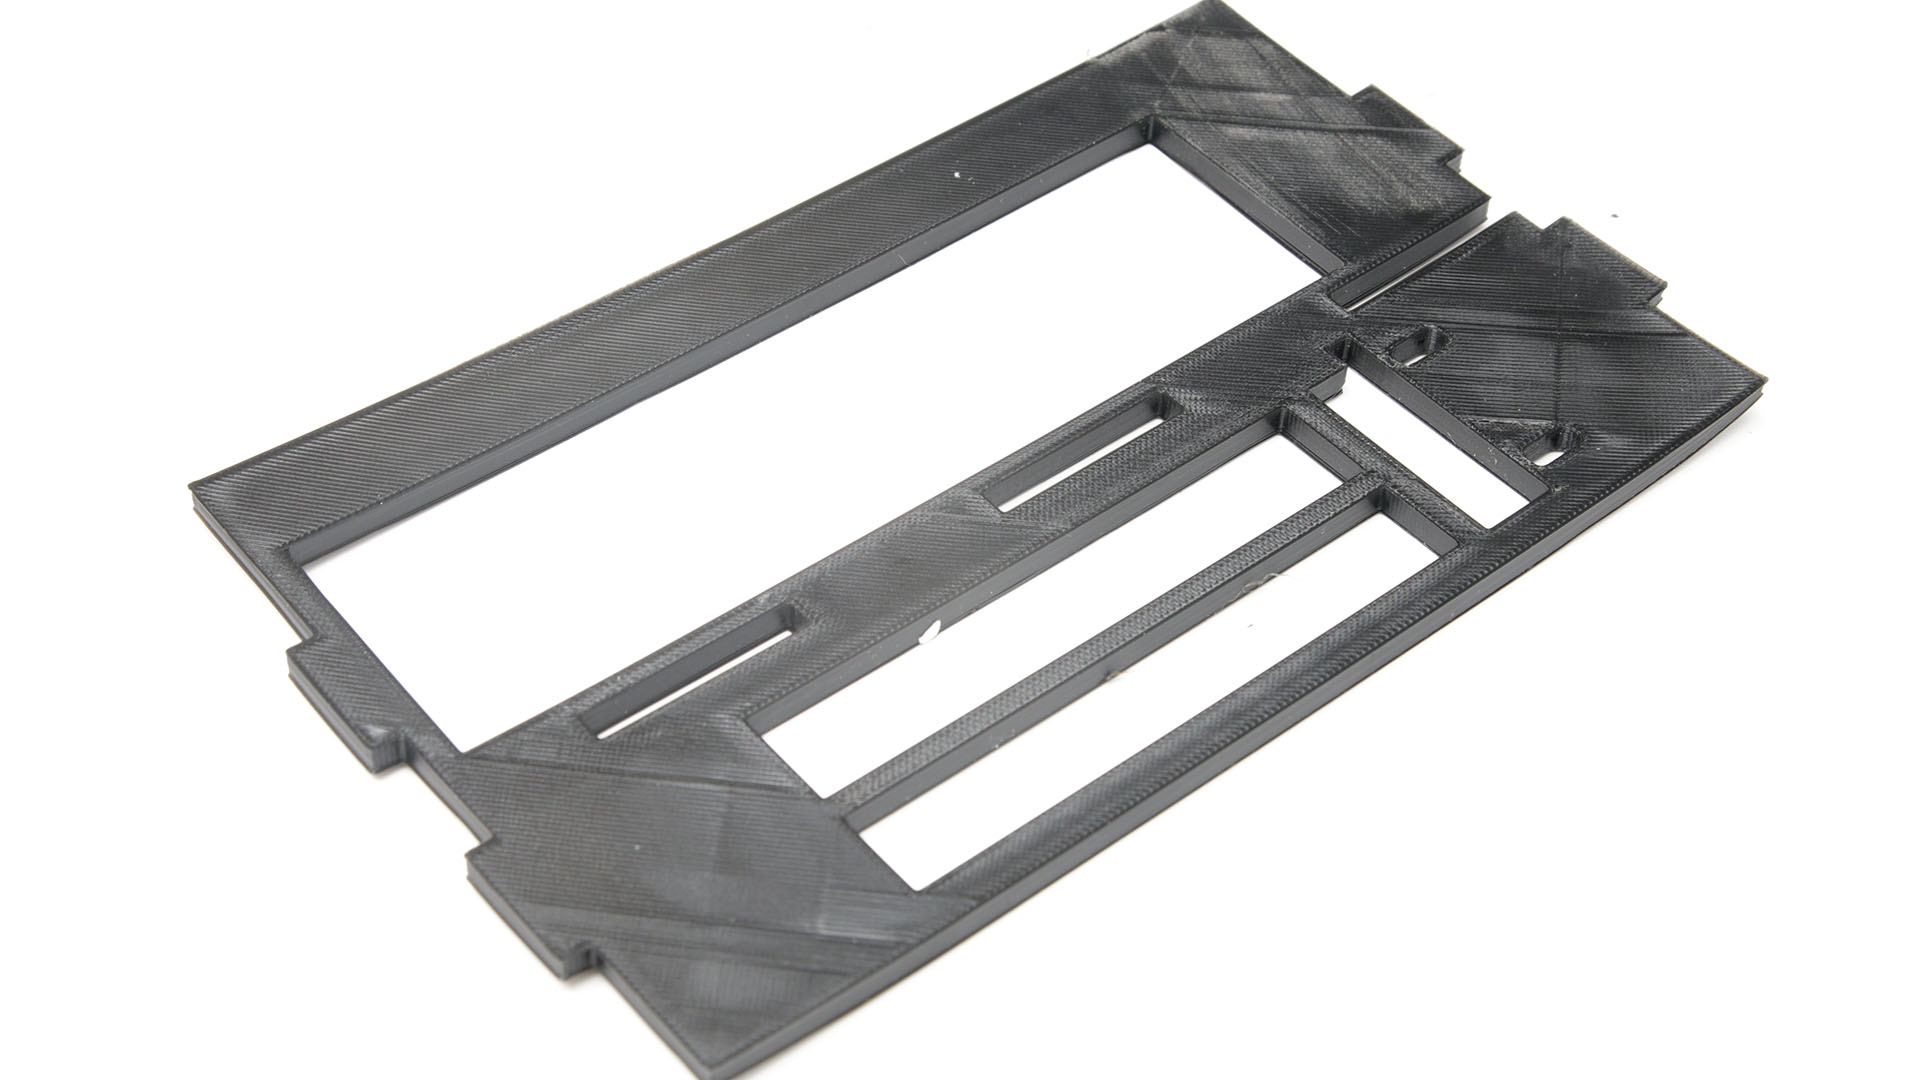
It’s best to print a single section first, so you can test your printer settings. Large, flat objects can be prone to warping, so you may need to adjust the temperatures of the print nozzle or print bed, as well as trying other materials. You’ll also need to see if your chosen thickness is sufficient to prevent too much flex.
16. Create rear panel
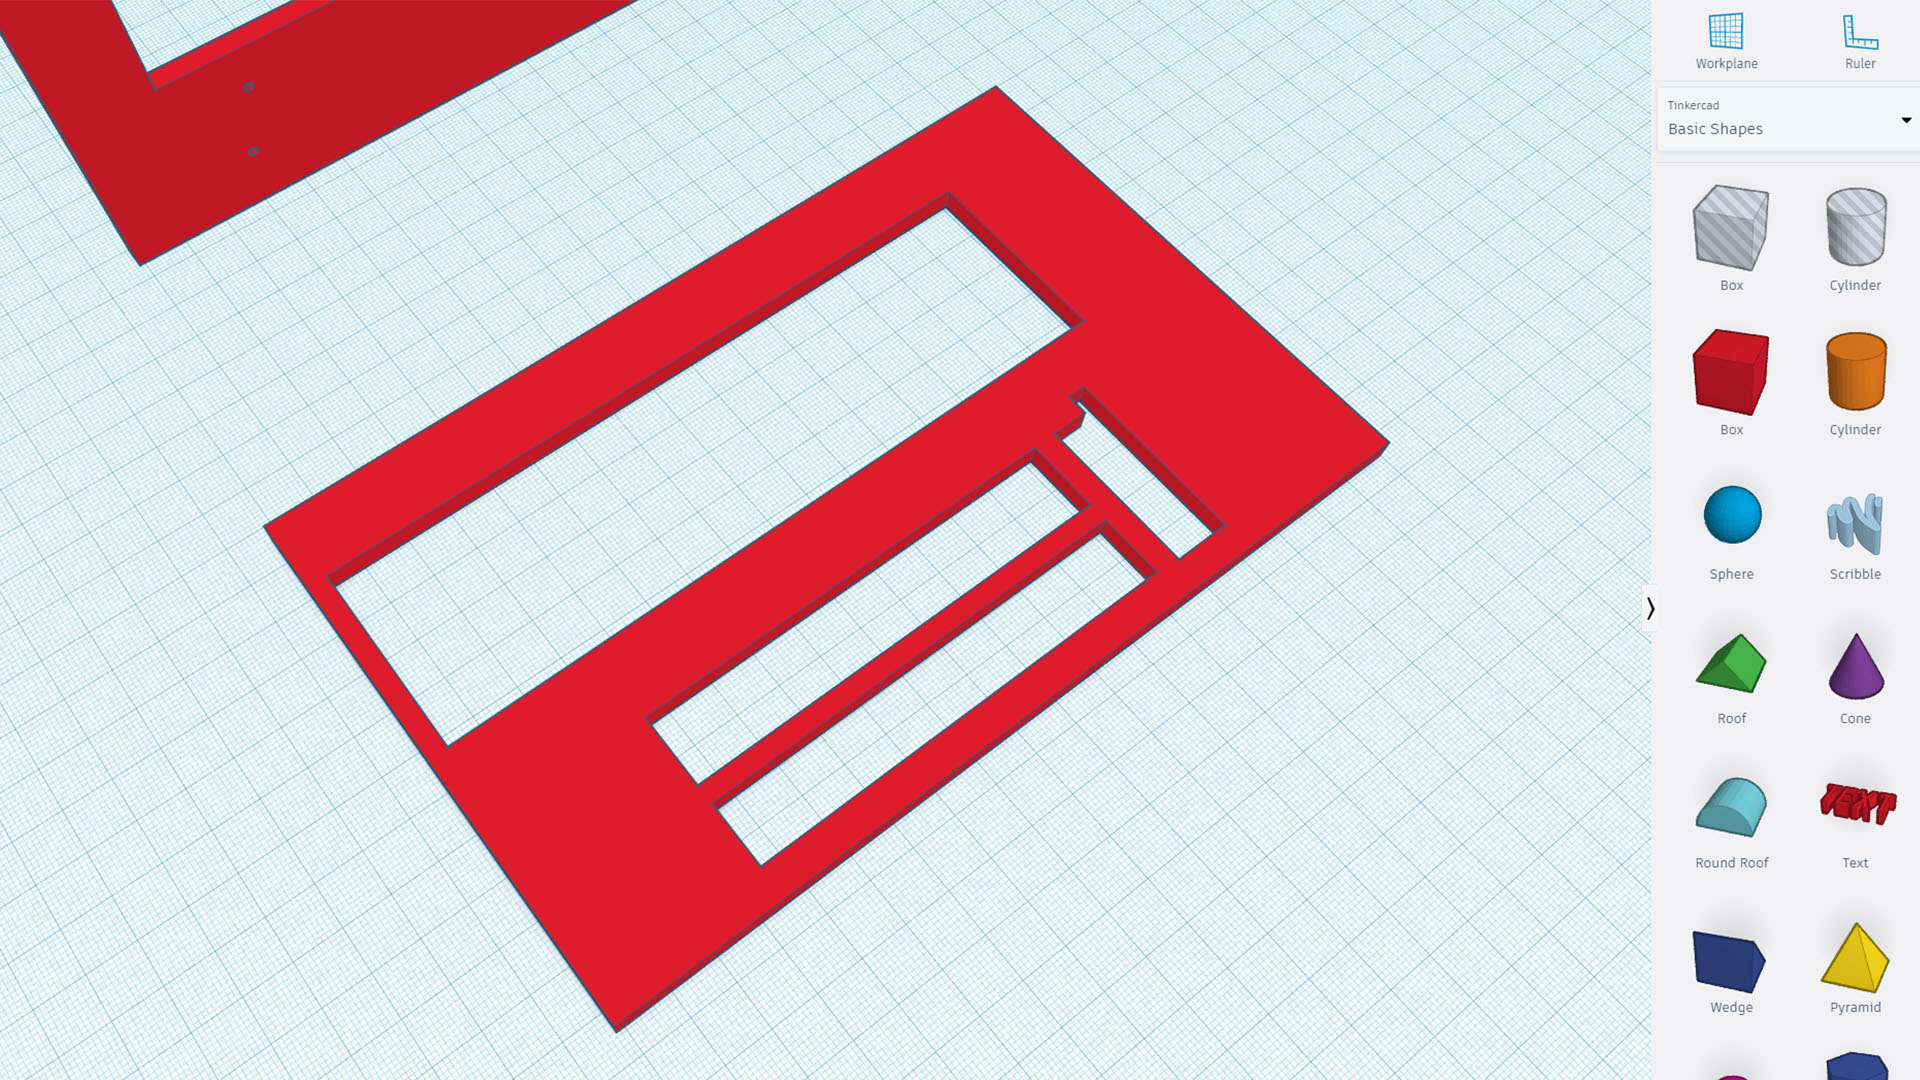
The rear panel will need an I/O cutout, as well as expansion slot brackets. You can use an existing case to measure the design elements, or use an existing model online, cutting away just the sections you need before adding them to your 3D model.
17. Create the base
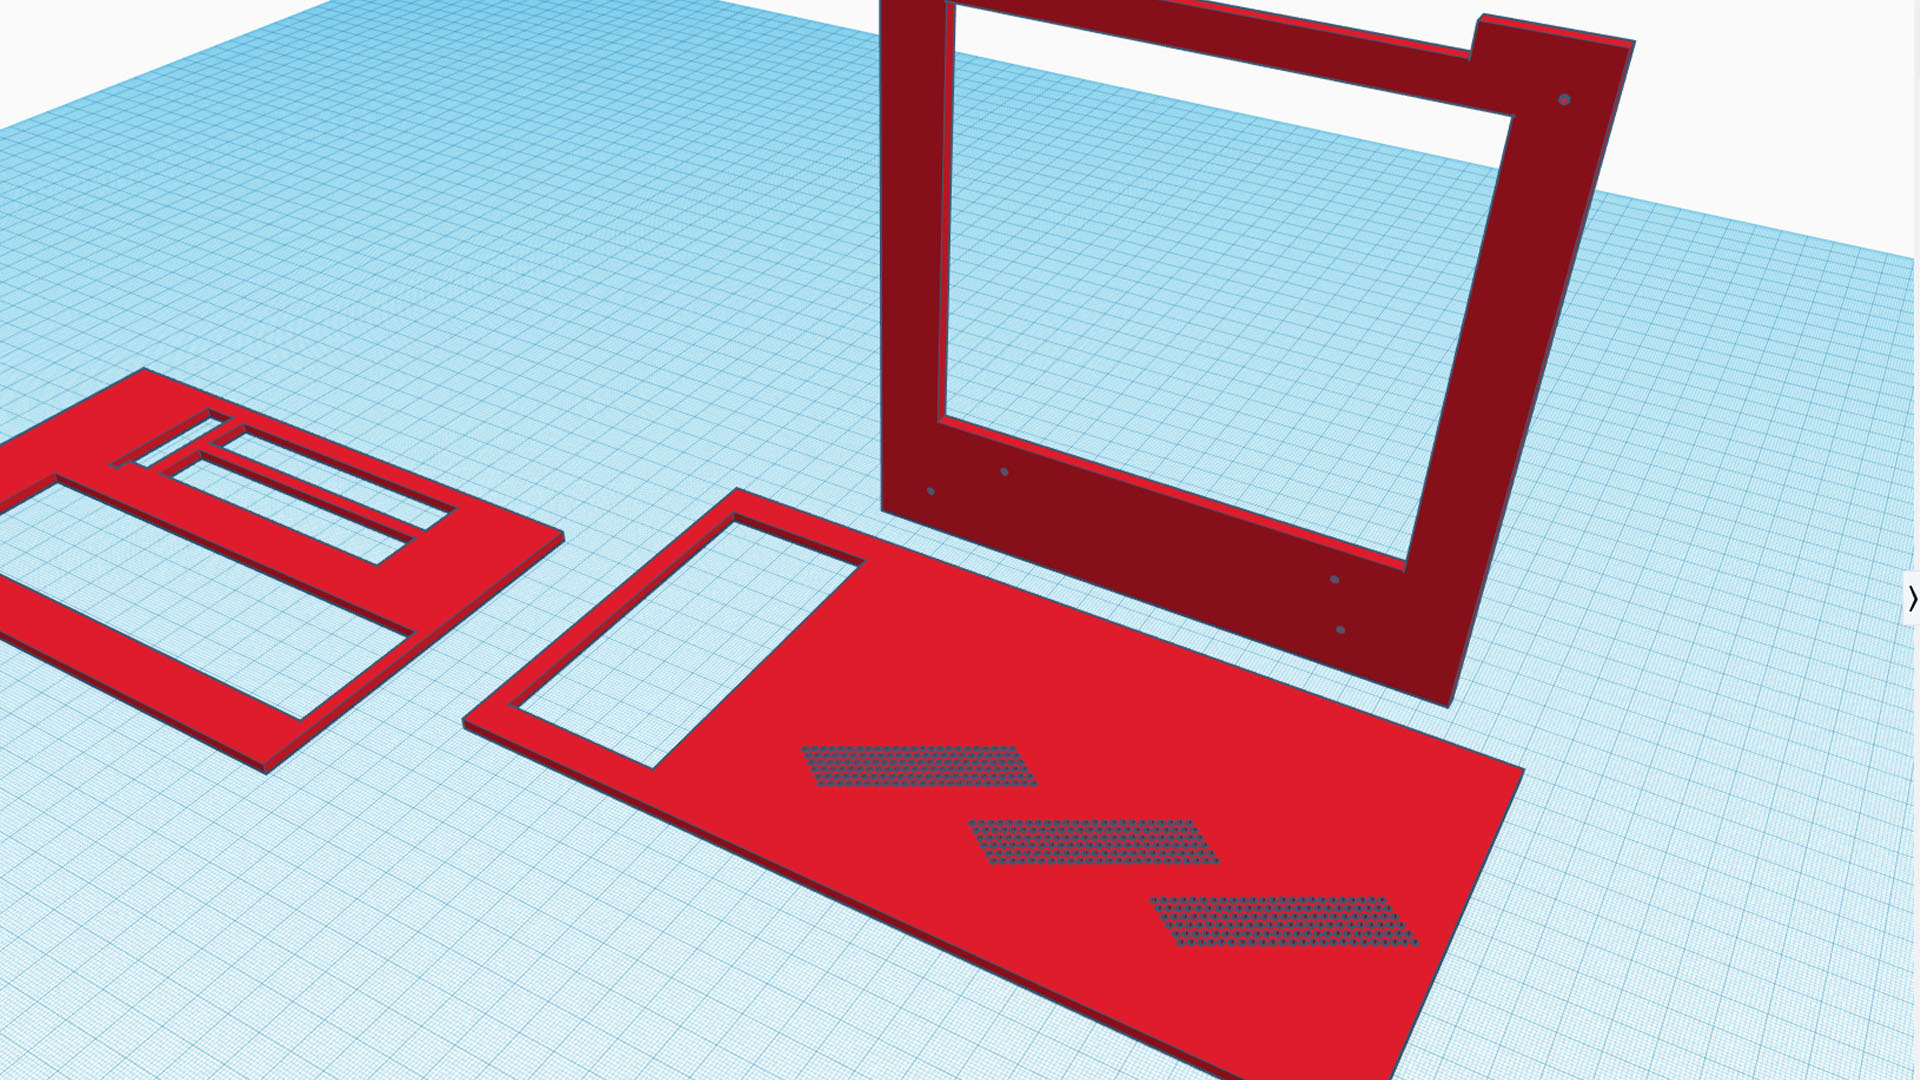
The base will probably be a fairly simple object, depending on your hardware configuration, but you may want to place your PSU or fan mounts here, as well as add some ventilation holes. You want to have the front and rear panels sitting over the ends to create a clean look.
18. Add case feet
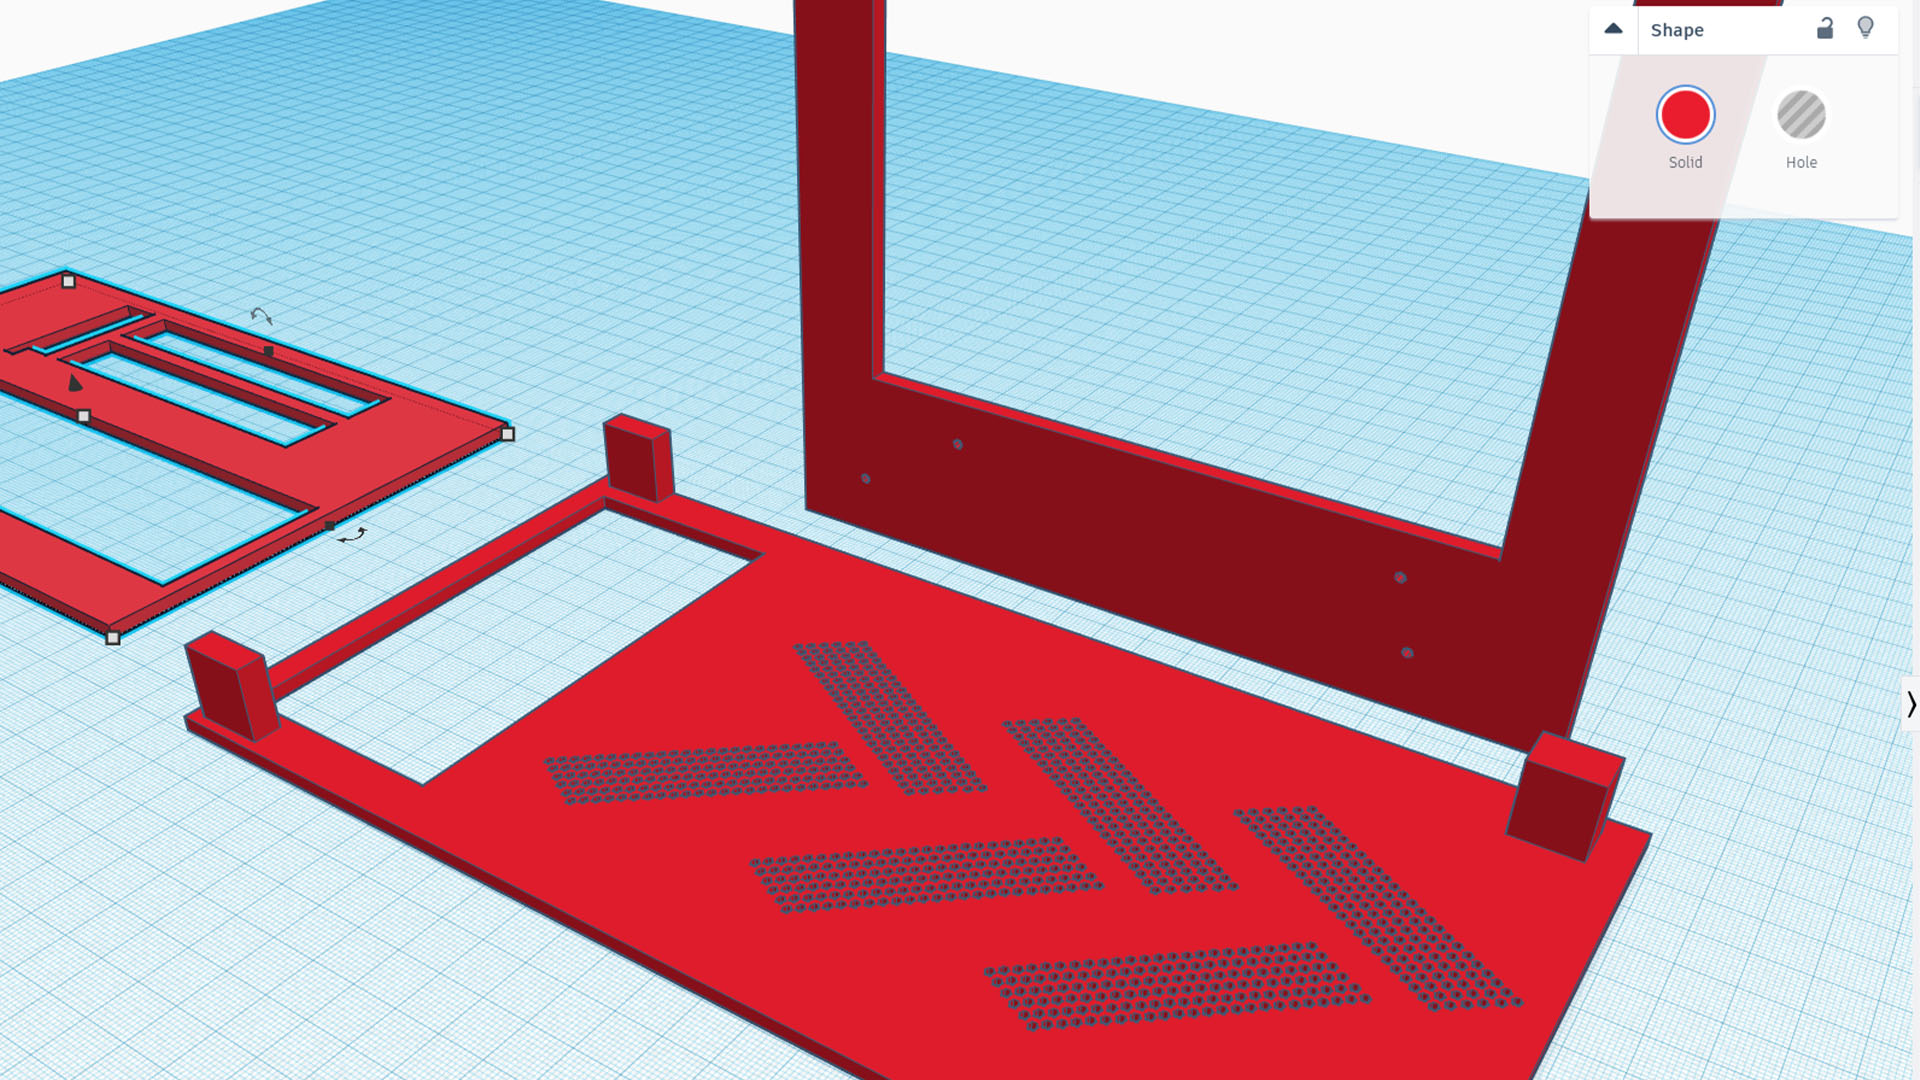
Case feet will be essential if you want to give the base clearance for better airflow, or if you want to run a PSU cable underneath the case. However, if you want to experiment with feet designs, or have the option of removing them, you can print them separately and use mounting tape to secure them later.
19. Create PSU mount
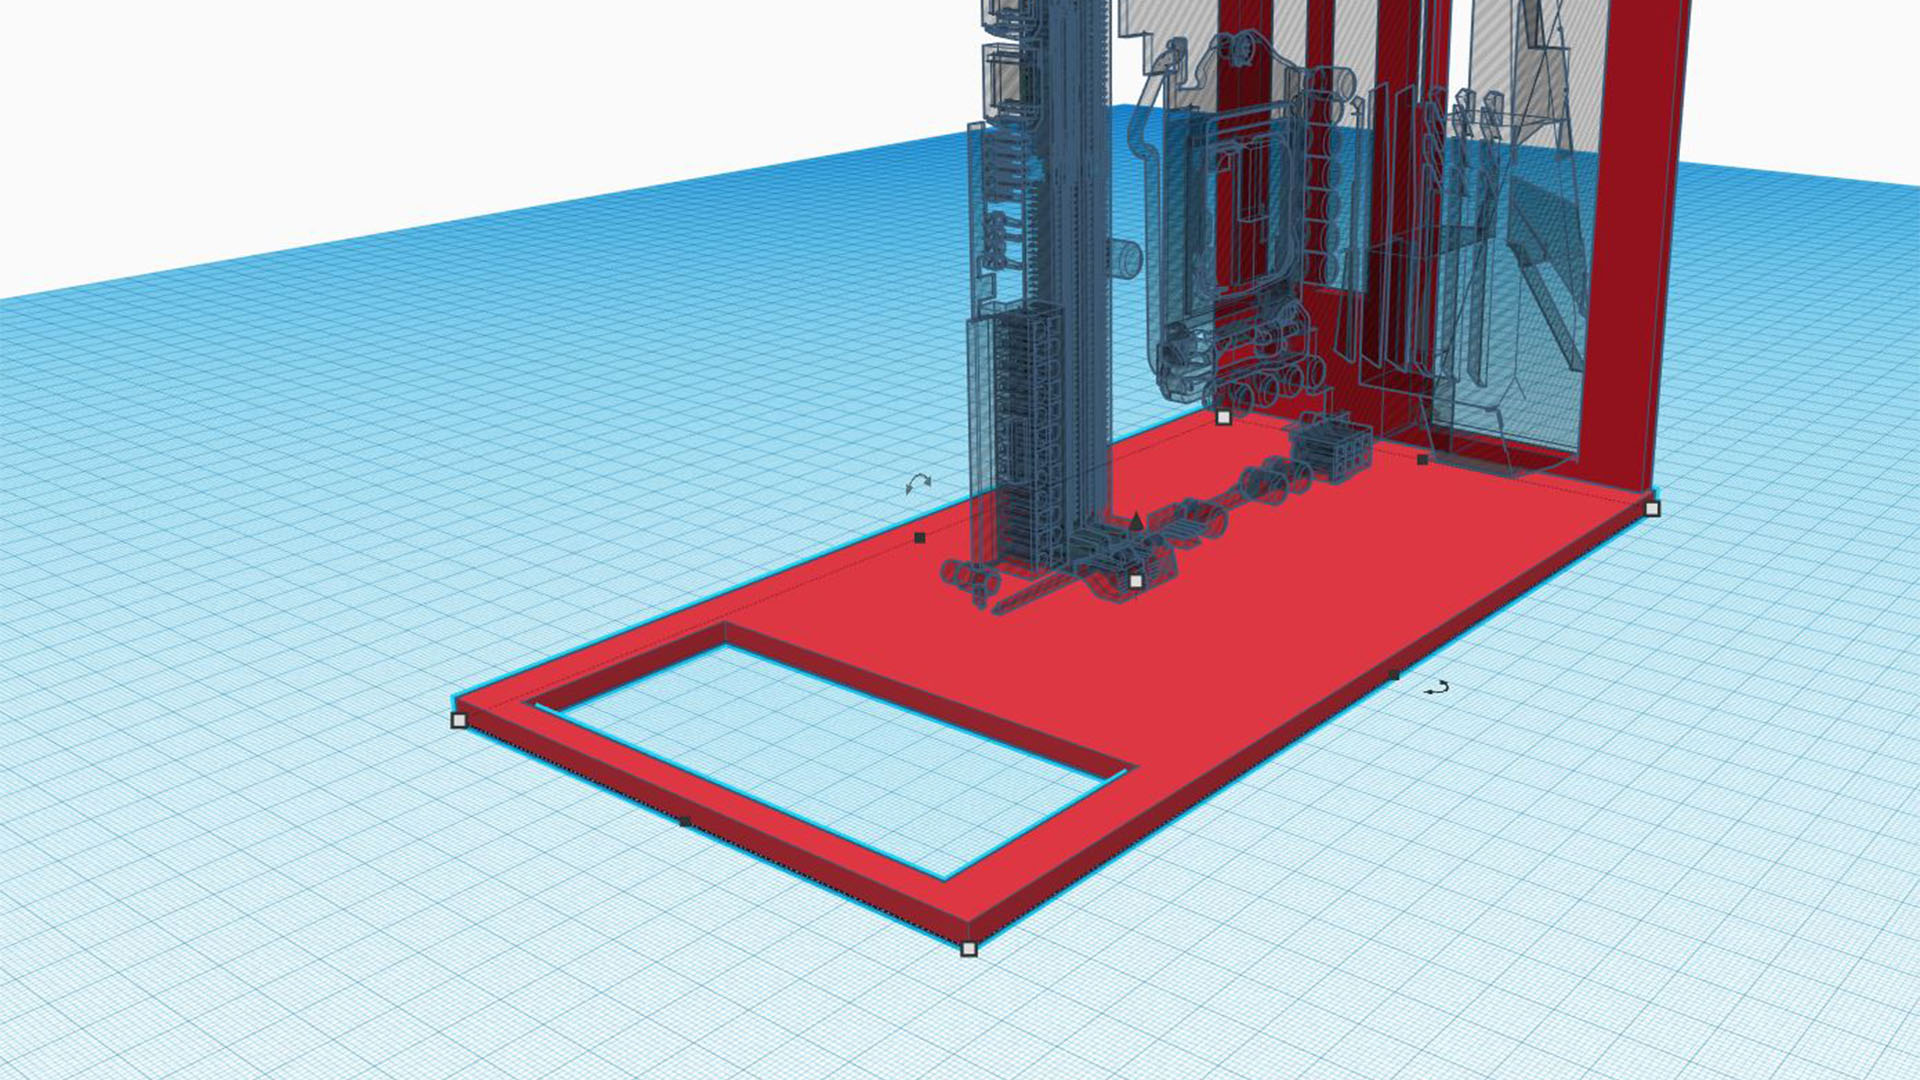
We’ve used an SFX PSU in our PC to keep its width as small as possible, which will also cut down on print material and print times. Mounting it in the front makes for the best use of space, and we recommend using an angled mains lead plug in this configuration.
20. Create side panels
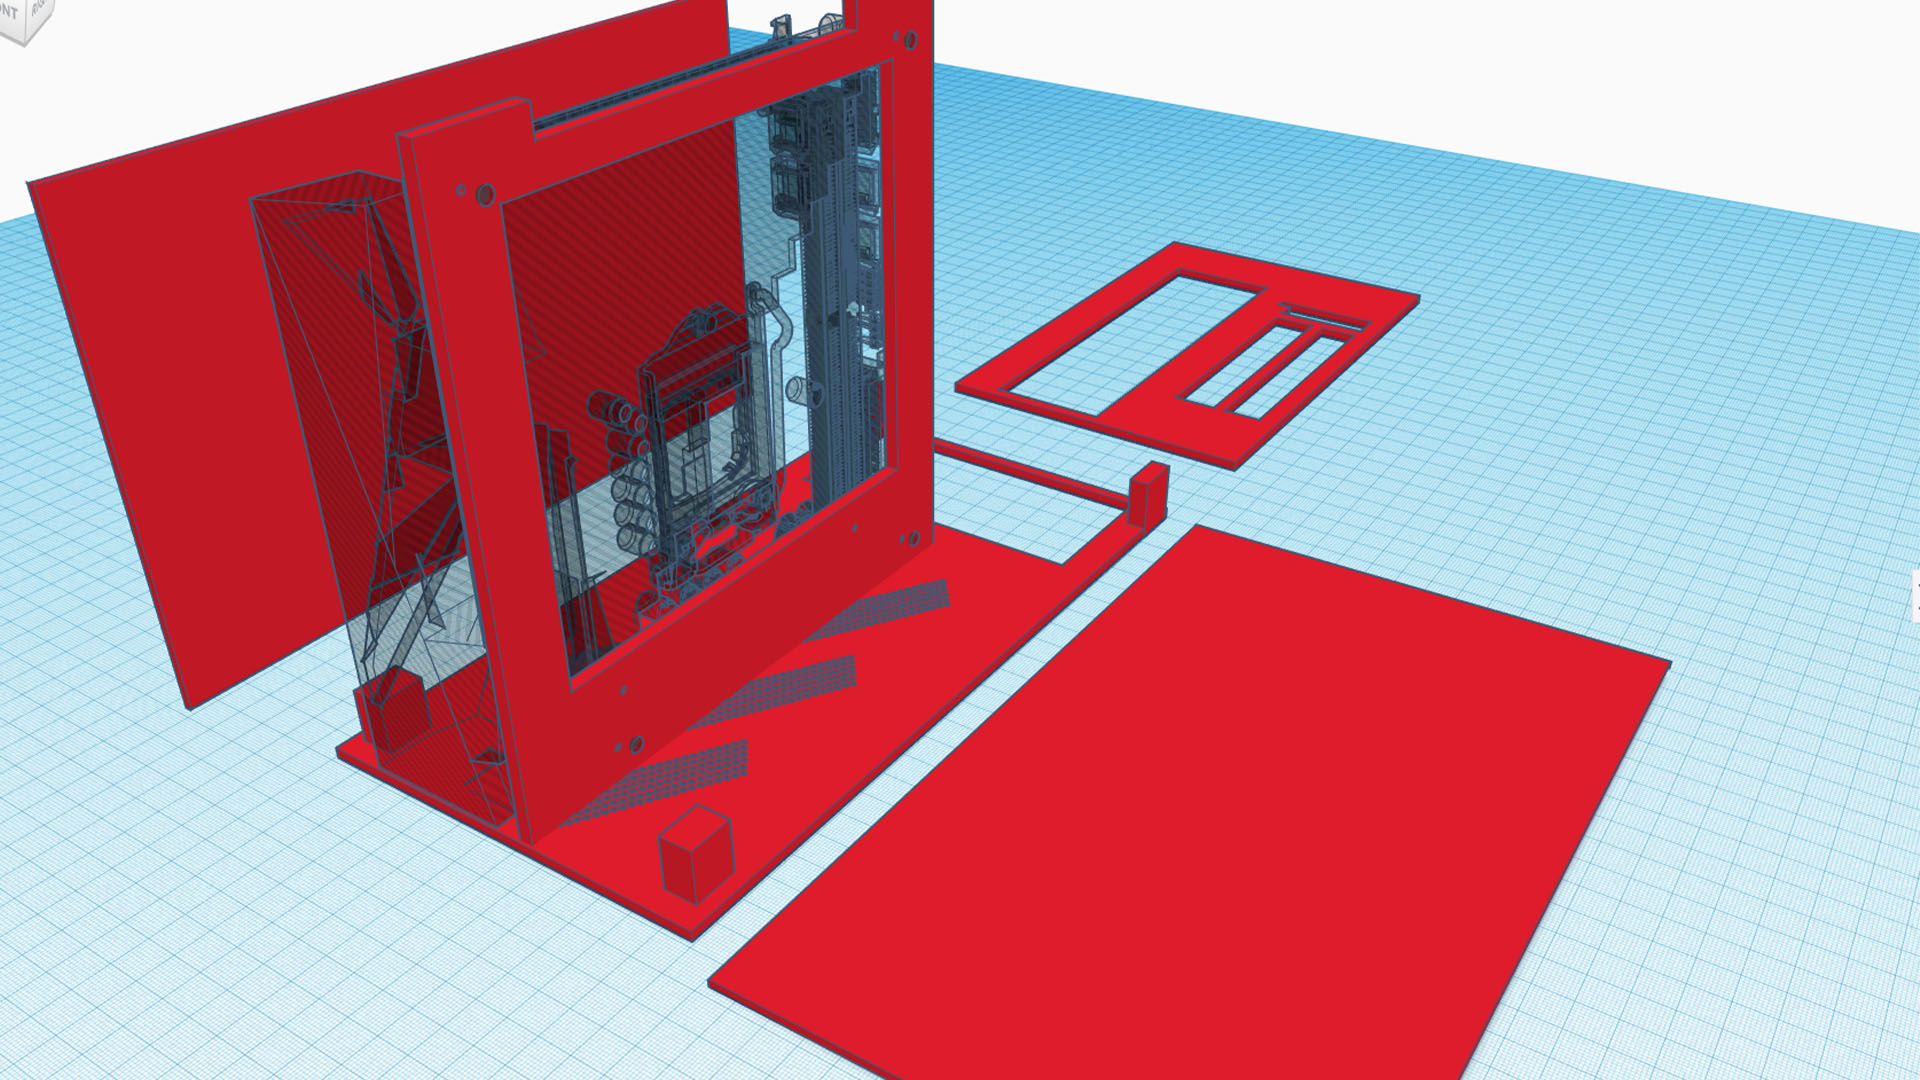
The side panels should sit on the outsides of all the other panels, in order to give your case a clean look. These will likely be the largest components you print, so if you haven’t bought a 3D printer yet, make sure its print bed is big enough for these.
21. Design front panel
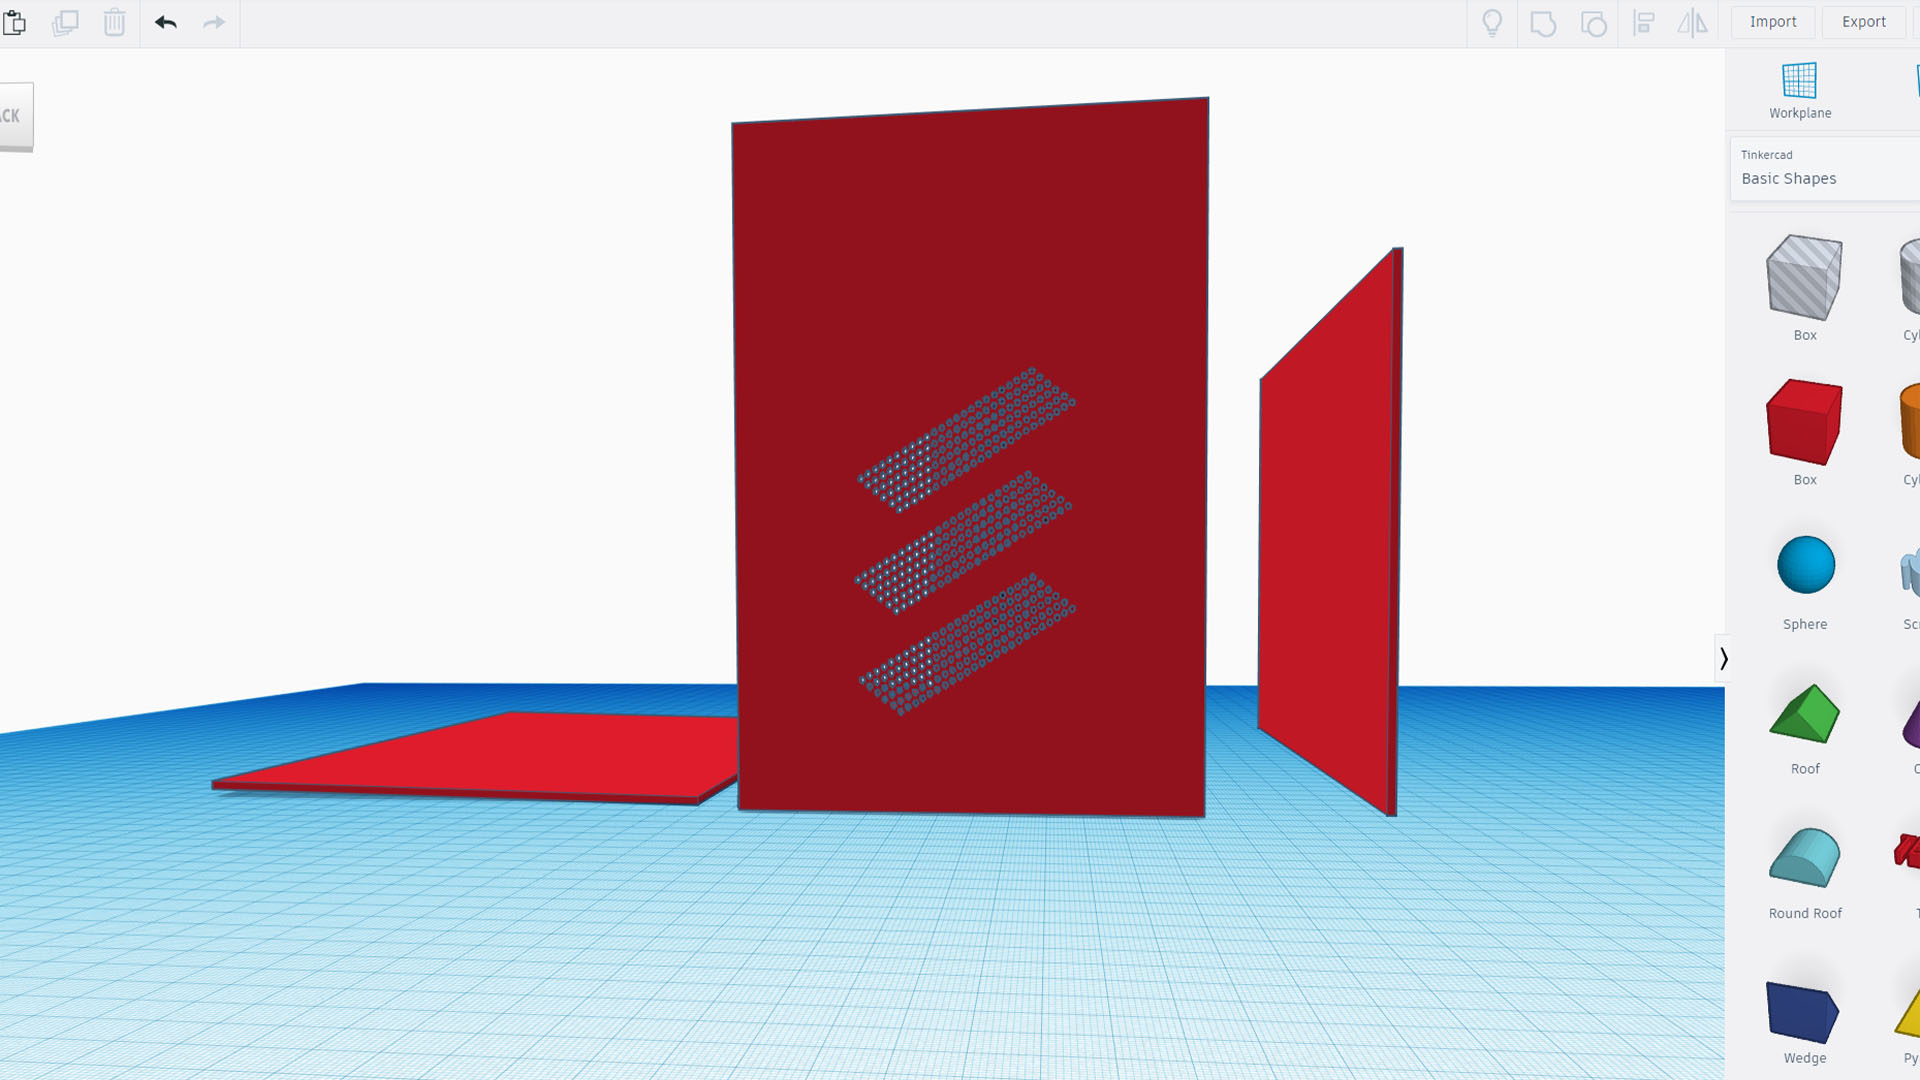
You may want to add ventilation, or a fan mount and grilles, to the front panel. Or, in a case such as ours, mount the PSU on it. If you want to avoid using screws here, you can consider making push-fit pins part of the printed front panel, with matching holes for them in the roof and base sections.
22. Create roof
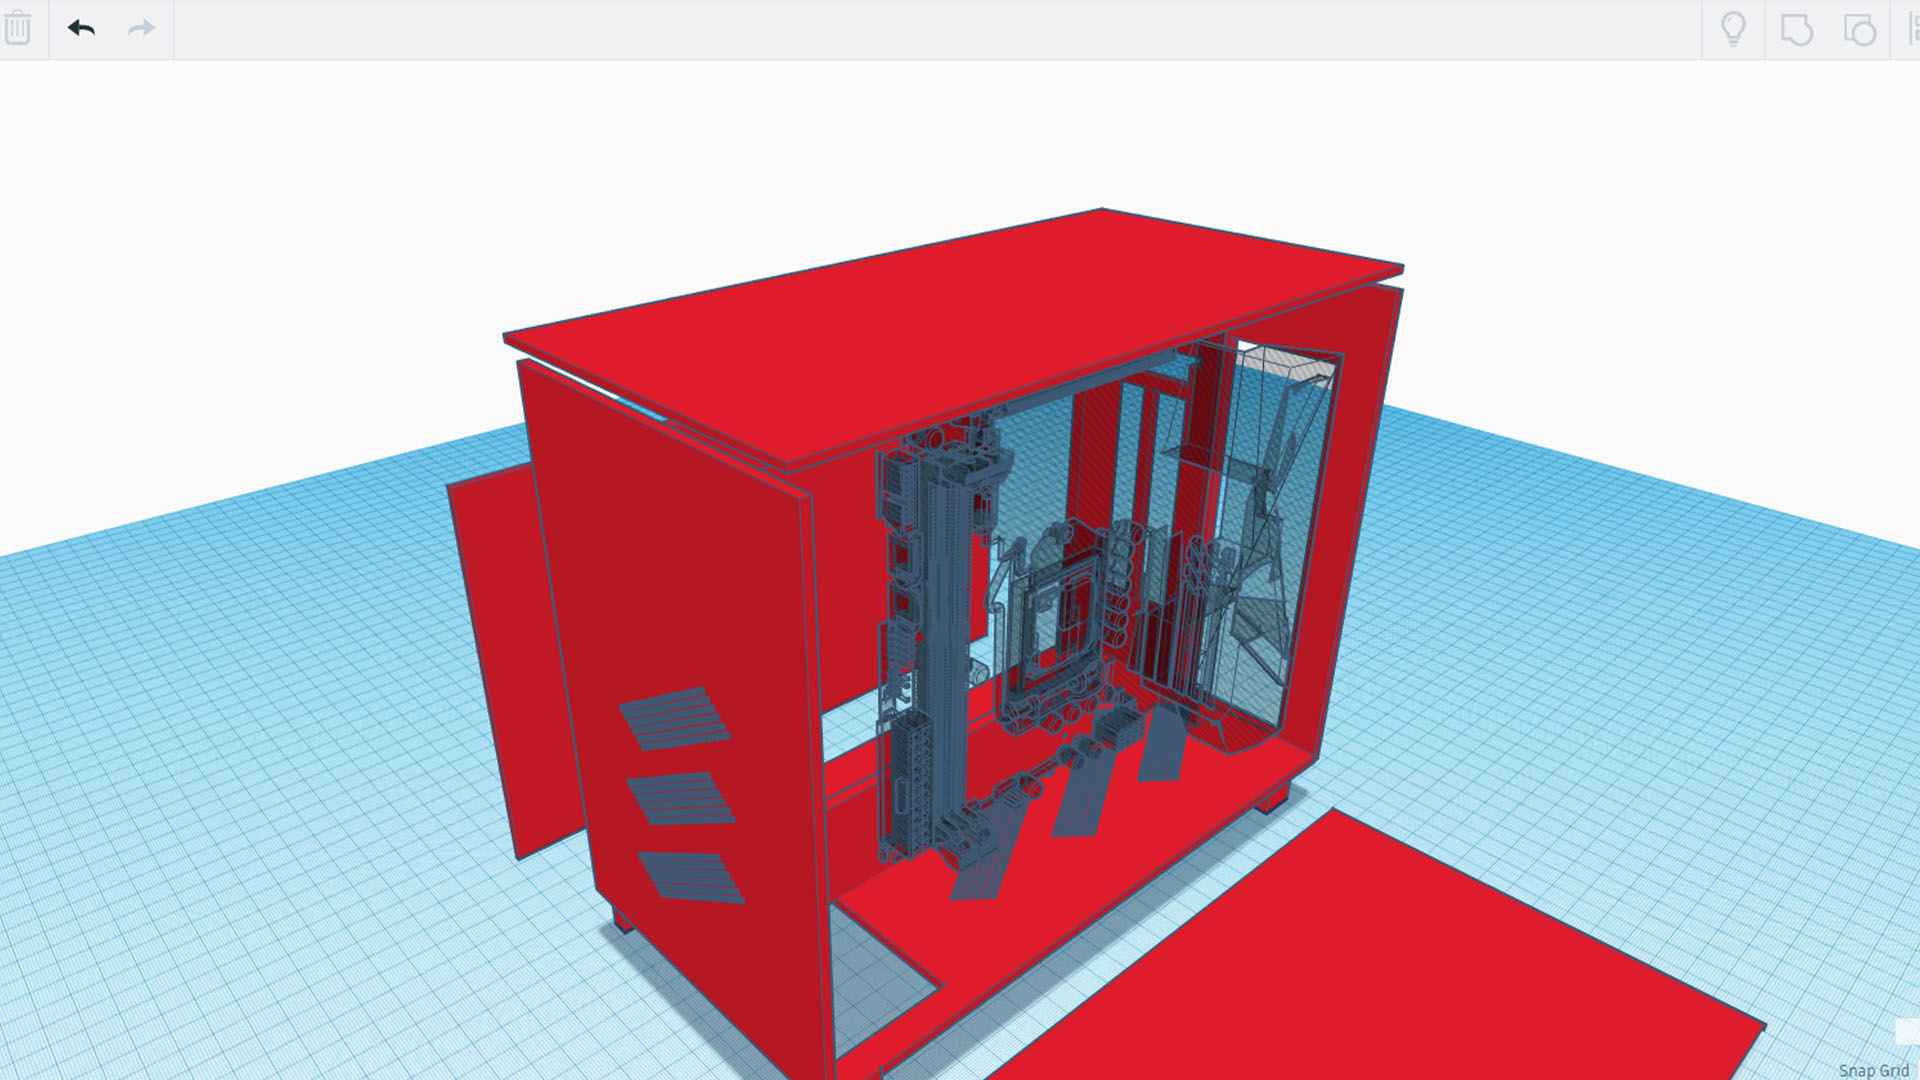
For the cleanest look possible, the roof section should sit between the rear and front panels, and this area is where you’ll want to place any fan mounts in a very small case. You could also consider a large opening for a window here, since our design will be using the side panels for ventilation.
23. Add ventilation holes
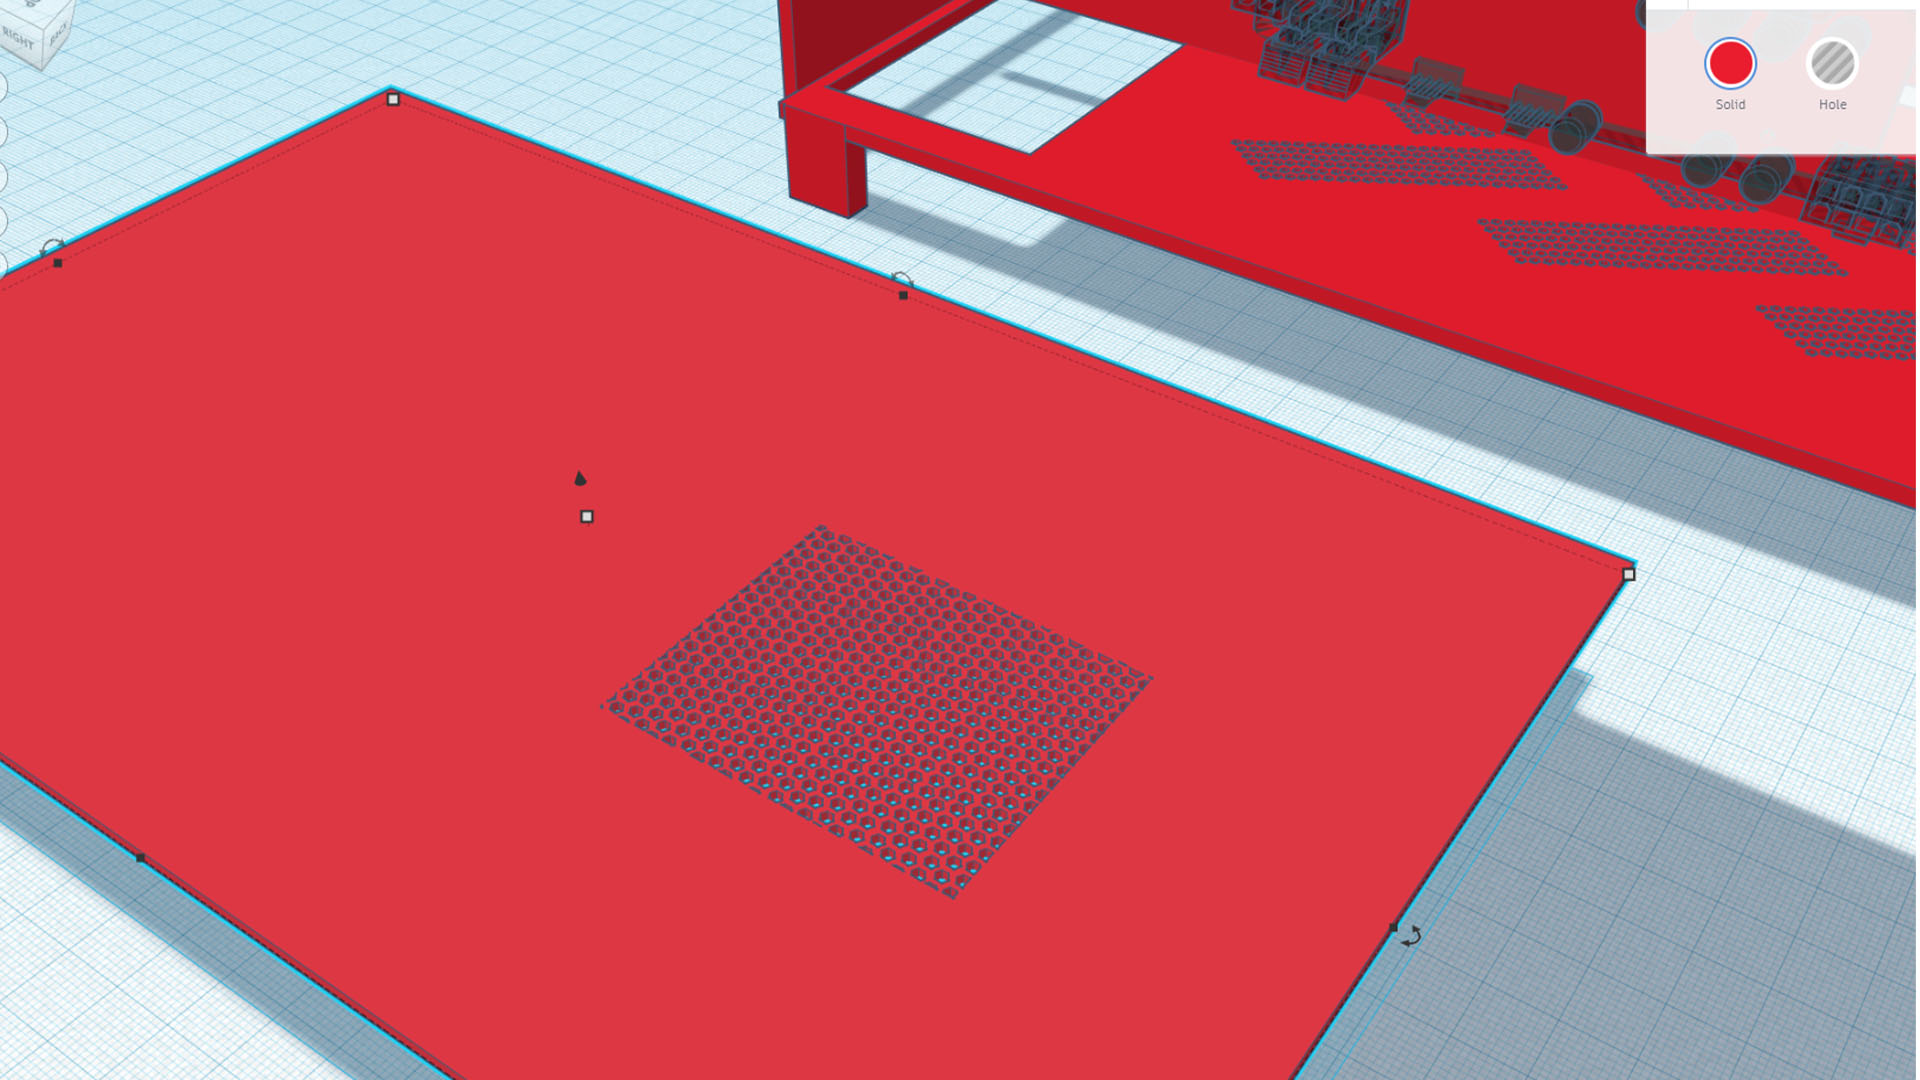
The most important addition to our design is ventilation – we’re adding side vents to allow the CPU cooler and GPU to breathe. These make a huge difference to cooling, so they’re essential in a small case unless you have several intake or exhaust fans.
24. Decide on power switch
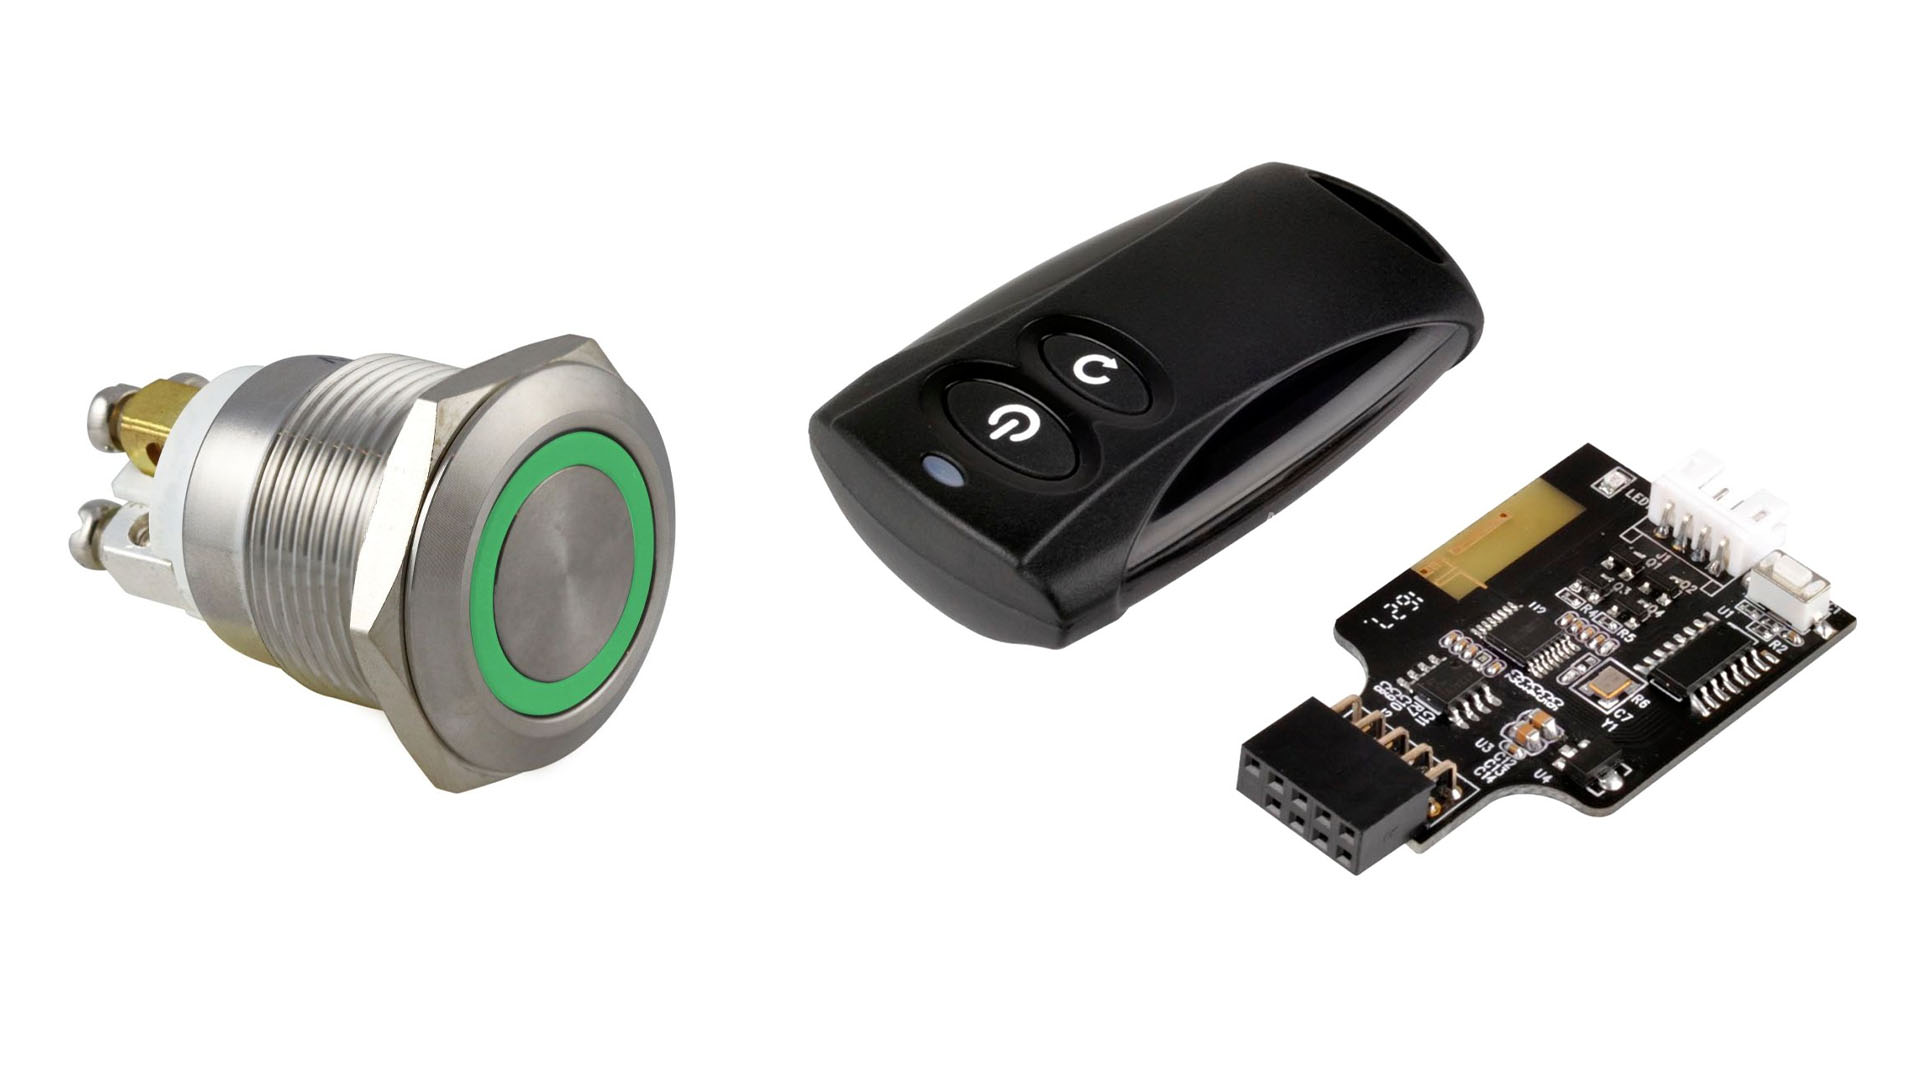
You’ll need a way to turn on your PC. You can consider using a momentary push button, which will require a specifically sized hole, as well as clearance behind it. However, you can also use an external or remote-controlled power switch to remove the need for a physical one.
25. Consider side window
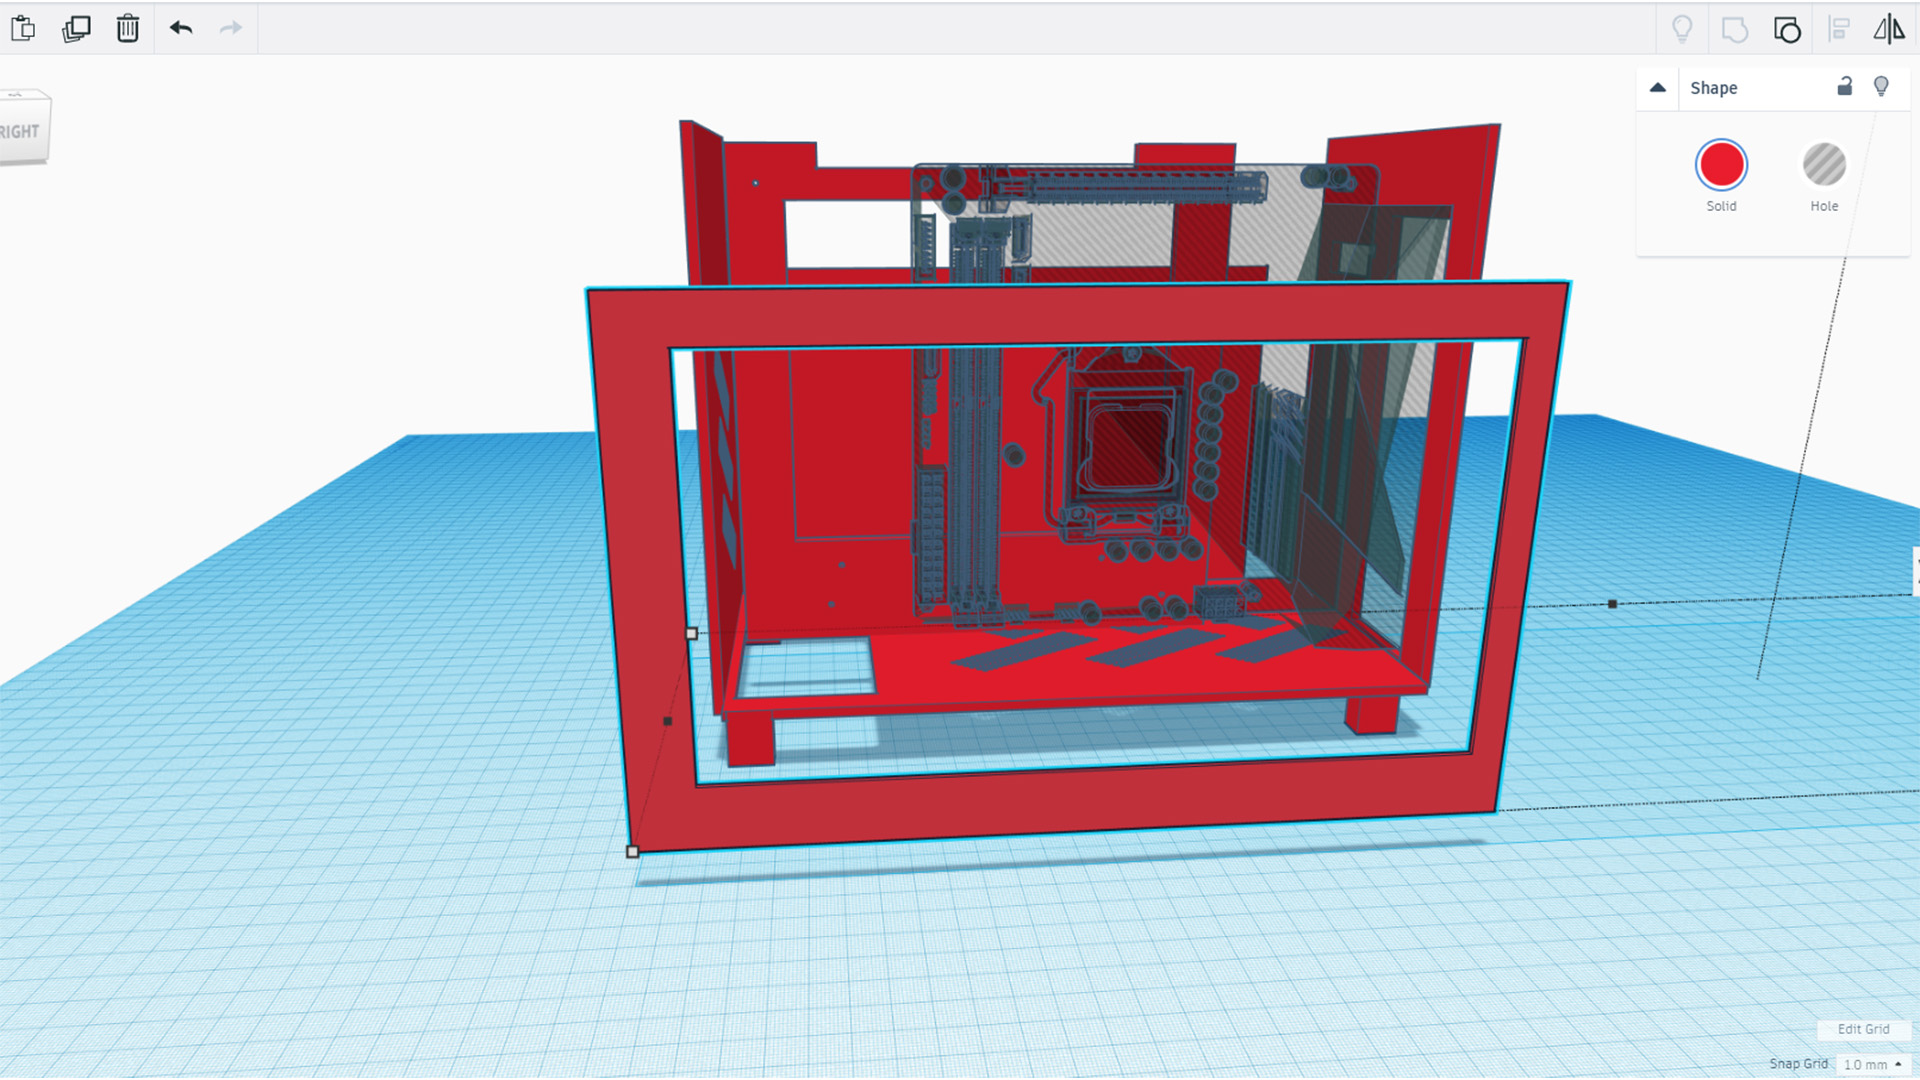
If you plan on using liquid cooling rather than air cooling for your CPU, you can consider creating a side panel window opening. You want the rim to be at least 1in wide in order to offer enough strength, and you can mount clear acrylic inside it using mounting tape.
26. Install construction cubes
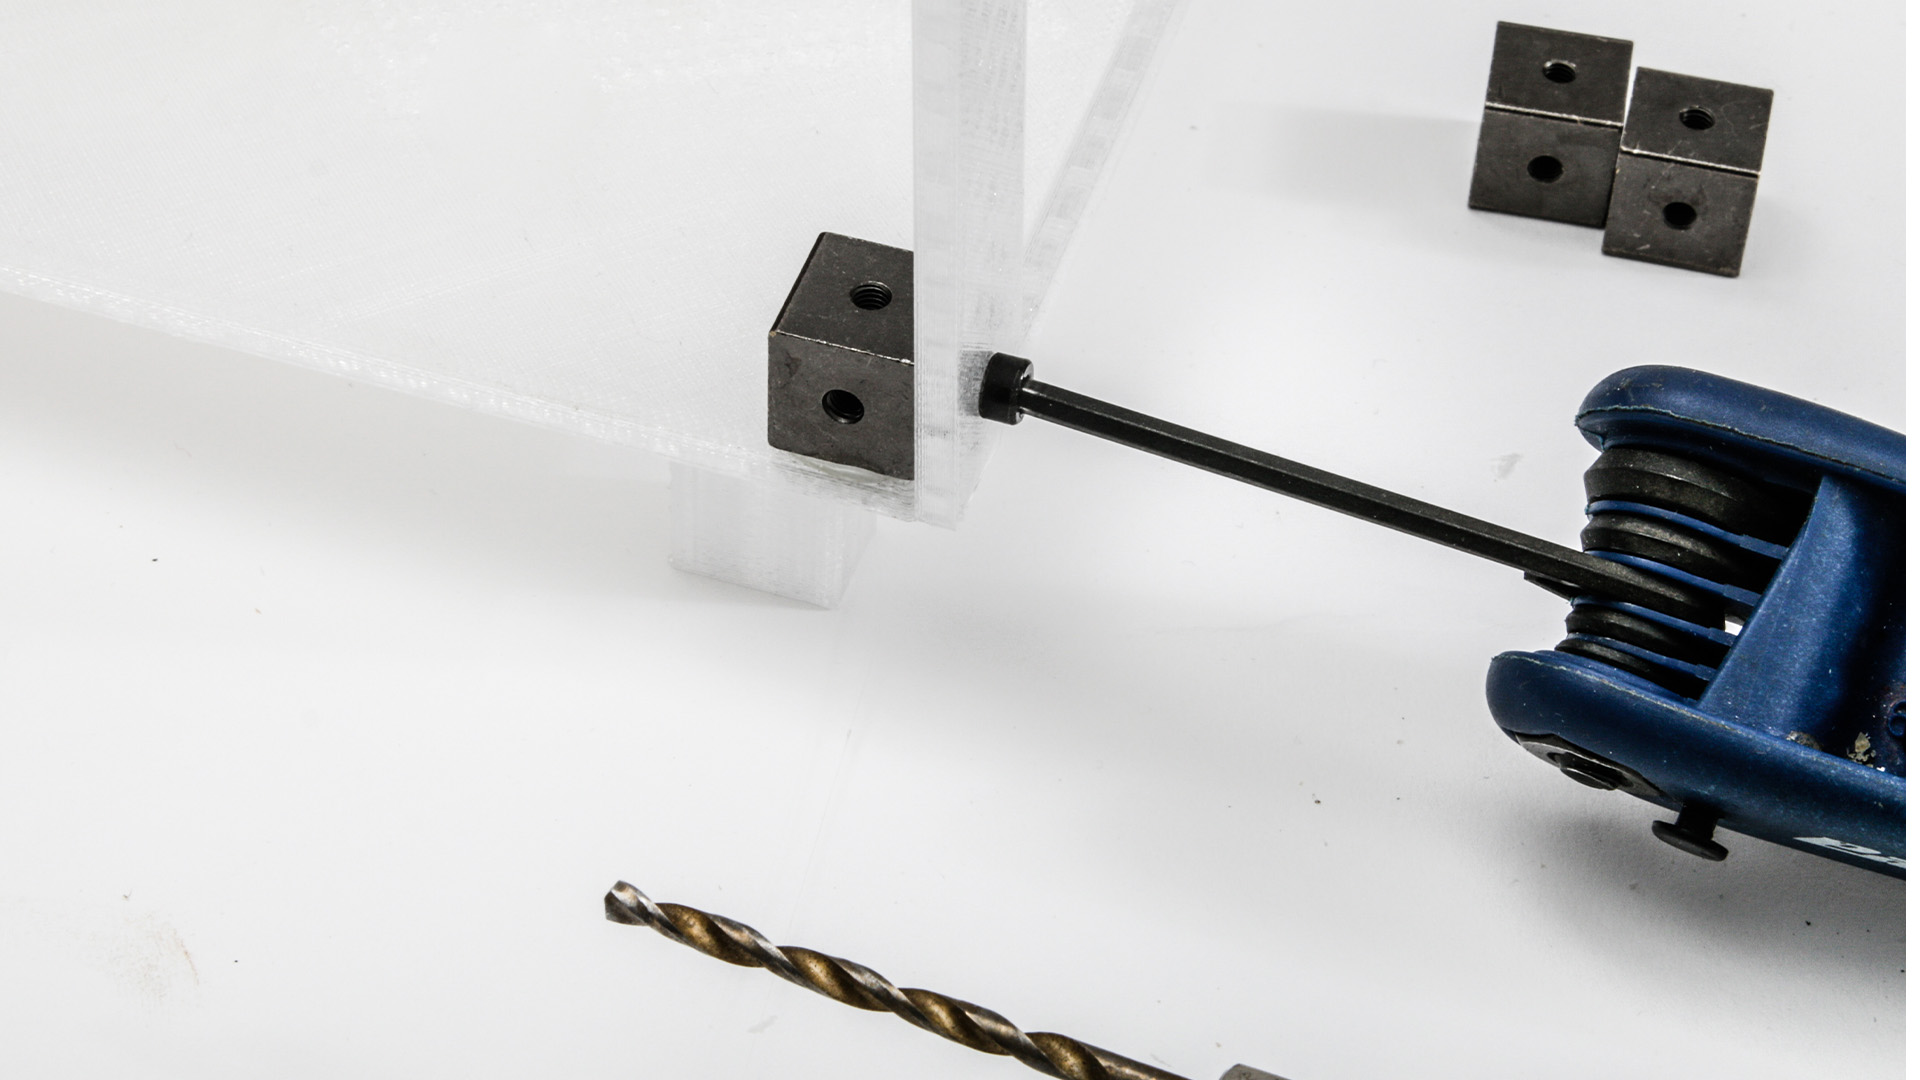
Print the motherboard tray and rear panel first, so you can continue working on them while the other parts print. You can install the construction cubes by drilling 3mm holes and securing them with long-thread 6-32 PC screws, taking care to align the motherboard with the rear I/O cutout.
27. Build the case
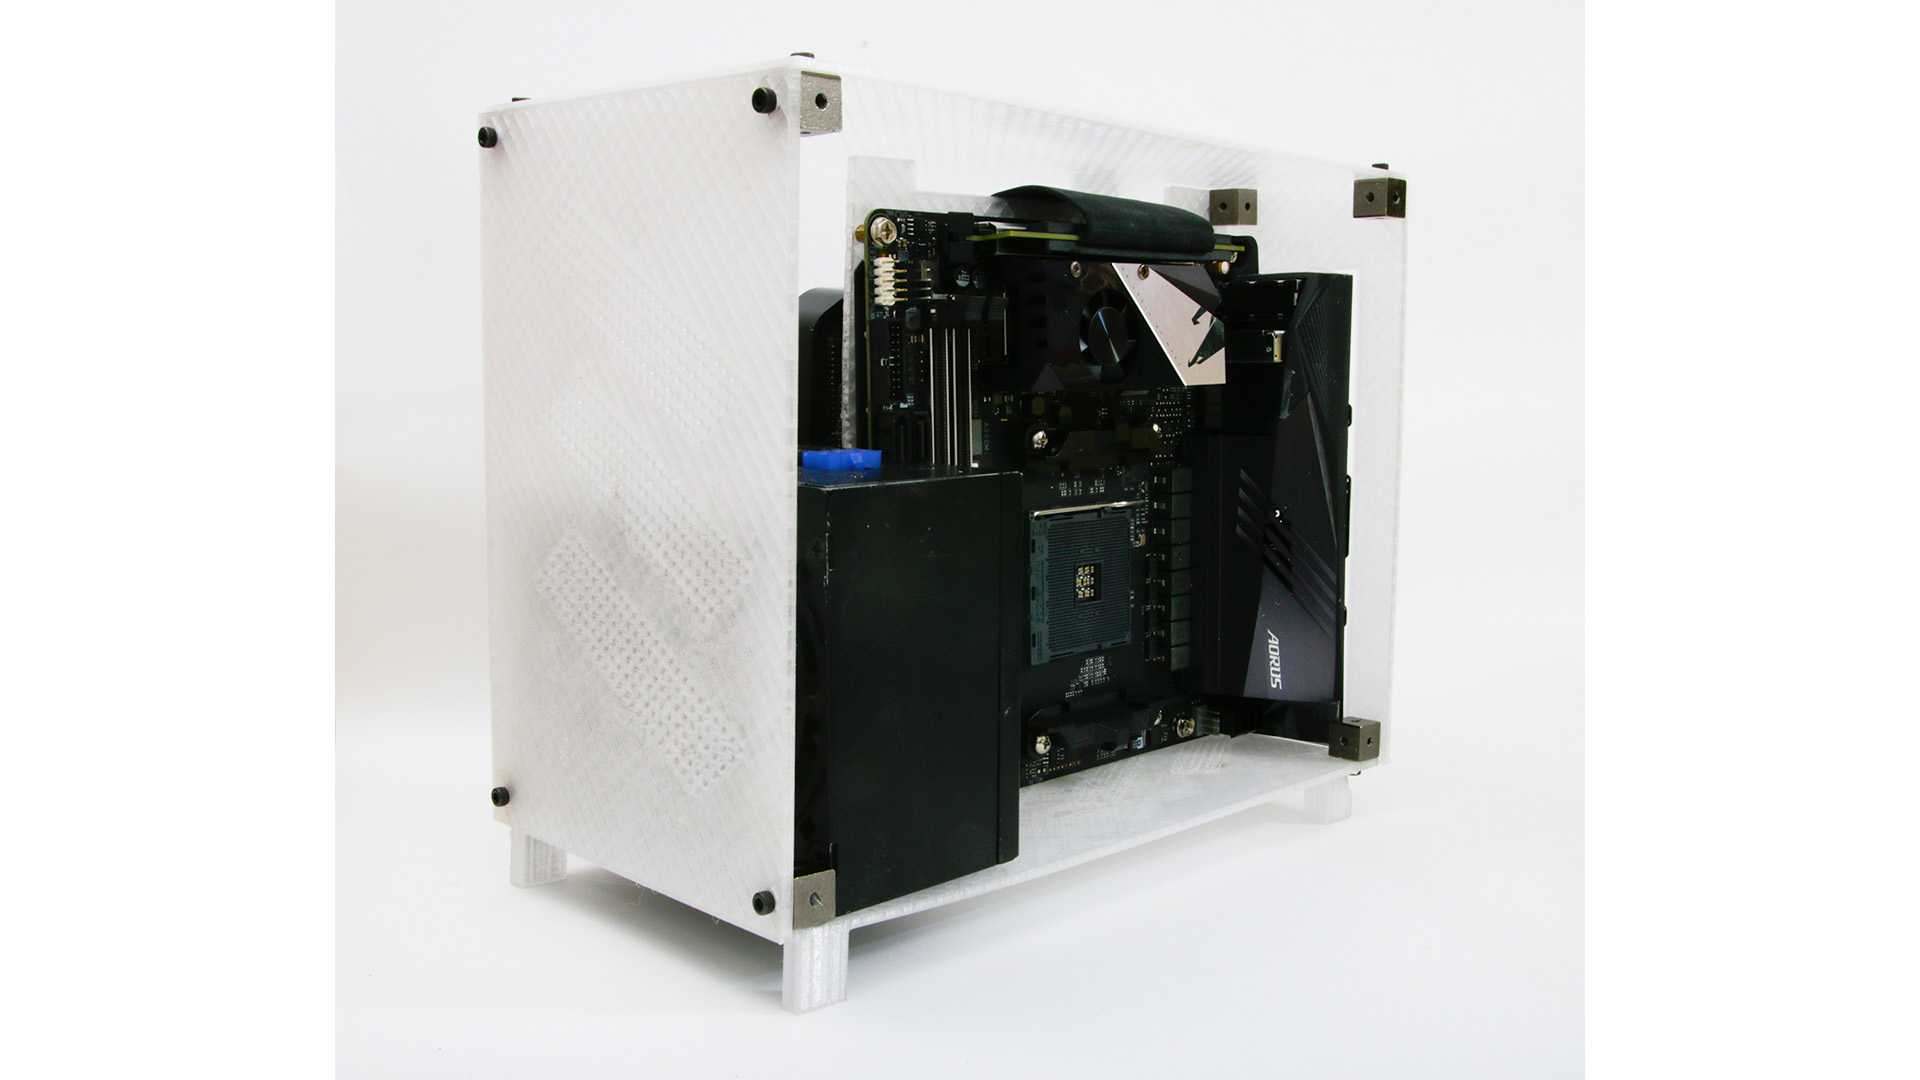
Install the rest of the case components, then install your hardware to make sure it all fits. You can consider sanding the 3D printed parts for a smoother finish, starting at 120-grit sandpaper, and working up to 1,000-grit, before using plastic primer and spray paint.
That’s it for our guide on how to 3D print your own case. It’s an involved process, but it means you’ll get the exact case design you want, as well as the satisfaction of knowing you’ve done it all yourself. For more 3D printing and PC case customization ideas, check out our guide on how to 3D print a reservoir mount, as well as our tutorial on how to vinyl wrap your PC case.
