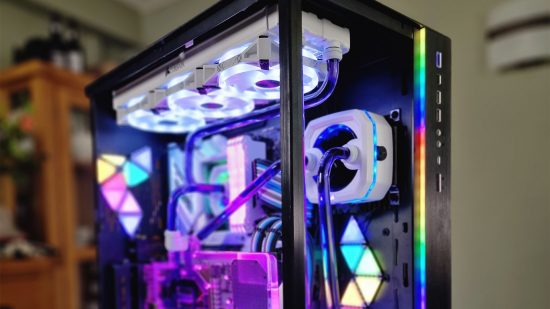
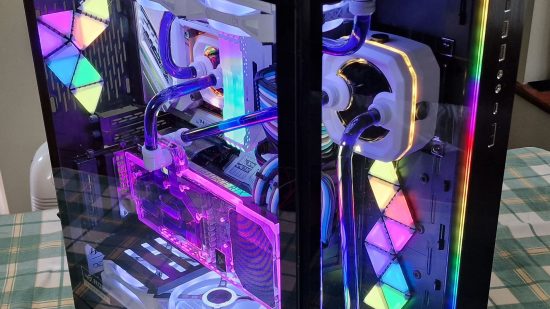
For his 50th birthday, Custom PC reader Steve Higgins decided to have his first stab at making a custom water-cooling loop in this colorful PC build, which is jam packed with RGB lighting. Using a Corsair hardline water-cooling kit, as well as the company’s LC100 light-up triangles, he made a really striking gaming PC, which he jokingly calls Operation Don’t Electrocute Yourself.
Custom PC has been celebrating the best PC builds since 2003, and our Facebook group has over 300,000 members. We’ve seen many custom gaming PCs, from mods based on existing case designs to scratch builds. Here we chat to Steve about how his RGB-loaded water-cooled PC was built.
Custom PC: What inspired you to build this PC?
Steve: I’ve been building PCs for 30 years for myself, family, friends and so on, but I’d never actually got around to building a custom loop. I’d looked at some of the creations featured in Custom PC and thought ‘I wish I could do that.’ I’d messed around with a series of AIO coolers in the preceding years, but with my 50th birthday approaching I decided I was going to take the plunge.
I’m self-employed and do a lot of my work via online conferencing – the aesthetics angle might be considered secondary to performance, but my PC is in the background when I’m conferencing. My previous builds have been a good talking point when speaking with potential customers, so I also wanted to up the ante a little.
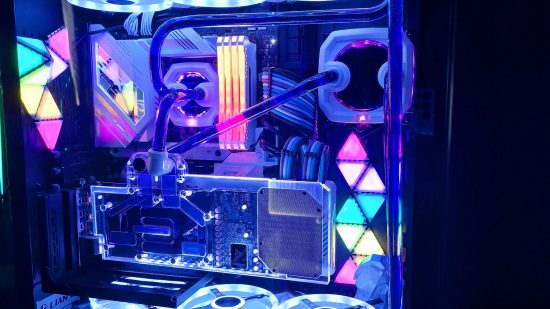
Custom PC: Why did you choose the Lian Li PC-O11D Asus ROG case?
Steve: I love the look of the O11D – it’s a nice roomy case for building, it shows off your components nicely and the second chamber for the PSU and drives makes tidying the cables a lot easier. When you’re dealing with a lot of RGB components, you really need extra room for the additional cabling and control hubs.
I had the regular-sized PC-O11 in white and silver previously, but I upgraded to a black PC-O11 XL just for a change. I found that I loved the look of white components against a black case, as the components seem to glow against the dark backdrop.
Custom PC: What are the light-up triangles?
Steve: They’re Corsair LC100 lighting panels. They’re magnetic, so it’s relatively easy to just put them where you want inside a typical PC chassis. The PC sits next to some Nanoleaf panels on my office wall, so there’s some attractive symmetry between them, although I haven’t synchronized them with each other yet. They’re controlled by iCUE, along with all of the other RGB elements, so synchronizing them is very simple.
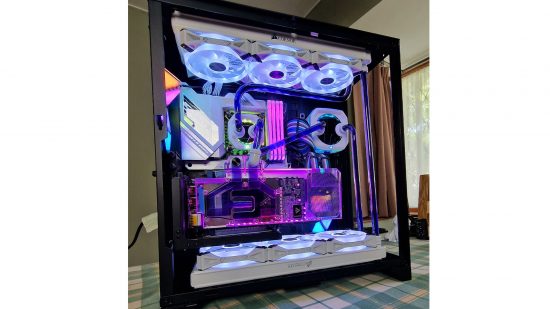
Custom PC: That’s a lot of lighting! Take us through all the parts that light up.
Steve: My theme was essentially ‘RGB all the things,’ which I know enrages some people (certainly my World of Warcraft guild mates!) but I love it. A guiding principle was that every light had to be controlled using a single piece of software. I’ve previously used a wide range of RGB lighting, but it can be very hit and miss when it comes to how well the different parts work with each other, and the software is often awful, particularly from motherboard manufacturers.
I wanted a wide range of RGB products that would play nicely together, and for it to be relatively straightforward to change the lighting quickly. Corsair’s iCUE is probably the best software I’ve used for this (though the bar is quite low!).
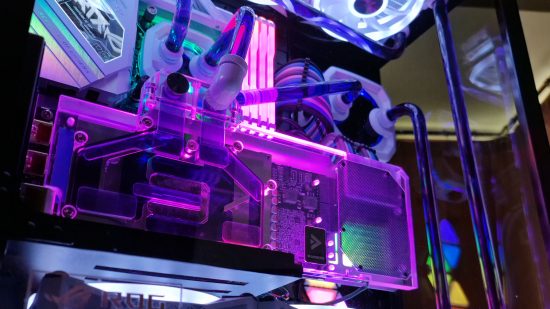
The case fans at the top and bottom of the case have the brightest RGB elements. They’re Corsair QL120 fans – they’re okay in terms of performance and they look great. The CPU block, pump/reservoir unit and the RAM are also Corsair and controlled through iCUE. The GPU block is made by Barrow and was a little difficult to find, as my card (a Gigabyte RTX 3080 Vision OC) uses non-standard power connectors, so many manufacturers didn’t release a block for it. It uses a 3-pin 5V connector for RGB duties, but I use an adaptor to plug it into a Corsair Hub and control it through iCUE.
The Asus motherboard has an RGB panel over the IO shield, but thankfully it plays well with iCUE without requiring any additional cables or adapters. When I’m video conferencing for work (with the PC in the background), I tend to keep the larger RGB elements, such as the fans and the lighting panels, white and leave the RAM, waterblocks and pump/reservoir to slowly cycle through colors. If I put it in full rainbow-unicorn mode it continually messes with the white balance on my camera!
Custom PC: That’s a really tidy build. How did you plan the tubing and cable routing?
Steve: I’d put together most of the hardware about three months ago using an AIO cooler, so I’d had time to get all the cables tidied away to a reasonable degree in the second chamber of the case.
I usually stick fan hubs, RGB hubs and so on to the back side of the motherboard tray and roof of the second chamber, to avoid cables piling up at the bottom of the case, and then route cabling up to them, making heavy use of cable ties to spread out surplus cabling. It’s amazing how quickly a rat’s nest forms in your case if you don’t keep on top of it. It helps that the second chamber of the case isn’t visible – it’s possible to get the interior looking in a ‘good enough’ state without having to be obsessive about it.
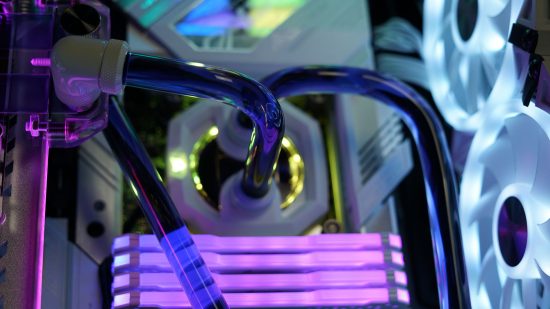
For the water-cooling loop, I spent some time placing the water-cooling components in various positions within the case to see what would give me the simplest tubing runs while still looking balanced – I didn’t want to cram all the gear into one corner of the case in order to keep tubing lengths shorter, and then have big empty spaces around the rest of the case.
I learned that understanding which ports are inlets and outlets on the waterblocks and pump/reservoir unit is paramount here – I almost got it wrong with the GPU block thanks to a dodgy translation in the instructions.
Custom PC: What tubing did you use, and how did you cut and bend it to shape?
Steve: The Corsair Hydro X iCUE XH303i kit I bought was supplied with 14/10in PETG hardline tubing. I did use the little hacksaw that came with the kit, but soon binned it in favor of a Dremel, which was much faster and gave me a cleaner, more accurate cut. A cheap hot air gun did the business with bending the tubes, along with a silicon insert to keep the shape of the tubing as it was bent. I did have a bending tool available to create specific angles but ended up not using it.
Custom PC: Take us through the water-cooling loop?
Steve: I’ve always been put off custom loops because of my lack of understanding of (and fear of mismatching) fittings and tubing. I went with a Corsair complete kit, because it meant those decisions were already made for me, and I could be sure all the kit would match properly (plus I was already using iCUE).
Now that I’ve had a bit of experience, though, I’m a lot more comfortable buying other manufacturers’ kit. Within a couple of days of setting up the CPU loop, I decided to add my graphics card to the loop, sourced a waterblock for it and merrily dismantled my card. Several days after that I added a second radiator. I was well and truly bitten by the water-cooling bug – I’m already planning what parts I’m going to use for my wife and son’s PCs.
Custom PC: How did you find working with hard tubing?
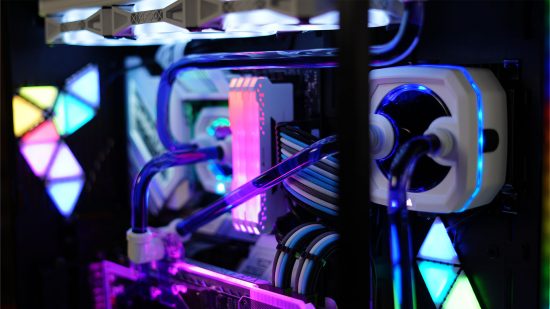
Steve: This is the part that made me most nervous – I’d initially planned to use soft tubing due to the relative ease of cutting and manipulating it into place, but after looking at other people’s systems I decided that hardline tubing looked better, plus if other people can do it, so can I!
I watched hours of video, asked for advice on online forums, bought all the tools and so on. My wife actually did the first couple of tubes because she’s far better at that sort of thing than me, before I gave it a whirl. It wasn’t nearly as hard as I’d feared it might be, though. Patience is the key – let it heat up slowly and evenly and you can manipulate it quite easily.
Custom PC: What spec did you choose and why?
Steve: It’s a Core i9-12900K with 32GB of RAM and an Nvidia GeForce RTX 3080 graphics card. I’ve been a PC gamer since I built my first PC in 1992, but I also use my PC for a wide range of activities, such as making videos, editing photos, conferencing and so on, so a good, versatile spec is important to me – over the years though I’ve always gone for the best price / performance CPU but with my 50th approaching I felt like splurging a little. That said, I didn’t want to pay outrageous prices for DDR5 RAM, so I went with a DDR4 motherboard and reused the RAM from my previous system.
Custom PC: What PSU cables are those?
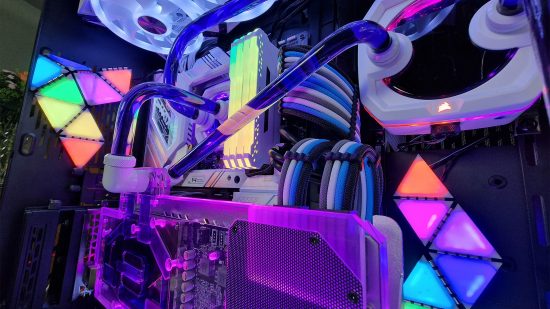
Steve: They’re Antec sleeved cable extensions. I’m using a white Cooler Master 850W PSU, and I find the sleeved cables look a little more respectable than the stock cables. I did previously use Lian Li Strimer RGB cables, which looked great but just wouldn’t fit around the water-cooling tubing.
Custom PC: What temperatures do you get with those six fans and the custom loop?
Steve: I’ve been really impressed with both the temperature drops and the quietness of the system. The Core i9-12900K is a hot boy, and I hadn’t expected much of an improvement from the AIO cooler I’d been using, but my system went from most cores idling in the mid-30°Cs to the mid-to-high-20°Cs, with significantly less noise from the fans.
Once I’d added the GPU to the loop, the CPU temperatures increased a little but the GPU temperature dropped by about 15°C. Now the fans often drop to zero rpm and the PC is almost silent, which is a pleasant change from what I’m used to.
Custom PC: Did you come across any difficulties?
Steve: Getting the air out of the loop. I now have arms like Popeye after rotating the case to move the air bubbles.
Custom PC: Do you have any tips for readers thinking about creating their first custom water-cooling loop?
Steve: Don’t leave it as long as me to give it a try. There’s a lot of information available online, and plenty of knowledgeable and helpful people to support you, plus the end result is incredibly satisfying.
Also, on a more practical note, I’d advise anyone building a custom loop to include a means of draining the system – I didn’t and ended up getting a mouthful of coolant after trying to siphon it out when I added the GPU block. To be fair, it tastes better than you’d think, but it probably isn’t good for you!
Custom PC: Are you completely happy with the end result?
Steve: I set out to familiarise myself with the process and the parts, so from that perspective I’m happy with the end result. If I knew two weeks ago what I know now, I’d have included the GPU block and second radiator from the start, but I didn’t think I’d find the whole experience so enjoyable. Now I’ve done it once, though, I’m keen to try out other components, other types of coolant and to see how creative I can get with the tubing. I suspect this build will never truly be finished!
Specs
- CPU: Intel Core i9-12900K
- GPU: Gigabyte Nvidia GeForce RTX 3080 Vision OC
- Storage: 4 x 2TB NVMe SSDs
- Memory: 32GB Corsair 3200MHz DDR4
- Motherboard: Asus ROG Strix Z690-A
- PSU: Cooler Master V850 v2 Gold 850W
- Cooling: Corsair Hydro X iCUE XH303i
The PC builder

- Name: Steve Higgins
- Age: 50
- Occupation: Self-employed community development specialist
- Location: Flixton, Manchester
- Main uses for PC: Gaming, video production, photo editing, office work and web development
- Likes: Horror movies, cycling, playing the ukulele (badly), the occasional glass of port
- Dislikes: Getting a mouthful of purple coolant
Steve clearly can’t get enough RGB lighting, and this colorful PC build shows just how much you can do with what are now off-the-shelf components. The lighting panels and most of the water-cooling gear are all available in Corsair kits (though you still have to put in the work!) That’s a top build Steve, we love it.
Check out our best gaming setups guide if you want to see more outstanding custom PCs, and if you’ve built an extraordinary PC of any description yourself, then we’d love to see it! Join our Facebook group if you’d like to submit your own work for consideration.
