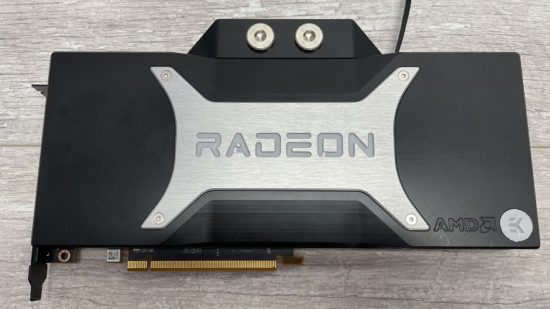
Graphics cards have often been attractive targets for water-cooling systems, as their coolers can be noisy when gaming, and modern boosting algorithms actively take temperature into consideration too, meaning you can boost performance. Tie your graphics card to a water-cooling loop with a decent cooling capacity, and you can cut noise and temperatures by huge margins, allowing you to game in peace and quiet, while also having an awesome-looking PC.
We’re happy to have one of EKWB’s first samples of its Radeon RX 6800 XT full-cover waterblock, so we can see if replacing the card’s triple-fan cooler is worth it in terms of boosting cooling and cutting noise. We’ll also show you how to install a waterblock on the RX 6800 XT in the process.
Installing GPU waterblocks can be tricky due to the number of screws and cables used on modern graphics cards, but we’re pleased to report that the RX 6800 XT is a relatively easy card to dismantle and water-cool. In this guide we’ll show you how to do it step-by-step, and the only the only extra gear you’ll need is a micro screwdriver, some thermal paste cleaner and a lint-free cloth.
1. Remove backplate
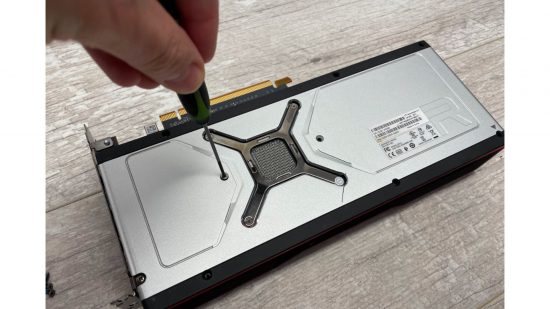
The Radeon RX 6800 XT has a large backplate on the top side of the PCB, which you’ll need to remove in order to access the heatsink-securing screws underneath it. Lay the card fan-down on a flat, sturdy surface and locate the backplate’s mounting screws, removing all of them.
2. Remove screws
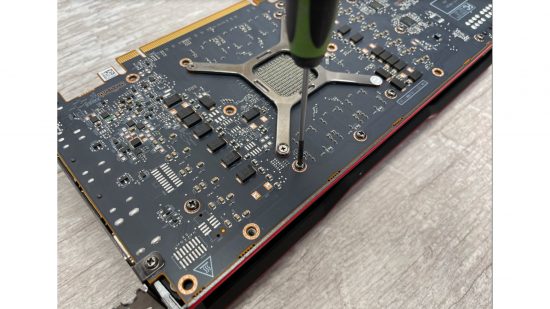
There are four screws in a cross-shape bracket, which secure the cooler to the core of the GPU, and these screws need to be left until last to prevent the heatsink from falling away at one end. Remove all the other screws around the PCB, and use a container to store them so none of them rolls away.
3. Remove bracket screws
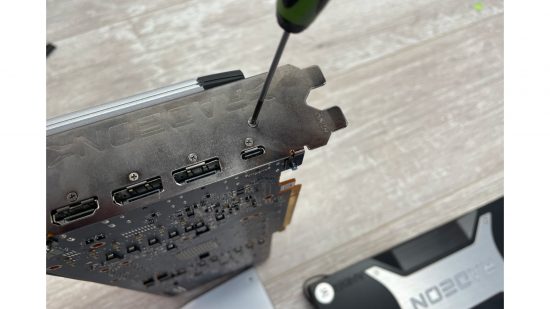
The waterblock comes with a single-slot bracket that can replace the card’s two-slot bracket. This might be useful if you have a vertical graphics card mount, as you can then place the card close to your side panel. There are several screws at the end of the bracket, which need to be removed in order to dislodge the stock bracket.
4. Remove extra PCB screws
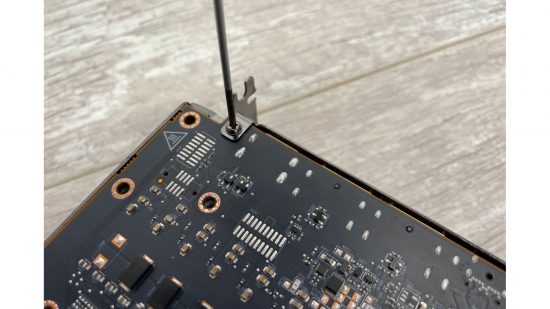
There are some other screws around the bracket, which attach to the PCB, securing both the cooler and the bracket. You’ll need to remove these screws next.
5. Remove core screws
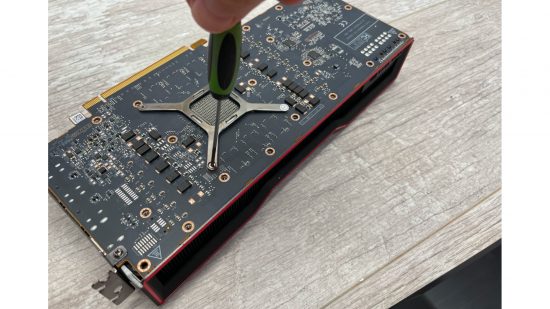
Making sure the card is placed on a flat surface, remove the four screws and bracket surrounding the GPU core. When lifting the card, the cooler will now be loose, so take care to support the cooler from underneath. Not doing so could see it fall off the card, potentially damaging the cables still attached to it.
6. Detach cables
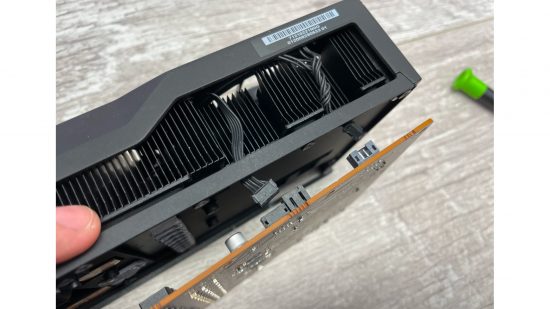
Gently lift the cooler from the bracket end, to reveal where the cables attach to the PCB. Use a plastic pick or thin-nose pliers to gently dislodge the cables. Apply any force to the connector, not the cables, or you risk damaging them.
7. Lift off the cooler
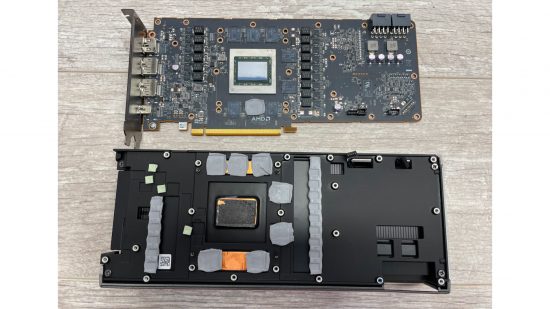
The cooler should come away easily. If not, check for screws you may have missed. The thermal paste on the core can also set and make it tricky to dislodge. A hairdryer can warm the paste, making removing the cooler easier – use a high heat setting for 20 seconds, blowing 6in away from the rear of the card, aiming at the core area.
8. Replace thermal pads
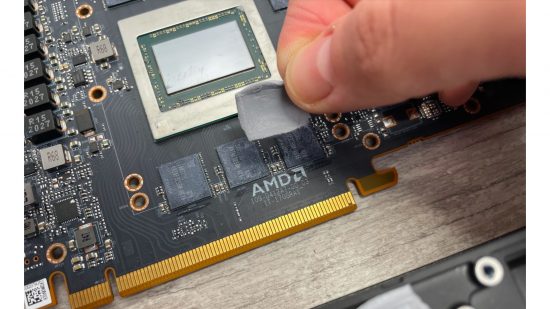
You’ll want to keep any thermal pads that are dislodged on the cooler, so you can replace it if you decide to sell your card in the future, or if you otherwise need to replace the cooler. Use a flat plastic tool, such as a credit card, to lift them off the PCB in one piece, and then place them back onto the cooler.
9. Clean the GPU
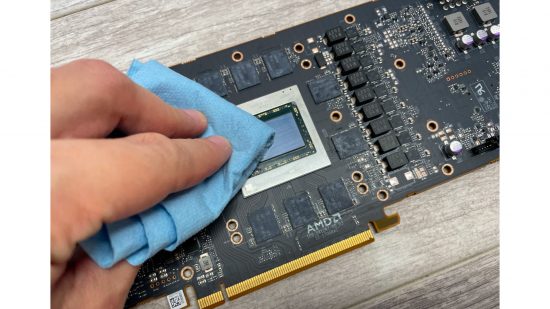
The stock thermal paste needs to be removed before you apply fresh paste, which is included with the waterblock. Use thermal paste cleaner and a lint-free cloth or high-density workshop towel to remove the bulk of the paste first, then use the cleaner to deal with any residue.
10. Remove stock bracket
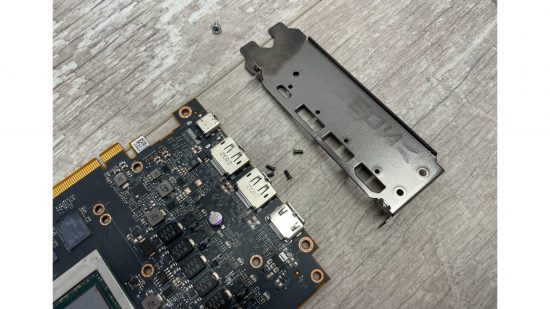
If you plan on using the included single-slot bracket for the card, go ahead and remove any remaining screws needed to detach the stock dual-slot bracket. Keep the screws and bracket safe in the graphics card’s original box.
11. Attach the bracket
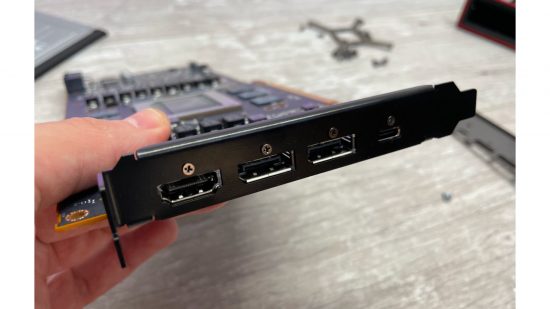
With your card clean and ready for its new components, attach the new single-slot bracket if you want to use it. This is secured using the screws at the end of the card. Be sure to align the ports first, then use a micro screwdriver to secure the screws.
12. Cut thermal pads
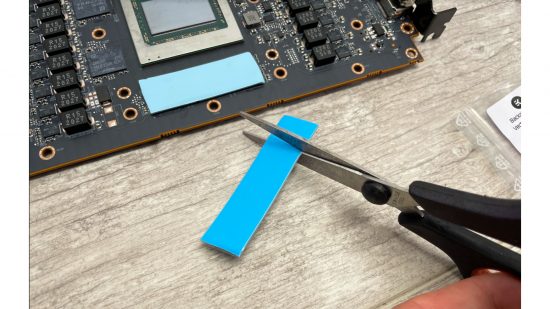
Two sizes of thermal pads are included with the waterblock, and the thinner pads are to be used on the main PCB. Cut the pads into strips according to the instructions, remove both sides of protective film and then place the pads on the memory and power circuitry.
13. Apply thermal paste
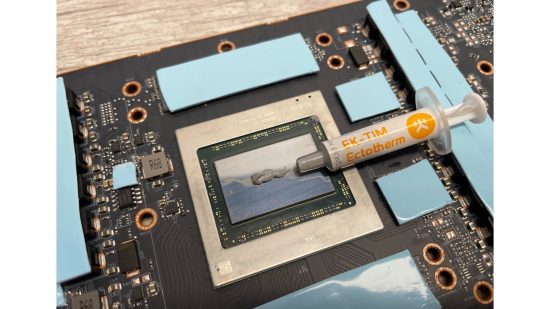
The waterblock includes thermal paste, but you can, of course, use your own. Apply a strip of paste the size of a grain of rice in the middle of the GPU core. The pressure from the block should spread out the paste on its own, which we’ll double-check in the next step.
14. Test-fit the waterblock
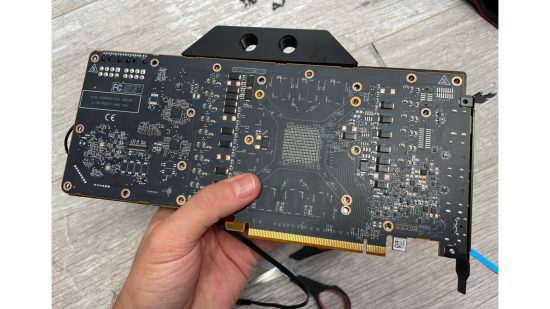
Place the waterblock onto the PCB and press them together. It should fit snugly, with the block making contact with the memory if you look at it from the side. Now remove the waterblock gently and check the paste on the core has spread evenly. This will ensure that adequate pressure has been applied and the block is seating properly.
15. Apply backplate pads
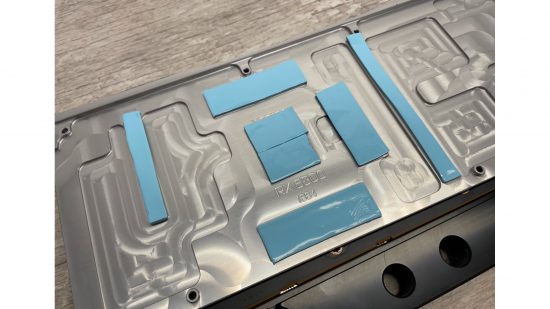
The thicker pads are used on the backplate to cool the rear of the card, behind various hot spots on the PCB such as the GPU core. Apply these pads according to the instructions, making sure to remove the protective film from both sides before doing so.
16. Install new screws
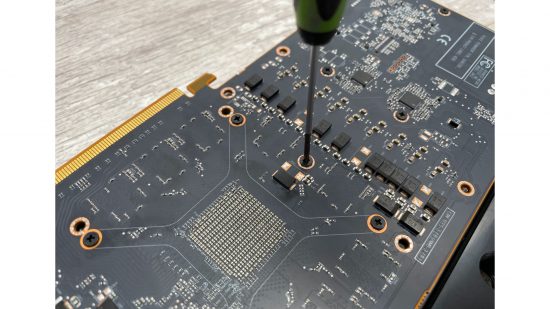
The waterblock uses its own screws to secure to the PCB, so follow the instructions on how and where to use these screws. The backplate will use some of the visible mounting holes, so be sure to avoid these holes when you’re installing the first set of screws.
17. Fit backplate and port bungs
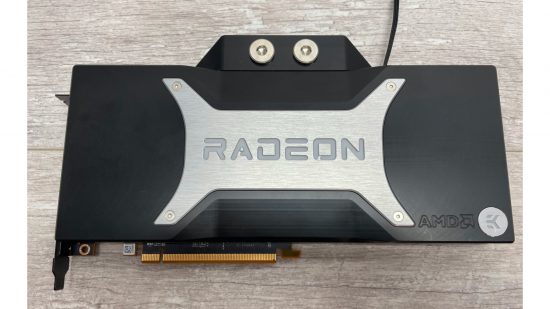
Lay the backplate onto the rear of the card, then insert the screws into its mounting holes. Secure it from the centre screws first, and work your way outwards, tightening each screw firmly. Finally, install the port bungs in any unused ports. You’re now free to install your fittings and connect your water-cooled graphics card to your PC.
18. Reinstall original screws
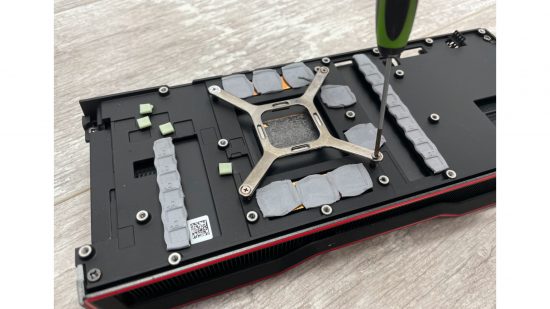
Just misplacing one or two of the small screws used to mount the stock cooler can prevent you from refitting it in future. Keep them in a bag until your water-cooled graphics card is ready to use, then reattach them to the cooler where possible and place it in the box. This way you’ll know where each screw goes and keep them all safe.
Cooling performance
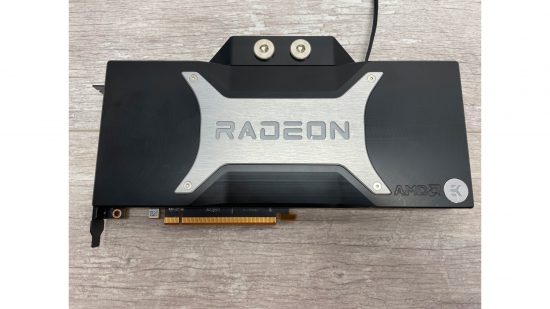
You’d expect to see a drop in temperatures when moving from air to water cooling and we weren’t disappointed. We first ran a looped stress test using Metro Exodus’ built-in benchmark at 2,560 x 1,440 with Ultra settings. This was with the card at stock speed, and we recorded the GPU boost and memory frequencies, as well as the GPU core and hot-spot temperatures recorded in GPU-Z. This way, we could gauge the impact of both overclocking and water-cooling the card.
There are several ways to overclock the RX 6800 series, from simply increasing the power limit to using the Rage Mode setting that lifts power and thermal limits to boost frequencies. You can also use a full manual overclock. We opted for the latter to be able to turn as many dials up as possible.
Our overclock entailed raising the power limit in Radeon Settings to 115 per cent, the peak boost frequency up to 110 per cent (due to the maximum setting of 115 per cent crashing our stress test), and the memory overclock up to 107 per cent. This saw the peak boost frequency rise from 2383MHz to 2577MHz, and the memory frequency from 1992MHz to 2140MHz.
At stock speed, the peak GPU temperature hit 77°C and the hot-spot temperature reported in GPU-Z hit a toasty 93°C with the stock air cooler installed. The overclock resulted in the core temperature rising just one degree, but the hot-spot temperature hitting 98°C. In our Metro Exodus benchmark at 2,560 x 1,440 with Ultra settings, the overclock saw the minimum 99th percentile rise from 63fps to 70fps, which is a healthy gain of 11 per cent, and the average going from 107fps to 112fps. Even with the stock cooler, overclocking is definitely worthwhile.
Once we’d fitted the waterblock, we started by looking at the temperatures. The peak temperature with the card at stock speed fell from 77°C to 56°C, while the hot-spot temperature fell from 93°C to just 72°C. Our air-cooled boost frequency peaked at 2383MHz, but water-cooling the card added nearly 100MHz of boost headroom, rising to 2470MHz. However, it did nothing for the memory, which sat at 1990MHz.
Compared with the stock speed performance in Metro Exodus, the minimum frame rate rose 2fps from 63fps to 65fps, with 2fps being added to the average frame rate too.
We applied the same overclock settings as we did to the air-cooled card and managed to bump up the average frame rate to 116fps from an air-cooled overclocked result of 112fps.
However, it was the temperatures that were really interesting here. They fell from 78°C for the core to 63°C, and the hot-spot temperature fell from a massive 98°C to just 84°C, although the latter measurement did increase significantly from the 72°C result at stock speed.
Overall, then, you’ll see gains in performance and noise reduction at both stock speed and when overclocked with the RX 6800 XT. Temperatures fell by up to 22°C and boosting increased by nearly 100MHz just by dropping the temperatures. A combination of overclocking and water cooling resulted in the minimum and average frame rates rising from 63fps and 107fps to 70fps and 116fps.
The higher temperature headroom clearly allowed for higher boosting at stock speed, resulting in performance gains without touching any overclocking controls. However, it’s the temperature reductions that are the biggest hits, with massive falls in the core and hot-spot temperatures, both when overclocked and at stock speed. Thankfully, the RX 6800 XT is also quite easy to water-cool compared with many RTX-series cards, and there are waterblocks available at launch too.
With your new waterblock installed, all that’s left now is for you to enjoy your graphics card’s quieter running and lower temperatures. If you’re planning a new build, then you’ll also want to read our full guide on how to build a gaming PC, which covers every step of the process. If you’re new to the world of water-cooling, then make sure you also read our full guide on how to water-cool your PC.
