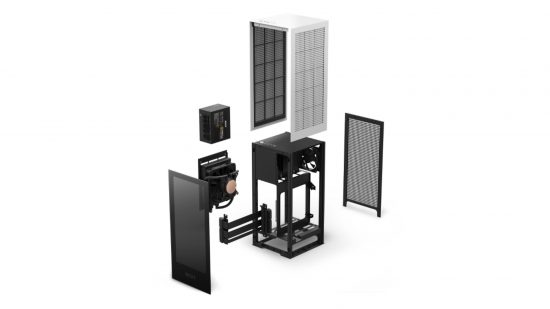
Last month I tested NZXT’s fabulous new H1 V2 mini-ITX case and I loved the original case, in spite of its PCI-E riser cable problem and issues cooling some graphics cards, especially Nvidia’s RTX 3000-series Founders Edition cards, as its tiny footprint and easy build process made it very appealing. It was also easy to spray-paint, and there are lots of custom parts available for it too. However, the comparison between the old and new version of the case hit a bit of a hitch when I tested it last month.
Rather than using our usual mini-ITX test gear, I thought it more important to compare the original case with the new one to see if NZXT’s claims were true about improved cooling.
In fact, it would be impossible to get a CPU temperature from this case that’s comparable with other cases anyway, since H1 has its own AIO liquid cooler, rather than the cooler we use to test other mini-ITX cases.
I planned to drop an LGA1200 motherboard and a Core i9-11900K CPU into the H1 V2, and the new case coped very well with this CPU, despite it being a very toasty customer. In fact, I’d say even a Core i9-12900K should be fine in the H1 V2. The fact that the pump is set to full speed all the time was a slight concern, but thankfully it didn’t prove to be an issue in terms of noise.
I’ve had a machine running in the original H1 for a few months now for various reasons, but it’s not been under any heavy loads that would stress the cooling. However, I had seen the PC switch off a few times, which I suspected was down to Windows 11 gremlins. I stripped down that PC, made sure the case was clean for testing, and transplanted the new testing hardware across to the old model.
Despite using the exact same hardware, though, the PC wasn’t playing ball. It would slow down dramatically, restarted a couple of times and, despite several tries, I couldn’t even get the benchmarking software to run. Eventually, I hit the EFI to see if anything had changed, and it was then that I spotted the CPU temperature, which was close to 100°C. Clearly, something wasn’t right, so I did some digging.
The pump/waterblock unit was making good contact with the CPU, and I’d opted to use LGA1200 instead of LG1700 in order to avoid compatibility and mounting issues. The fan was working and the thermal paste had a good spread. Powering on the PC seemed to indicate the pump was working too, as you could hear it spin up. I also made sure it was connected straight to the PSU, so it would be running at full speed without any interference form the motherboard.
Then I noticed something odd. One tube running from the pump was hot, while the other was the same temperature as my hand. Clearly, something wasn’t right. I headed into the EFI again and connected the pump and fan to the motherboard – as I suspected, both were shown it as running, with the pump at its maximum speed of around 4,000rpm. However, it was very clear that the coolant wasn’t flowing around the loop, or if it was, it was doing so extremely slowly.
Clearly, I needed to fix it, so I could get some results, and as the AIO liquid cooler in the new H1 looked slightly different from the original one, I couldn’t swap that over either – the testing needed to be fair.
Perhaps the coolant level was low – that’s a common issue in AIO liquid coolers, although it had barely seen more than a few months’ use.
I opened up the fill port that was present on the radiator and the coolant was sat at the top. A little jiggling saw the level drop a bit as air bubbles rose, but I wasn’t able to add more than a few drops of aftermarket coolant, and doing so had no impact on the dire processor temperatures.
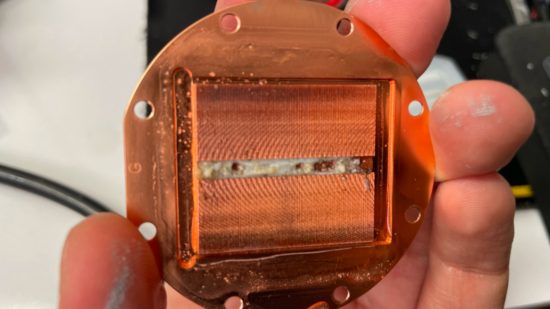
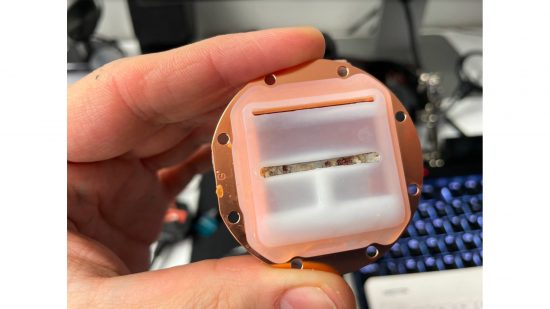
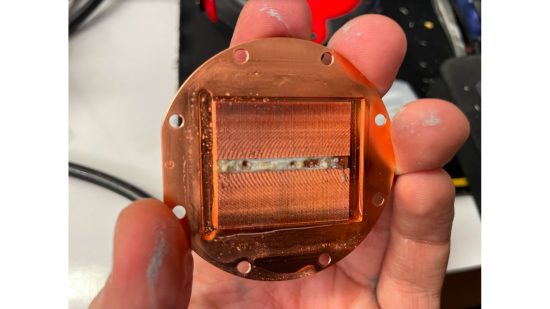
My last resort was to open the pump to see if there was an issue there. This was a fairly easy process, and just required removing a few screws. What I saw made my jaw drop. The waterblock was almost completely clogged with gunk. This gunk was clearly killing the flow rate and would absolutely explain why one tube was getting so hot. The coolant was basically sitting in the waterblock many times longer than normal and overheated as a result.
At least I’d found the cause, but it wasn’t clear where the gunk had some from. The loop had been sealed, and the cooler worked fine when I first used the case. Clearly, this gunk had dislodged from somewhere in the loop, or some chemical reaction had taken place to create it, with the particles getting caught in the fine fins in the waterblock.
I decided to drain all the coolant and clean the waterblock, since it was relatively easy to dismantle. Putting it back together again saw temperatures back to expected levels, but within five minutes, they started climbing much higher. Sure enough, on opening the pump again, there was more gunk, so I flushed the loop again, ran the pump and continually drained it to get rid of as much gunk as possible.
Eventually, after an hour of running, the pump was still gunk-free when I opened it up for the fourth time. This is pretty disconcerting, though, given that the liquid cooler and case were under two years old and had been in regular, but not constant use. In fact, searching online saw dozens of forum posts with NZXT H1 users reporting pump failures and returning their cases. That’s a shame, because a ten-minute loop clean could solve the issue.
Of course, this shouldn’t happen in the first place and it could be another reason why NZXT revamped the H1. However, in our How To guide you can see how to fix this issue if you experience it with your own liquid cooler, using our step by step instructions. If it’s more than two years old, I’d definitely recommend it, as it’s very simple. All you need is some third-party coolant, plus an hour or two of cleaning, and your liquid cooler should be good for another two years of operation.


