We all need to start from scratch sometimes and if you’re building a new PC, chances are you’ll need to learn how to make a bootable USB drive. This will enable you to boot your PC directly from a USB flash drive, rather than the SSD or hard drive on which your operating system is installed. This can be handy if you want to flash your motherboard BIOS, as well as if you want to create a bootable drive for installing an operating system.
There are a couple of ways of creating a bootable USB drive, but we’re going to use the command prompt in Windows so you don’t need to download any extra third-party software.
1. Insert USB flash drive into USB port
You’ll need a USB flash drive that has a large enough capacity to hold the software you want to boot. This will be detailed in the documentation for the software, but USB flash drives with plenty of storage are readily available now.
We recommend using at least a USB 3 model, so you won’t be waiting around for files to copy across to it.
2. Run the command prompt
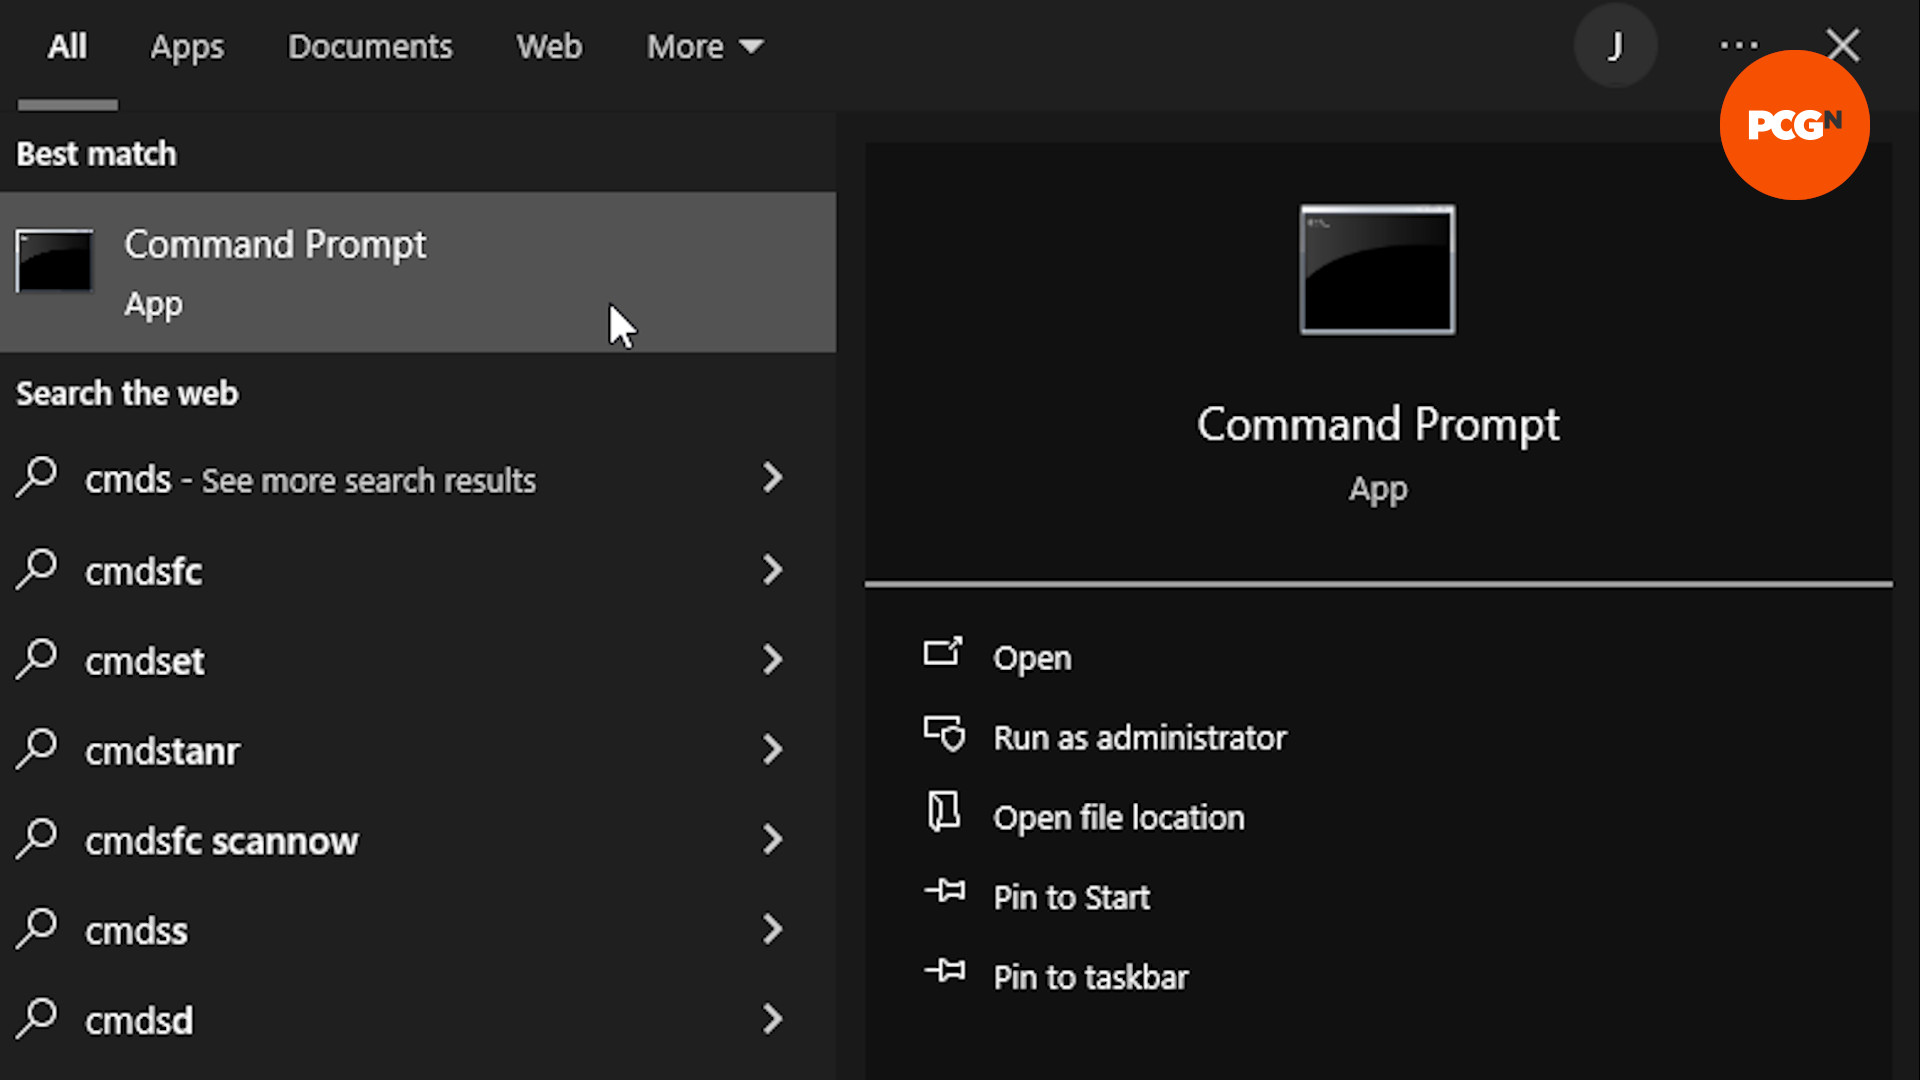
The next step is to open the command prompt in Windows. There are a number of ways to do this, but we find the quickest way to find it is to simply click on the Windows button and enter cmd into the Search bar. This will bring up the command prompt in the search results, and you just need to click on it to open it.
3. Run DiskPart
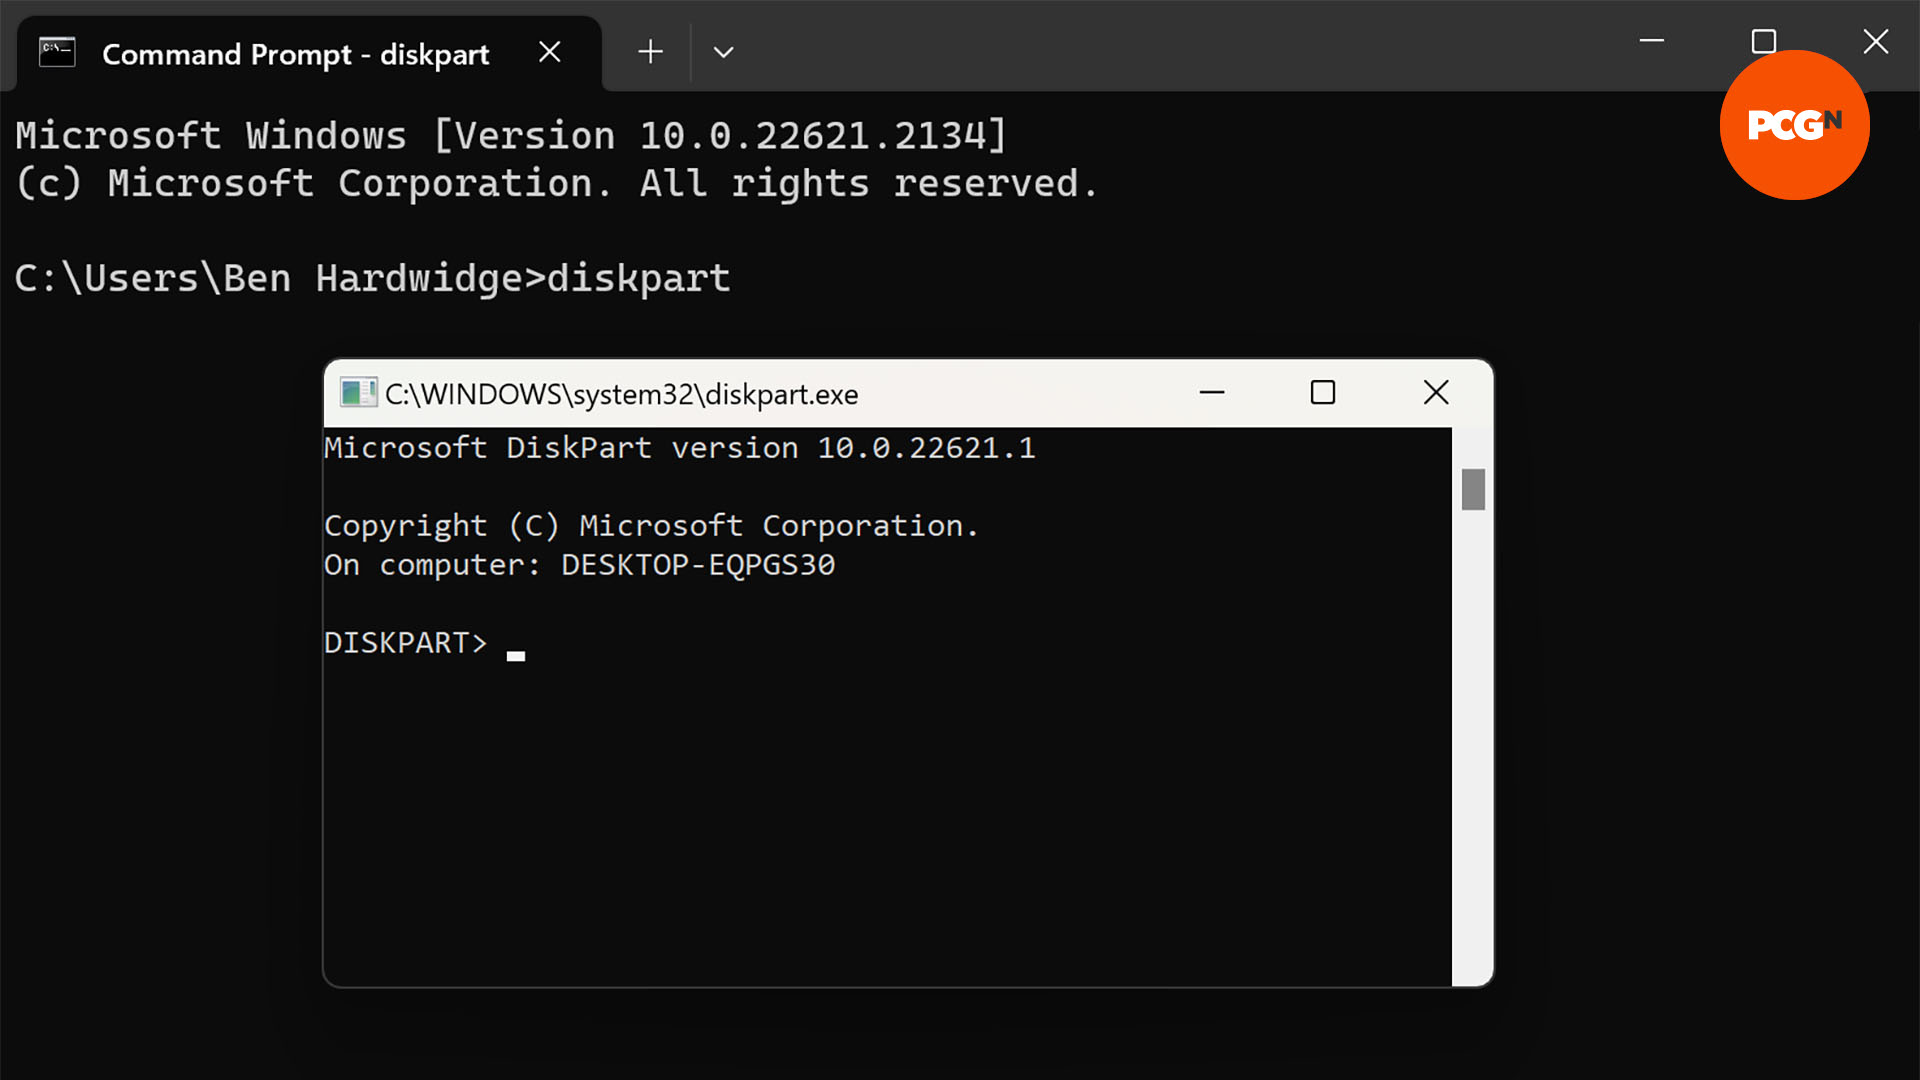
We’re now going to run Windows’ command prompt disk partitioning utility. You simply need to type diskpart next to the command prompt, and this will spawn another command prompt window that will enable you to create a bootable partition on your USB flash drive.
4. Find your USB flash drive
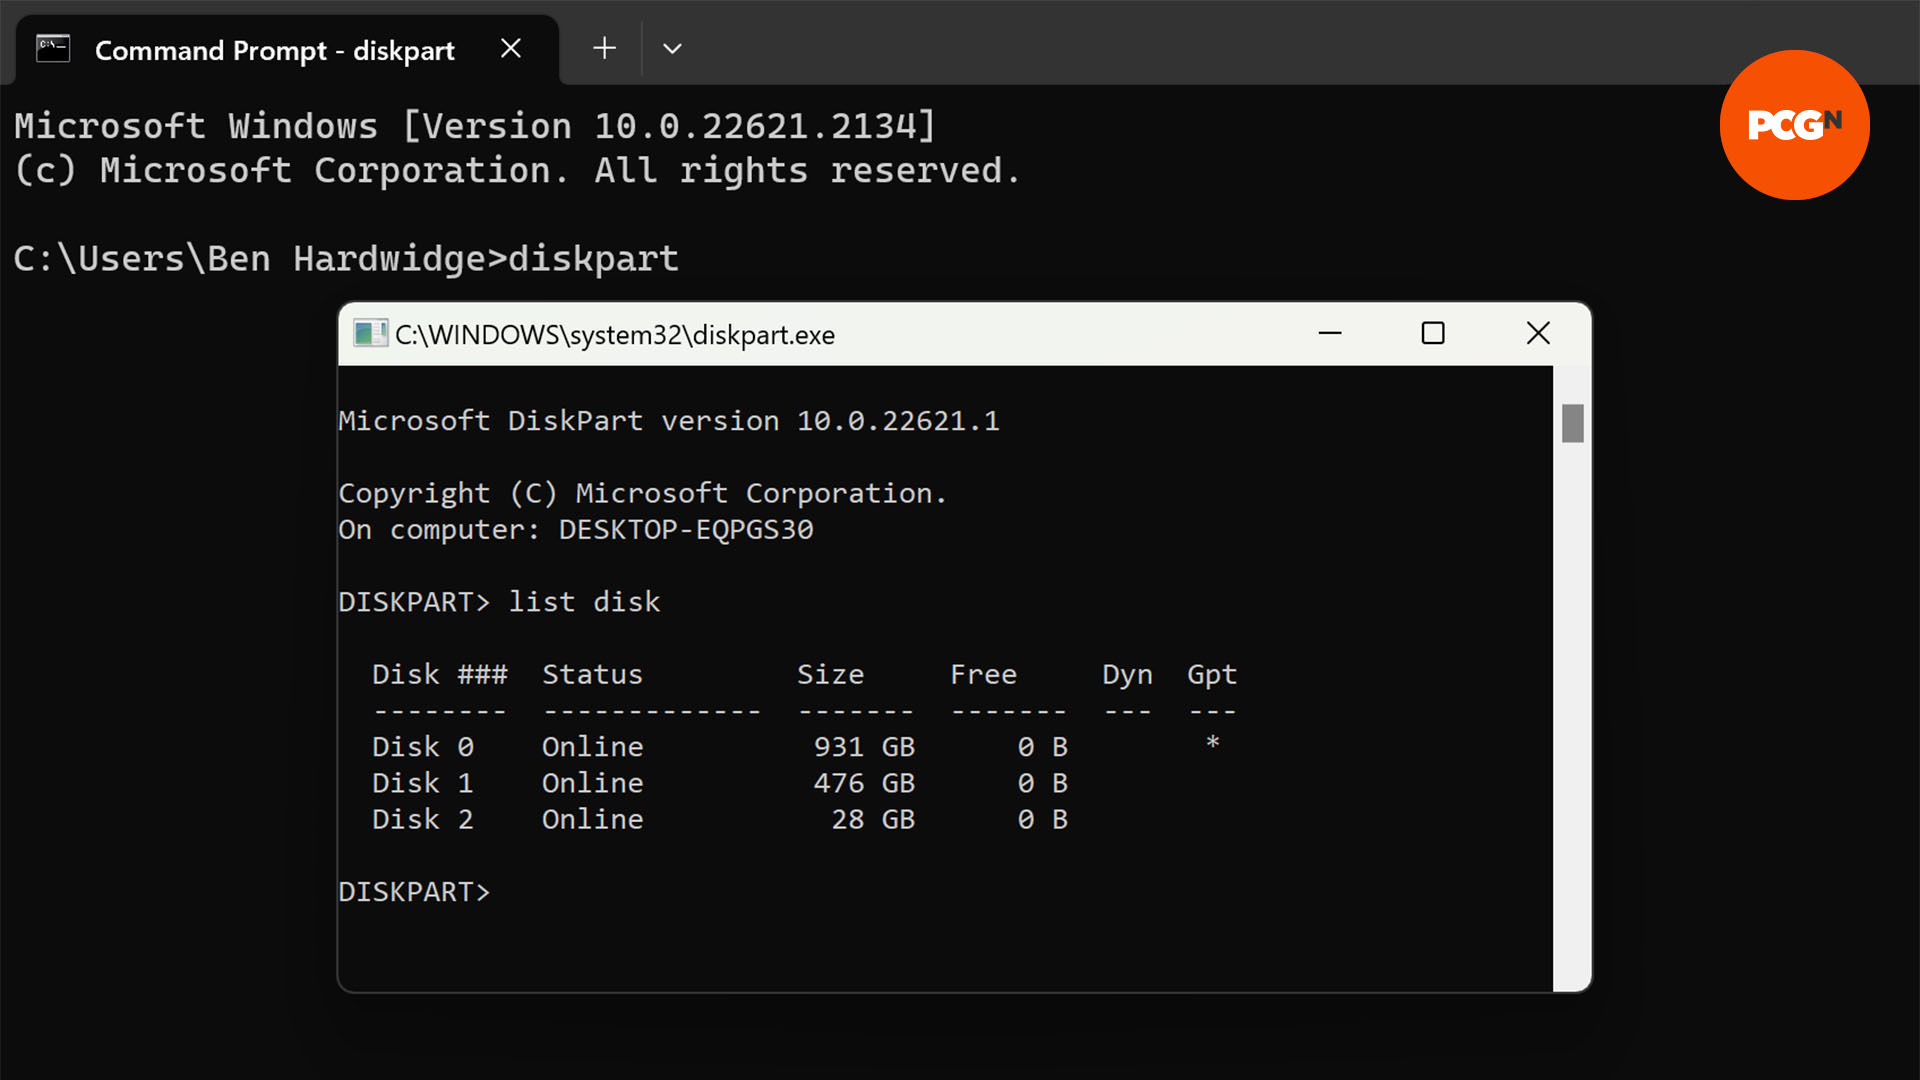
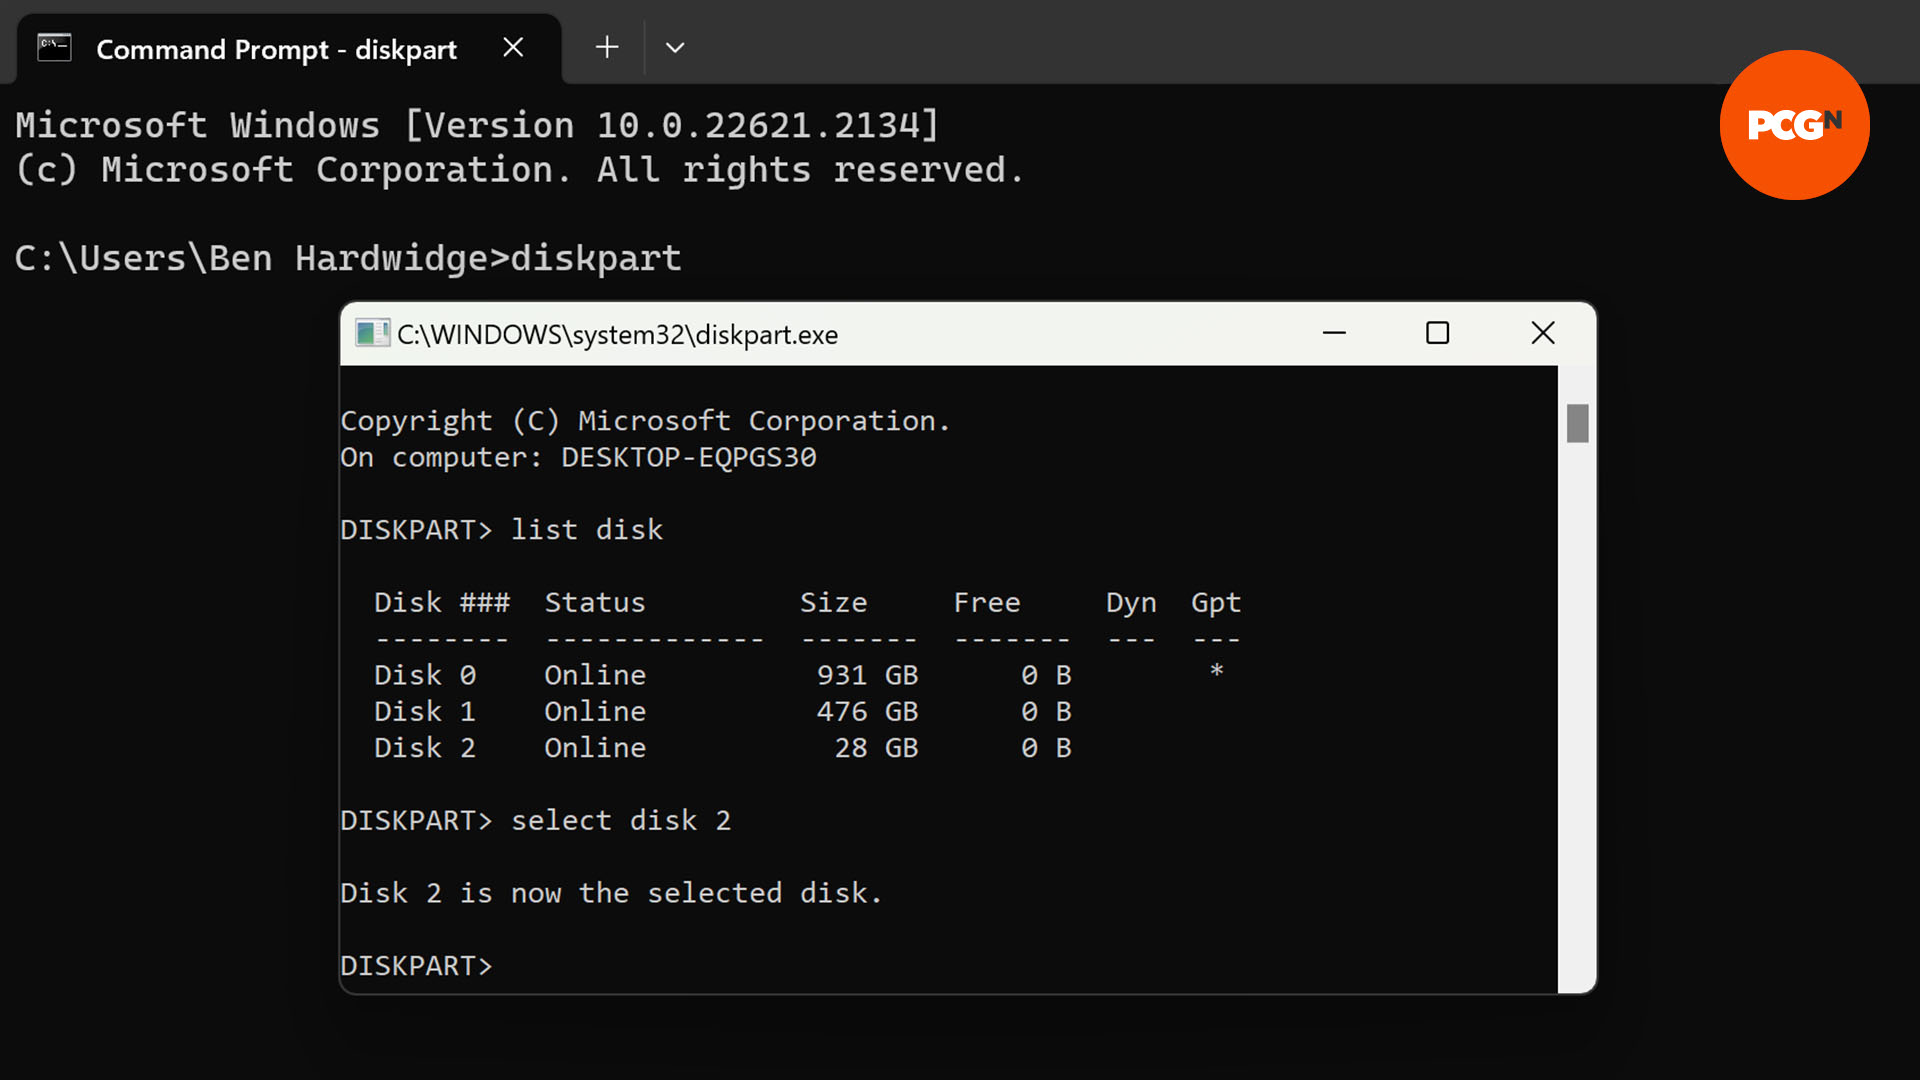
You absolutely don’t want to accidentally wipe your main SSD here, so it’s important to find which disk the command prompt sees as your USB flash drive. Type list disk next to the DISKPART prompt in the DiskPart command prompt Windows. This will bring up a list of all the physical drives in your PC.
In our case, our 32GB USB flash drive is Disk 2, which has 28GB of usable space.
5. Select your USB flash drive
To select your USB flash drive, type select disk x, where x is the number of your disk in the list above. In our case we typed select disk 2 in order to select our 32GB USB flash drive.
6. Wipe USB flash drive clean
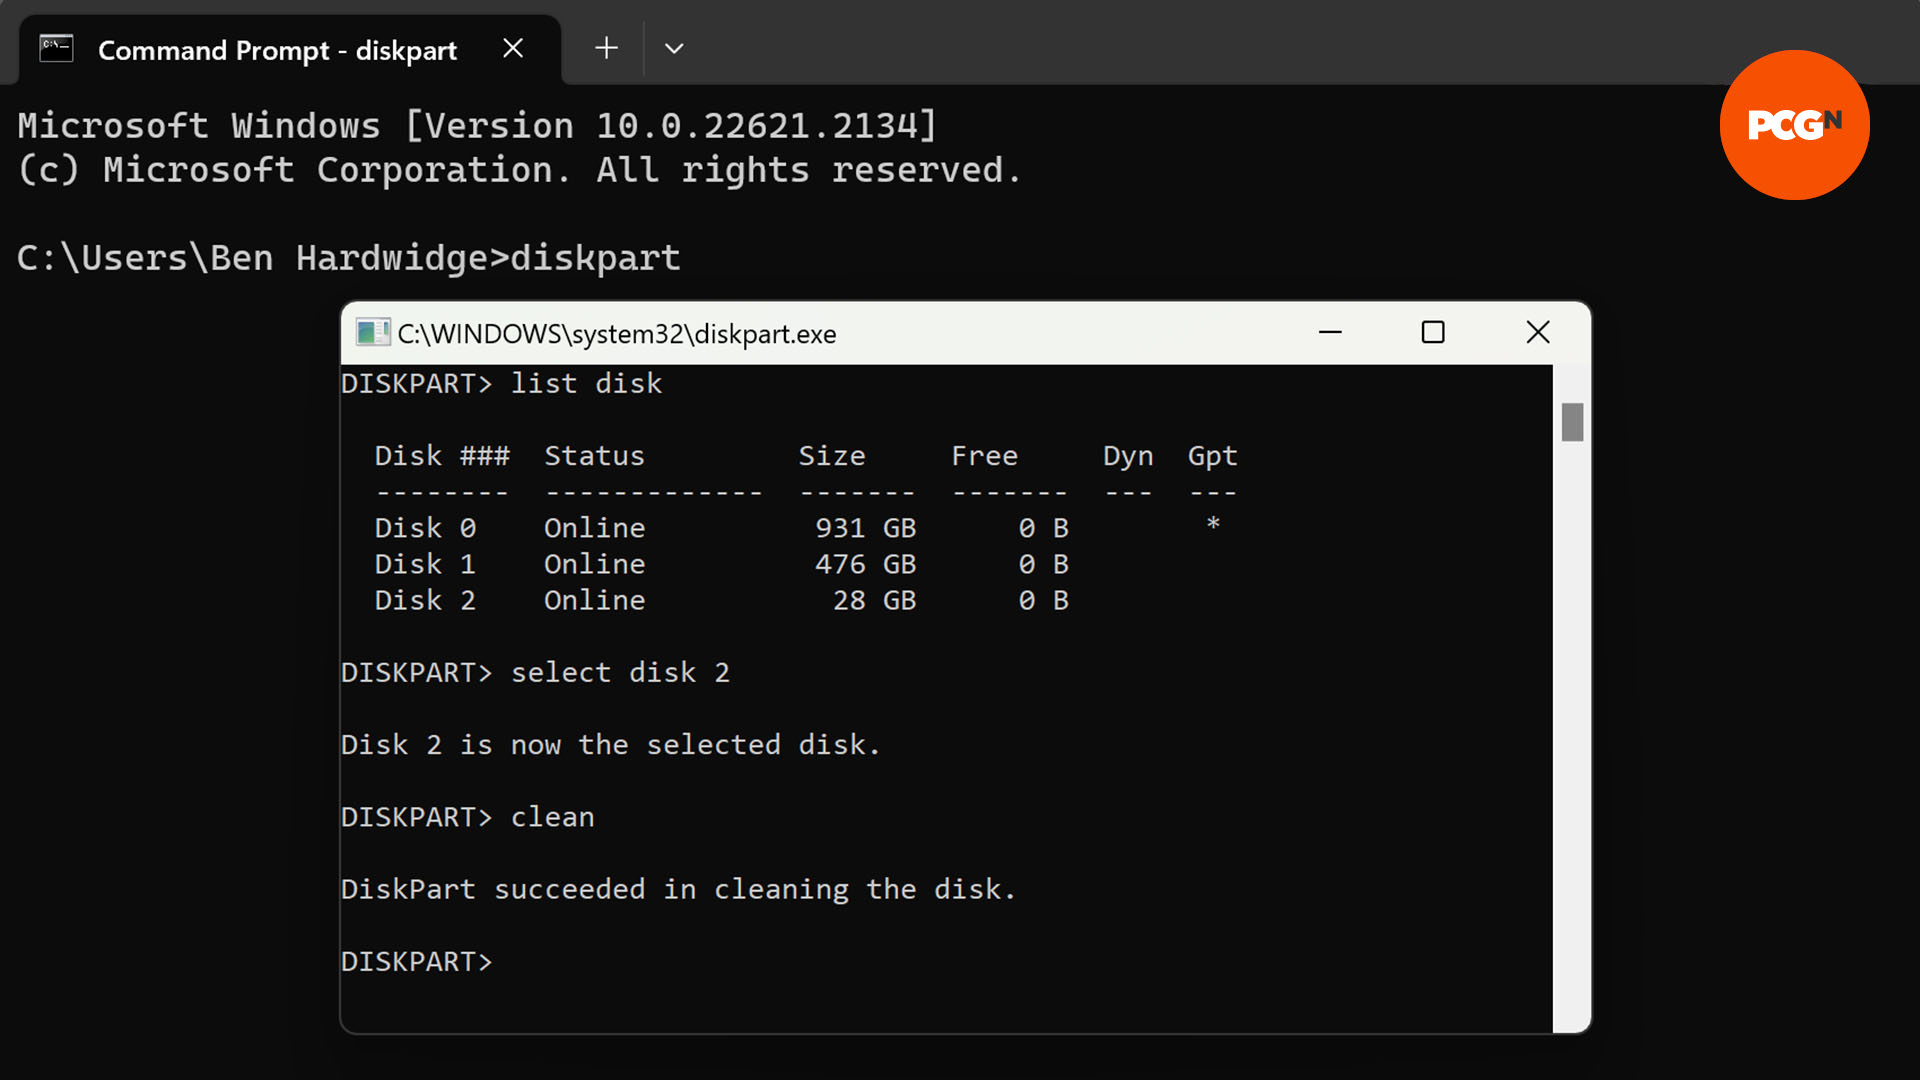
We now need to clear all the data off your USB flash drive. If there’s anything you want on here, then type exit to get out of DiskPart, and then use Windows to back up any files you still want on your flash drive. You can then restart the process and go through all the above steps again.
When you’re okay to wipe your USB flash drive, type clean at the DiskPart prompt.
7. Create partition on USB flash drive
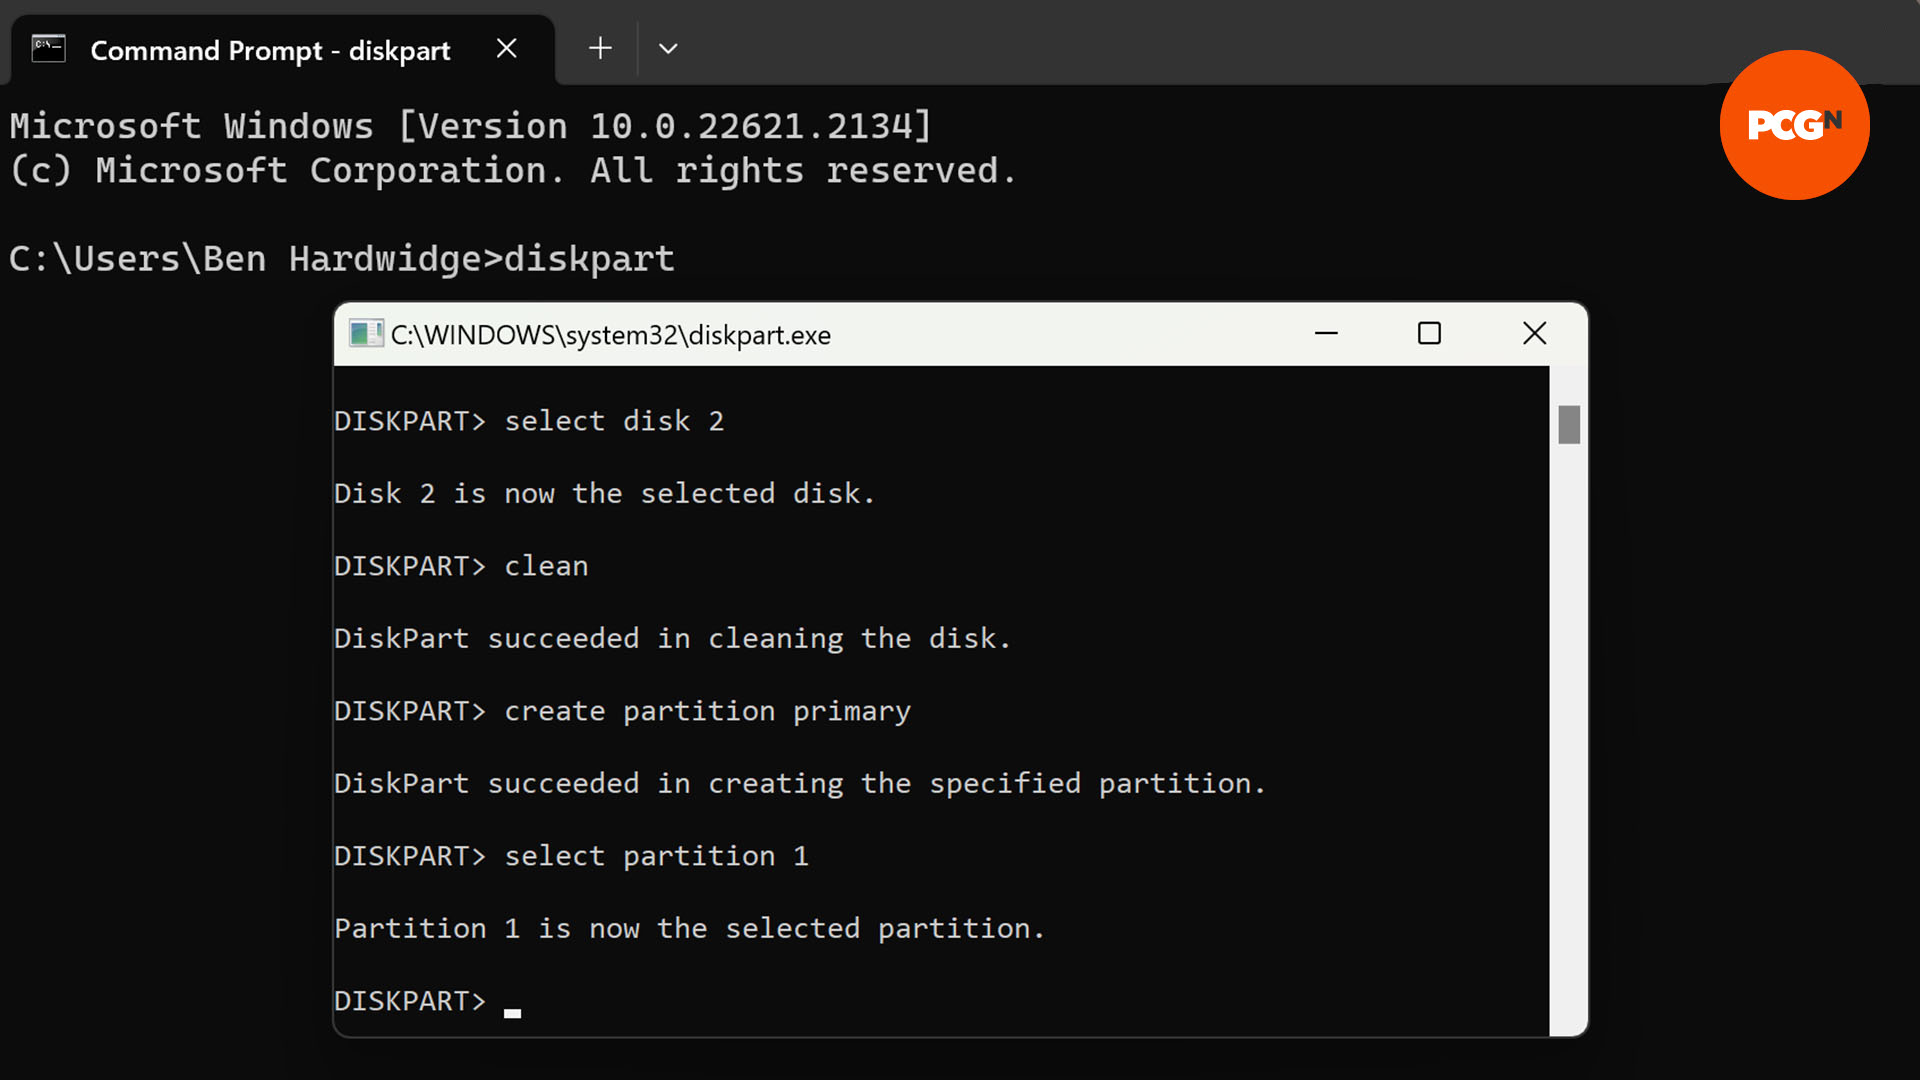
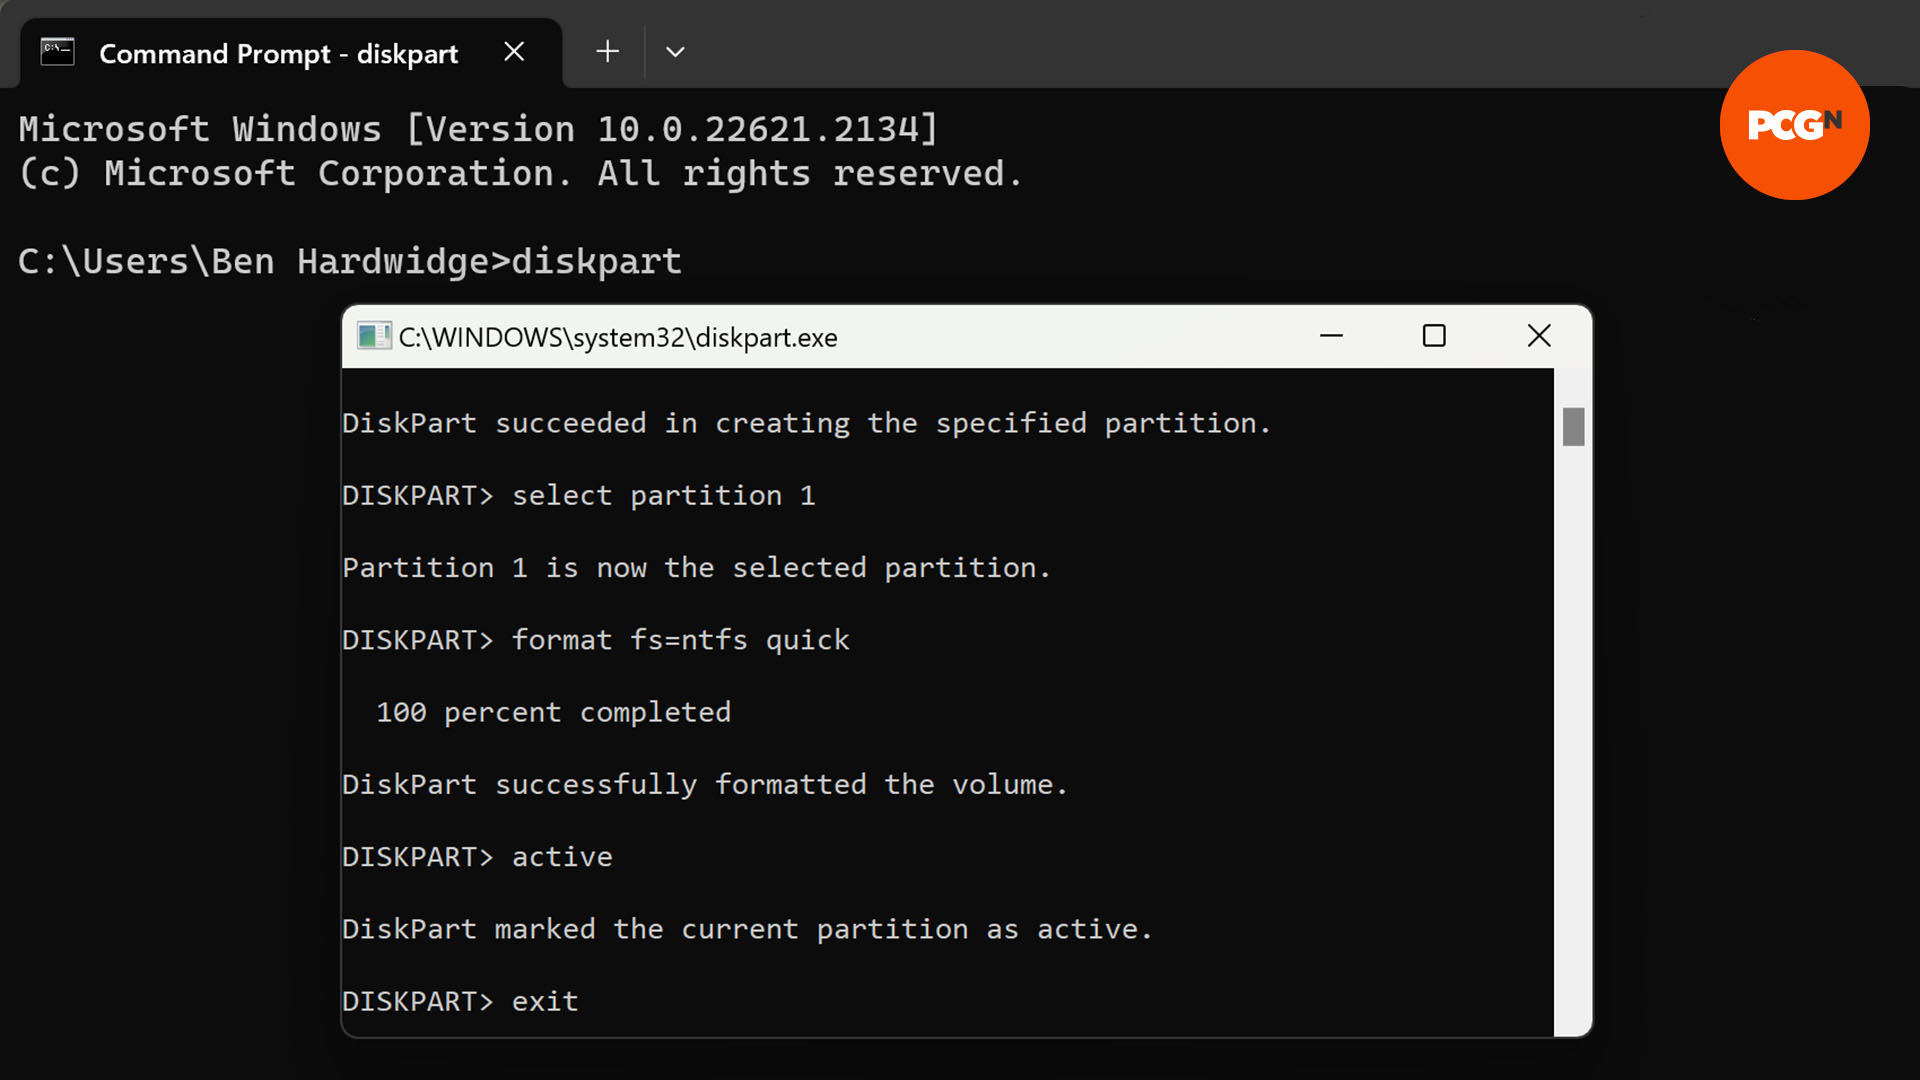
We now need to create the partition from which your PC will boot. Type create partition primary at the DISKPART prompt, which will create the partition. We now need to select this partition to ensure that the commands in the next step will apply to it. Type select partition 1 at the DISKPART prompt.
8. Format partition on USB flash drive
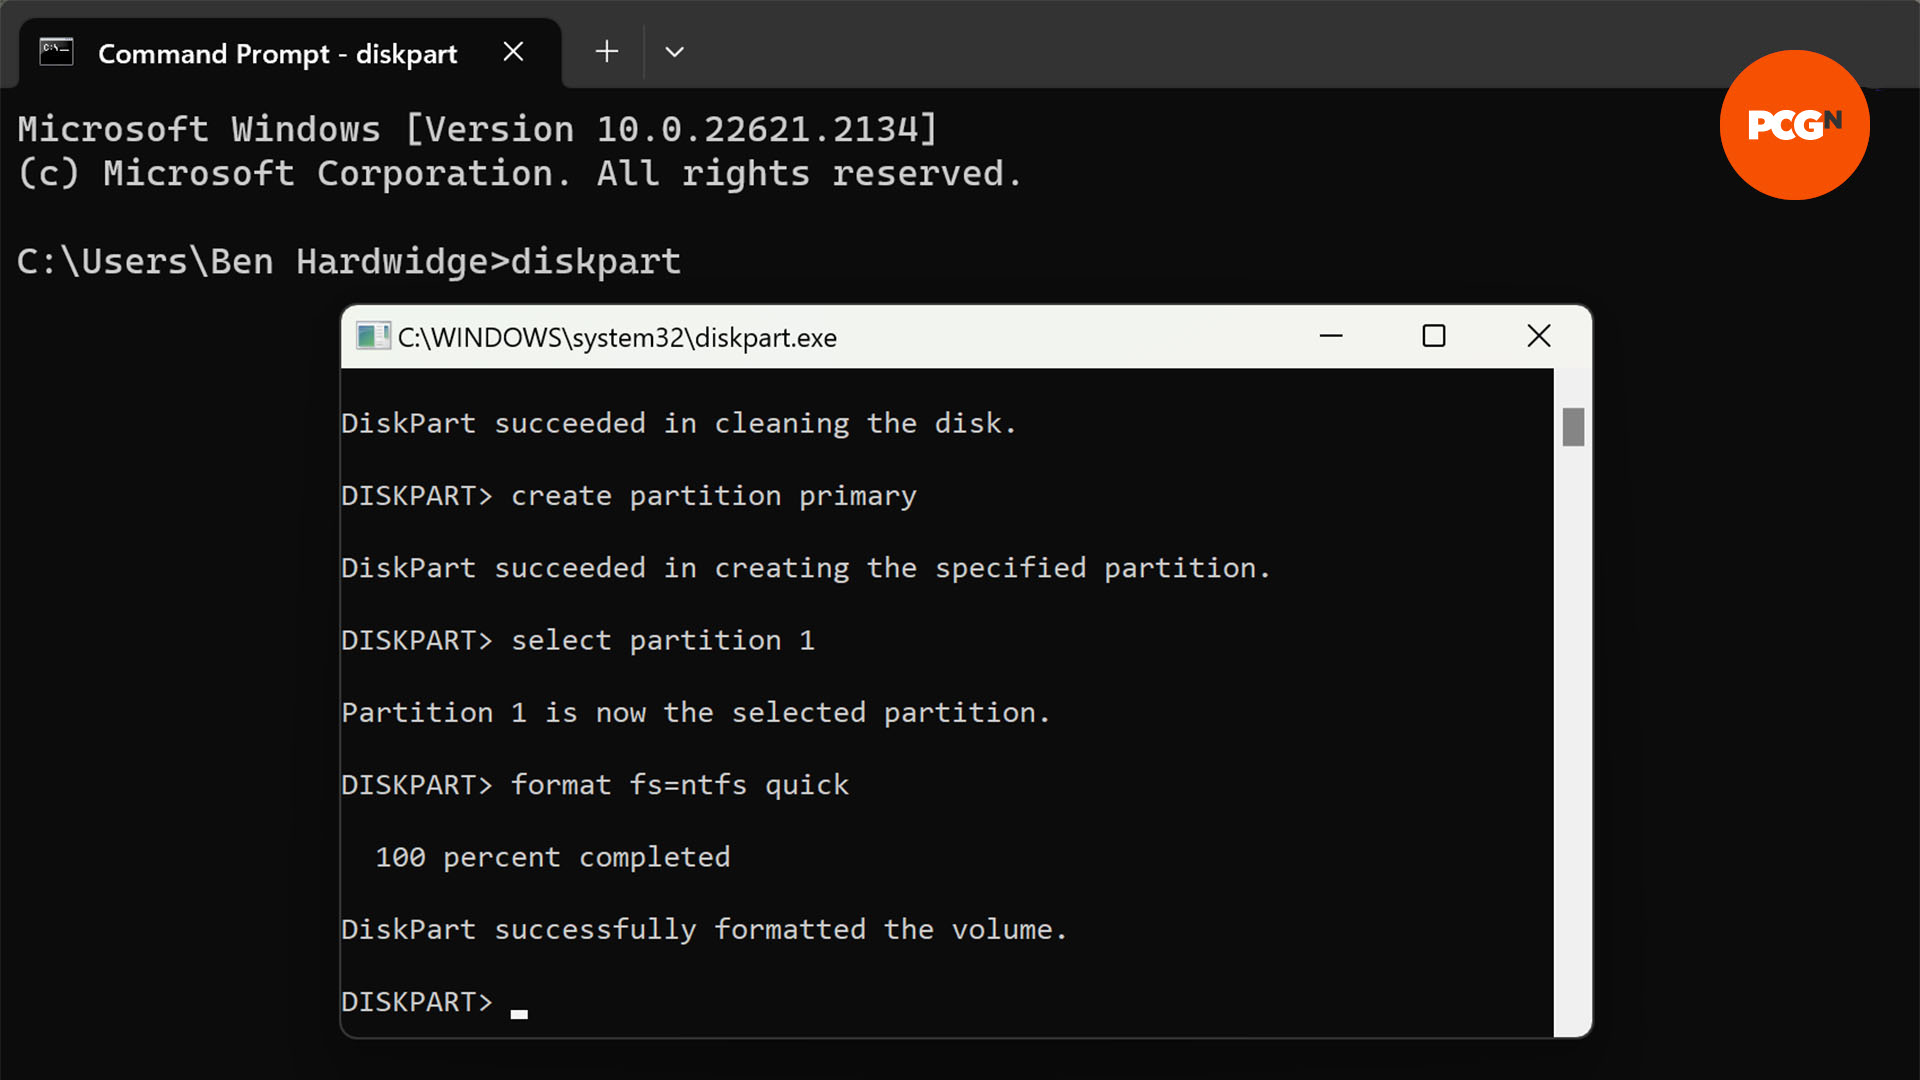
We’re now going to quickly make this partition readable by formatting it. We’re going to type format fs=ntfs quick at the DISKPART prompt, which will format the drive with NTFS, which is the file system used by Windows.
However, you can replace ntfs in the command above with fat32 if your chosen software requires the older FAT32 file system – format fs=fat32 quick – FAT32 is commonly the required standard for flashing your BIOS, for example. See our full guide on how to flash your BIOS if this is what you want to do.
9. Make partition bootable
Finally, we need to make our partition bootable, which is easy. Just type active at the DISKPART prompt. You now have bootable USB flash drive. Type exit to get out of DiskPart, and again to close down the command prompt. You now just need to copy the files you need for your software, such as for flashing your motherboard BIOS, in Windows.
That’s a wrap for our guide on how to create a bootable USB flash drive. Your next step, if you want your PC to boot from it, is to enter your motherboard BIOS or EFI, and make your USB flash drive the primary boot device.
If you’re looking to build a new PC, make sure you read our full guide on how to build a gaming PC, and check out our full guide on the best SSD for gaming, where you can find loads of recommendations for solid state drives at a range of speeds and prices to suit your needs.
