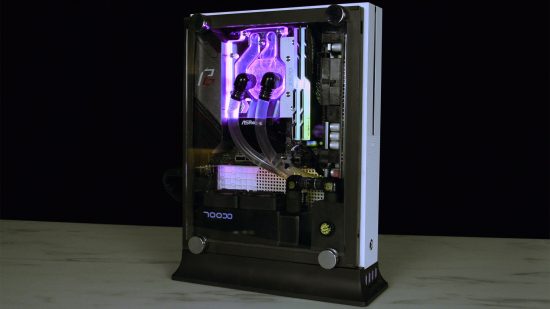
Using an AMD APU and a super-compact water-cooling system, community member Aaron Howe converted an Xbox One S into a fully functional PC. Cramming a full water-cooling system into such a small chassis presents a lot of challenges, so we were eager to find out more.
Thanks to our rapidly growing PC building Facebook page, we’ve seen many custom gaming PCs, from mods based on existing case designs to scratch PC builds. You can even submit yours for consideration right here. For now though, let’s find out how Aaron built his Xbox One S PC.
PCGamesN: What inspired you to build a PC into an Xbox One S?
Aaron: I hadn’t seen it done before! I had previously built an air-cooled PC inside an Xbox 360 and, using that experience, I wanted to take the idea of converting consoles to computers an extra step forward, adding complexity and push boundaries.
How did you plan this build?
It started with pen and paper and then moved to MS Paint of all things. I then got out a ruler and just started laying down general sizing to see what the box would take. I then made an initial concept build using J-B Weld and some aluminium to cold-weld a frame together, but the hardware inside was just too hefty. It kept breaking apart in a few weak spots, just from holding it and moving the system around.
I used the measurements of that original prototype to design an internal chassis in 3D software, which I ended up 3D-printing in one solid piece that just slides into the Xbox One S. It’s flexible in the right places, so it can bend where necessary, and it’s rigid in other places to keep strength.
What’s the side window made from, and how is it attached to the chassis?
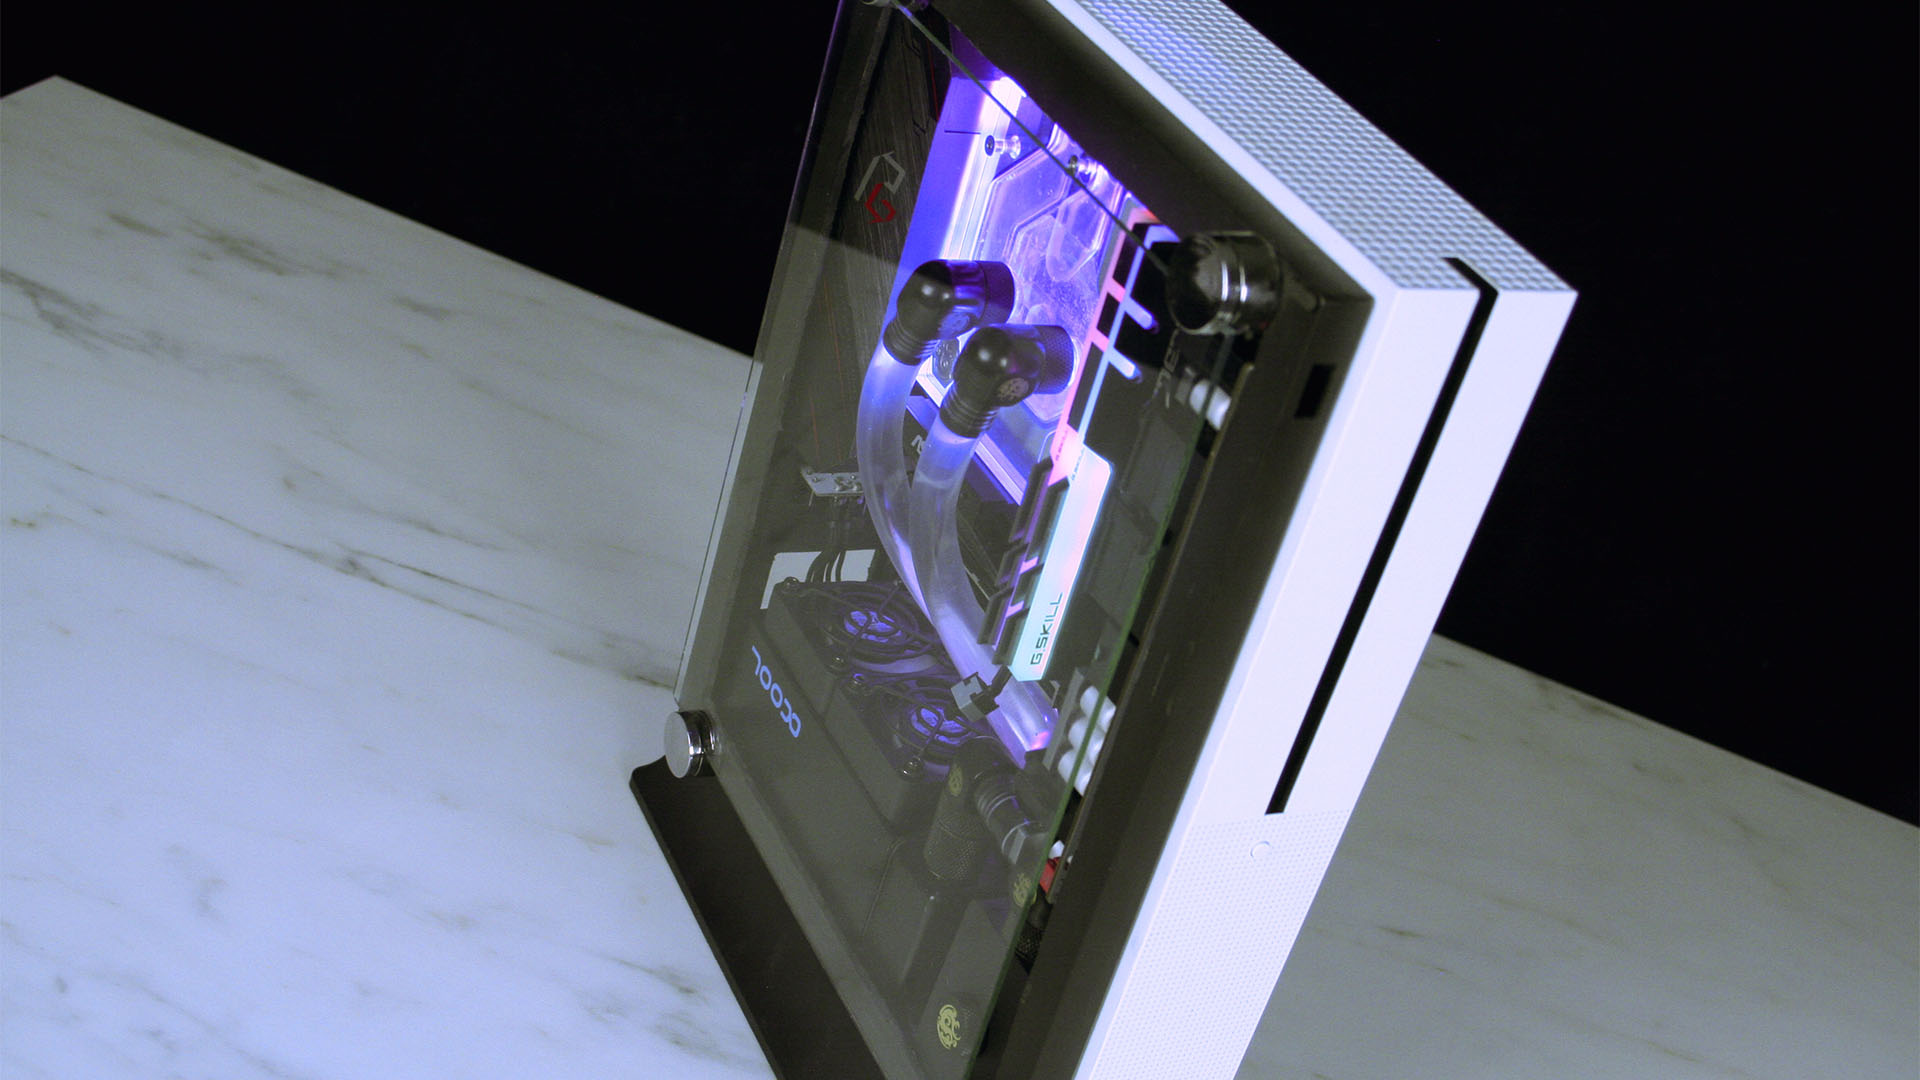
It’s not tempered glass; it’s just a glass piece from Home Depot. The idea for the glass panel was that I wanted the console to have a ‘sleeper’ look if it was faced downward, but if it was vertical it would show off its true nature.
To attach it, I used mirror clips that you would usually use to hang mirrors on a wall, which also act as feet if the console is laid down horizontally. The clips themselves are hung on with ‘extreme’ double-sided adhesive tape, which has more than enough strength to hold it up.
We’re intrigued by that tiny radiator at the bottom and the little fans on top of it. What fans and radiator did you use?
It’s the Alphacool XT45 50mm dual radiator, with two Gelid Solutions Silent5 50mm fans. Initially I tried to use the triple-radiator version, but I realised quickly that it would leave no room for the pump or reservoir, so I had to scale back the cooling. It’s powerful enough to keep the machine in the mid-60s (°C) while gaming, using stock clock speeds and an undervolt to 1.1V on the CPU. I’ve occasionally seen it go higher, but it’s rare.
Why did you use soft tubing instead of hard tubing?
To be honest this was my first custom loop ever, and I wanted to nail the basics of a custom loop first before I tried to add the complexity of making hard tubing bend like that. I might take the leap one day and transition the build to hard tubing, but for now it’s staying with soft tubing.
Take us through the rest of the water-cooling loop
While researching my size constraints, there was really only one pump and reservoir choice that would work for me. It’s the Alphacool Eisstation 40 DC-LT reservoir paired with their DC-LT 2600 ceramic pump. The super-compact form factor and perfect sizing, paired with their Alphacool’s XT45 radiator, really allowed the system to be small.
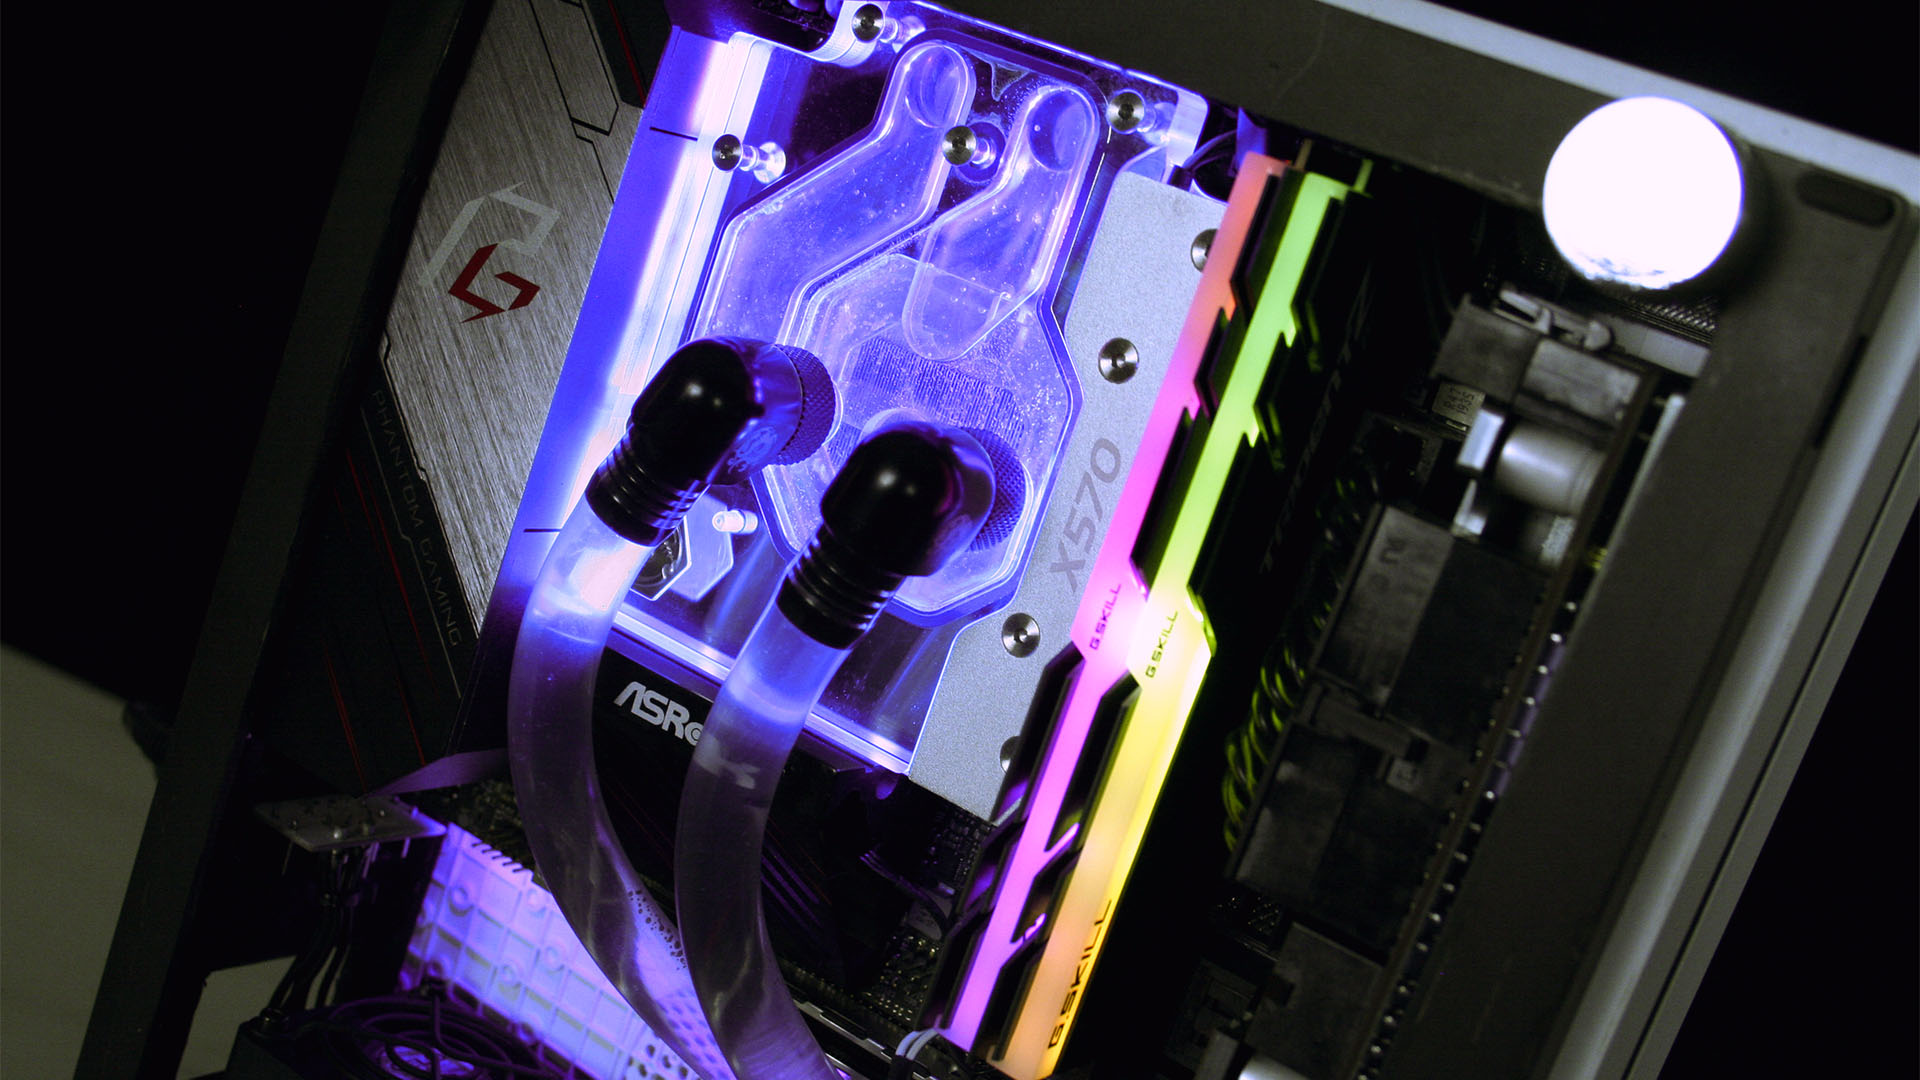
The fittings are made by Bitspower, and I mainly used them for aesthetic reasons. I liked the way they look, especially with the black finish, and the green O-ring makes a call back to the original Xbox design scheme. The waterblock I eventually used wasn’t my first choice. I went through multiple different versions, partially because I went through several motherboard ideas and various ways to try to make the build work as efficiently as possible.
I eventually landed on the ASRock Phantom Gaming X570 ITX/TB3 motherboard because of its feature set. Not only does it enable you to install a Ryzen APU with (what was at the time) the world’s best iGPU, the Ryzen 7 4700G, but it also gives you a Thunderbolt port at the rear, with which you can use an external GPU. I end up using it paired with a Radeon RX 5700 XT a lot of the time at LAN parties, which is housed inside a Razer Core V2 external GPU box.
Once I’d decided to use that motherboard, I found out there was a company that made a monoblock for it, and it was the same company from which I’d already bought my fittings. It really almost did feel like fate, as if this hardware was made specifically for my use case – I just had to buy it.
Where is the PSU, and what model is it?
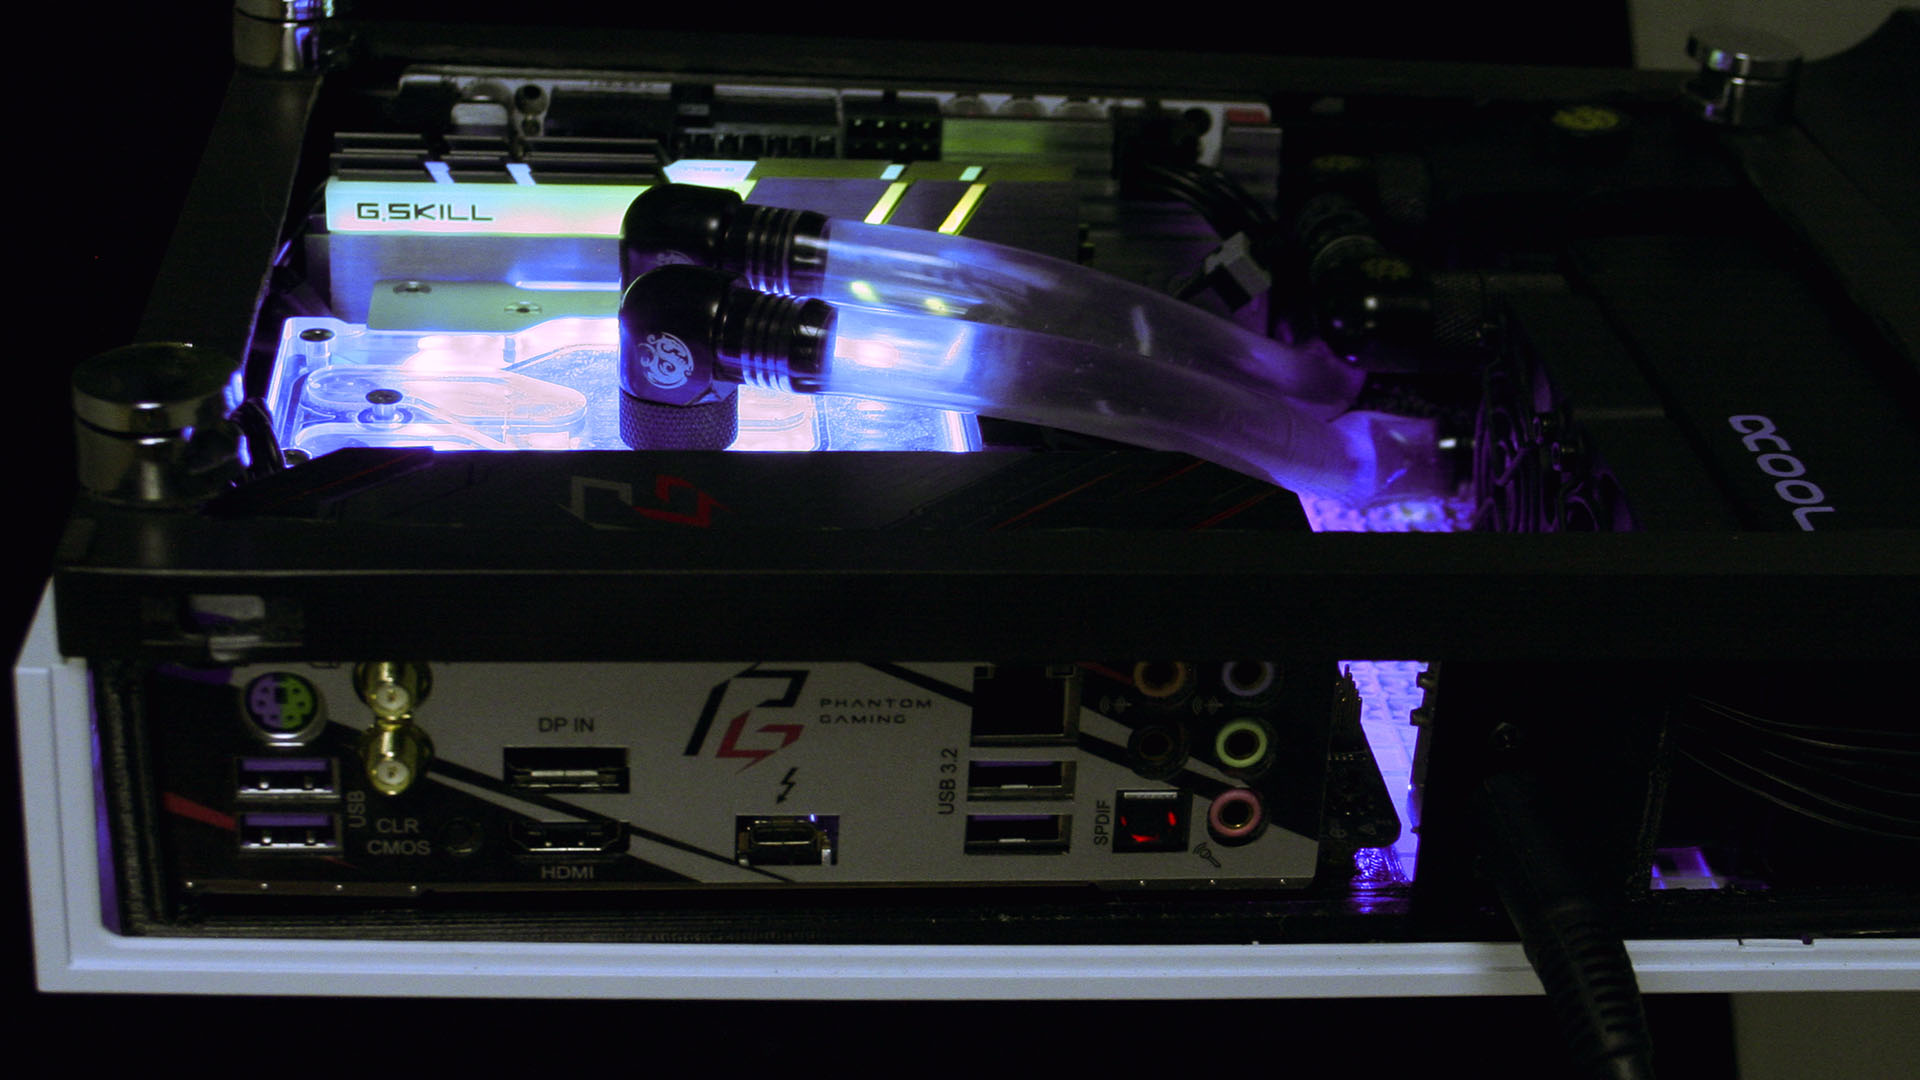
The power supply you can see just to the right of the motherboard is an HDPLEX 400W DC-ATX unit. It uses a laptop charging brick for input power, and then outputs all of the standard 24-pin, 8-pin EPS and SATA power cables you typically find in a computer.
What’s great about this PSU is that it’s also fully modular – I don’t have SATA or a discrete internal GPU, so I was able to only run two cables inside the system. The build uses a 1in ATX 24-pin connector that was built by a friend of mine, Heath from Tek by Design, and the 8-pin EPS connector was built by Michael over at MB Custom Sleeving. They’re good people and I wanted to include some work from both of them in my build.
What’s the stand underneath the machine with the four USB 3 ports, and does it interface with the PC?
It’s actually a vertical stand designed to convert the One S to a standing position, from Best Buy’s Insignia brand. It cost a total of $20 US. As for how it interfaces with the computer, that’s a massive rabbit hole I went down to try to get it to work. Since it’s designed for a One S, there are no drivers for it for a computer of course.
I went deep into trying to find a driver that would work for it – I checked the Hardware ID info and tried repeatedly to get it to function, but it sadly wasn’t meant to be sadly. I ended up snipping off the end of the USB cable, and it’s now just used to help keep the console upright, as well as to allow more airflow into the base for the radiator.
What spec did you choose and why?
It really came down to wanting a tiny powerhouse for LAN parties. I frequent PDXLAN here in the Portland, Oregon area, and wanted a PC I could easily carry to a few events each year. As such, the main choice I made was to go with the fastest APU available at the time.
It also has 16GB of 4800MHz memory. I tried out multiple different kits for this build, at varying speeds from 3200MHz all the way up to 4800MHz, and the faster memory did make a difference to frame rates when using the iGPU, so I kept the higher-speed kit.
Is there any way you could have squeezed a half-height graphics card in there, or is it just too tight?
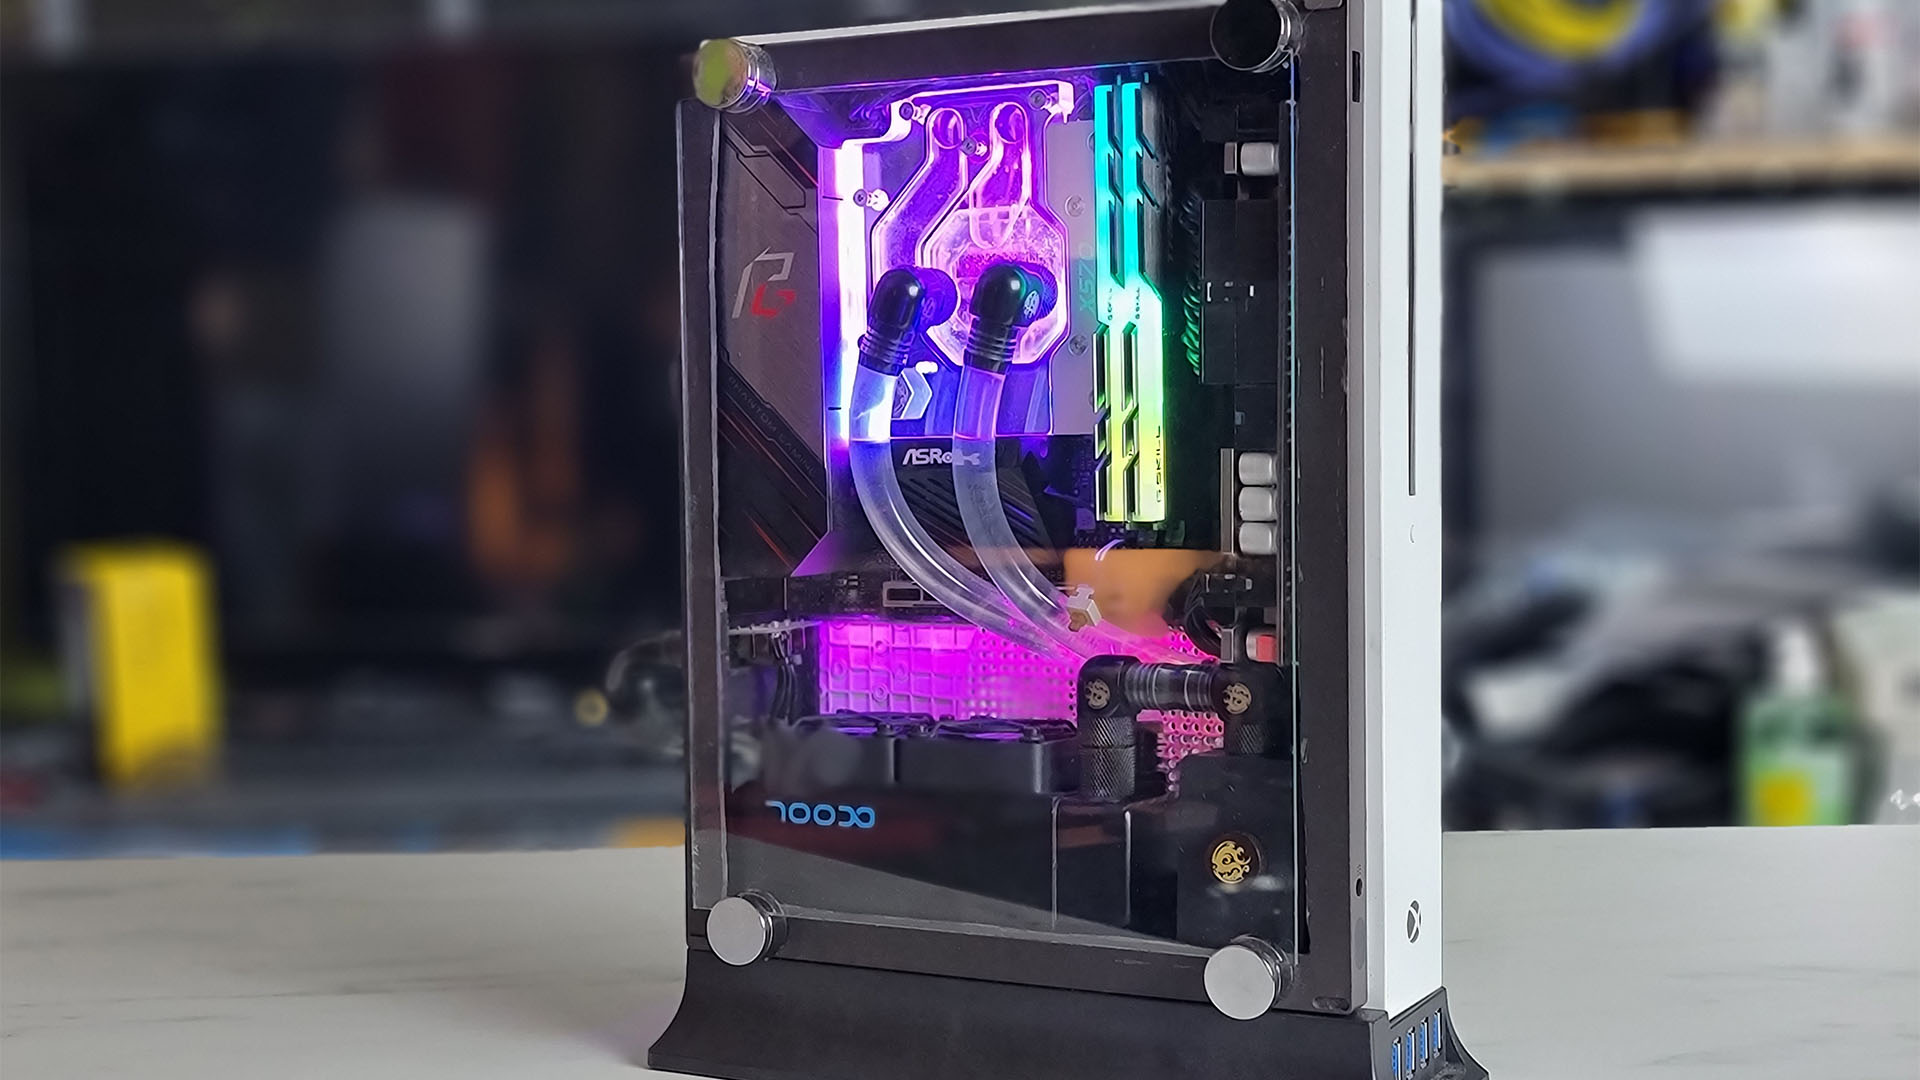
I actually get asked that a lot, but no, sadly there is just no room. There is about a 1 x 1″ rectangular shape below the motherboard but above the radiator where I could fit something, but that space isn’t large enough to accommodate any kind of graphics card. The motherboard heatsink, I/O cover and the radiator/fans leave no room between themselves and what was originally the bottom of the One S console.
What’s the performance like from the iGPU?
It actually works out really well for me. Around 90 per cent of my gaming time is typically spent playing either StarCraft or StarCraft II, so I can almost max out the settings and still have great frame rates. As far as modern gaming, I wouldn’t rely on it too hard.
When I use the Radeon RX 5700 XT eGPU, I set any games settings that rely on CPU performance to low or medium, and if I’m relying on the iGPU, all the settings are set to low. I’ve so far tested out StarCraft and StarCraft II, Diablo 3, BattleTech, Mechwarrior 5, Horizon Zero Dawn, Forza 4 and 5, and a few other smaller titles.
If I don’t have the CPU performance items set to low, eventually the system will succumb to heat soak, and temperatures will climb and climb until it just locks up. The 100mm radiator sadly doesn’t have enough cooling headroom for the system to run at full tilt
Did you come across any difficulties?
One huge problem was finding a waterblock that would fit in the small space between the CPU socket and the glass screen. I had tried a few variations of hardware, and multiple integrated pumps, but eventually I ended up going with a plain block, and then integrating the pump and reservoir lower down, instead of trying to use a triple radiator.
Trying to find a Ryzen 7 4700G was also super hard, as at the time AMD wasn’t selling the chips at retail, as it ended up doing with the Ryzen 5000-series APUs. I ended up having to buy an entire HP prebuilt system to get the chip, and then sell the rest of the system for parts.
The last real hardship is that, whenever I have to do maintenance, the pump wiring is really delicate, and I can end up breaking the pump just by pulling the computer apart.
How long did it take you to complete this build?
It took three years almost to the day to complete, my first post on overclock.net was on 19 July 2018, and I finished it in mid-June 2021. The main reason for this was just budgetary concerns, waiting for a 3D printer, only having weekends due to work, and health issues. It was well worth the time though, and I’m proud of the work I’ve done on it so far.
Are you completely happy with the end result, or do you wish you’d done some of it differently in retrospect?
Yes, and there are many improvements planned! I really want to get proper Start and Reset buttons wired up, and then figure out a way to get an Xbox One controller to turn on the PC, as you do with an Xbox.
I’ve also thought about using a tempered glass screen, and redesigning the internal chassis around the pump to make sure it doesn’t get damaged during future maintenance. There are a few other ideas I have in my head too, but I’m keeping those under wraps for now.
Xbox One S PC specs
- CPU: AMD Ryzen 7 4700G
- GPU: External XFX Radeon RX 5700 XT
- Storage: WD SN750 1TB SSD
- Memory: 16GB G.Skill Trident Z RGB 4800MHz
- Motherboard: ASRock Phantom Gaming X570 ITX/TB3
- PSU: HDPLEX 400W DC-ATX with Dell 330W laptop power brick
- Cooling: Bitspower ASRock X570 ITX/TB3 monoblock, Bitspower G1/4in to 3/8in 90-degree rotary barb fitting, Bitspower G1/4in 15mm extender fitting 15mm, Bitspower G1/4in-to-3/8in barb fitting, 3m of EKWB EK-DuraClear 10/13mm clear soft tubing, Alphacool DC-LT 2600 ceramic 12V pump, Alphacool Eisstation 40 DC-LT reservoir, Alphacool NexXxoS XT45 Full Copper 50mm dual radiator, GELID Solutions Silent5 FN-SX05-40 50mm fans
We’re amazed that you’ve not only managed to squeeze a full mini-ITX system into that tiny chassis, Aaron, but that you’ve also managed to water-cool it – that’s top work!
This post originally appeared on Custom PC, which has been covering amazing setups for over 20 years and is now part of PCGamesN. Join our 500k member Facebook group to discuss this build.
If you consider yourself to be an expert PC builder, you can submit your own custom PC build to us today for a chance of being featured on PCGamesN in the future.
