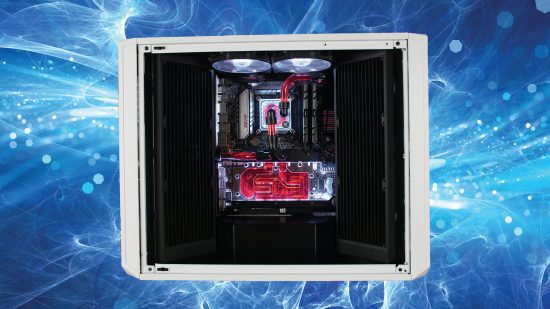
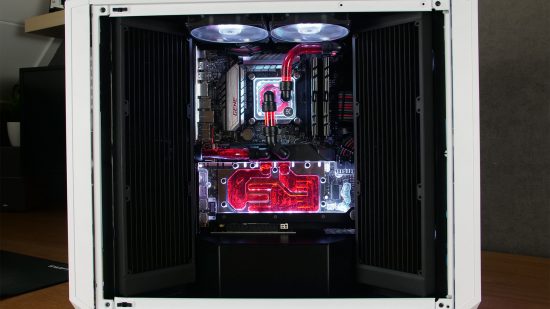
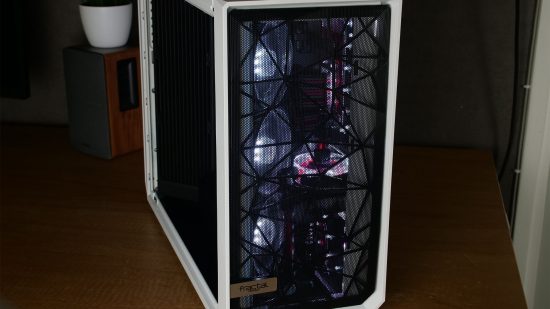
Moving the motherboard in your gaming PC to the middle of your case is no easy feat, but PC modder Jeroen ter Horst has done an expert job here. He gutted his Fractal Design Meshify S2 and completely changed the layout, with a custom distro and cable management plate, while moving the motherboard to center stage, flanked by a pair of angled 360mm radiators.
Custom PC has been celebrating the best PC builds since 2003, and our Facebook group has over 300,000 members. We’ve seen many custom gaming PCs, from mods based on existing case designs to scratch builds. Here we talk to Jeroen about how he transformed his Fractal Design Meshify S2 case.
Custom PC: How did this project start?
Jeroen: It all started in early 2019 when I was still happy with the performance of my previous build, but I wanted my PC to have a fresh look. My goal was to create a fresh and new-looking design that hadn’t been seen from a particular case before, while also being able to fit at least two 360mm radiators inside the case for cooling.
Custom PC: Why did you base this build on the Fractal Meshify S2?
Jeroen: From my earlier experience of modding a Fractal Define S in 2018, I knew that adding an extra front panel on the back side of the Meshify S2 would be quite easy. Add the full mesh panels on the top, and I was convinced this case would be a great candidate for this mod.
Custom PC: The airflow system is quite unusual – how does it work?
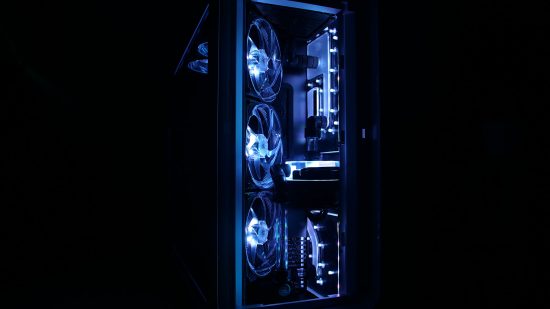
Jeroen: I wanted to highlight the unique radiator layout, and I liked the clean look of just the radiators being on show without fans on top. Thanks to the dual mesh front panels, it was possible to move the six intake fans to the sides of the radiators that face the front panels.
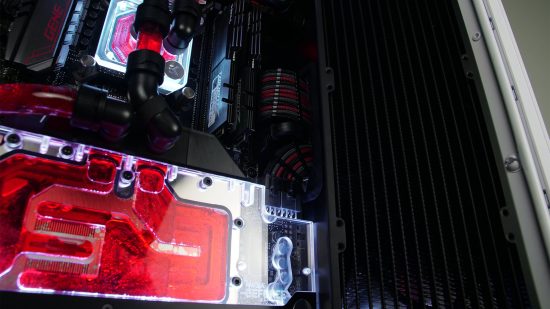
These fans push fresh air from outside the case through the radiators in the main compartment, where the motherboard and GPU are located. Meanwhile, the PSU pulls its own fresh air from the underneath of the case, and there are also vents in the main compartment. With the help from two exhaust fans in the top, all the hot air gets pulled out of the system.
Custom PC: We’re intrigued by the minimalist look of the water-cooling loop – where does it all hook up inside?
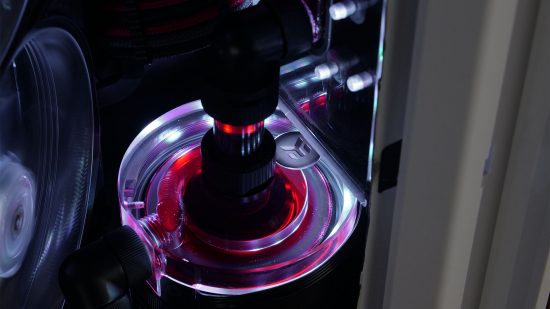
Jeroen: The front side of the loop directly hooks into a custom-designed distro plate that sits behind the motherboard tray and serves as the base for all the cable management. Once the liquid enters the distro plate, it’s routed through both radiators and goes into the built-in reservoir until it enters the pump again and goes around. In total, this system has four drain ports, three of which are hidden behind vanity panels in the back.
Custom PC: Moving the motherboard to the middle of the case must have involved a fair amount of work. Tell us about the process.
Jeroen: I started by drawing the internal frame of the Meshify S2 in CAD. In this case, I used SolidWorks, since I was familiar with using it at school. Once that was done, I knew exactly how much space there would be available with which to play, and I could create a design that would fit.
With the help of the online 3D library GrabGAD, I was able to find models of a micro-ATX motherboard, a water-cooled GeForce GTX 1080 Founders Edition, EK 360mm radiators and the Noiseblocker fans I used. I then compared these with pictures of components from the Internet, and I was able to confirm and modify the 3D models to my needs and start the puzzle to fit all the hardware inside the build.
The first step was finding the optimal angle for both the 360mm radiators, which ended up being 45 degrees. Once those were in place, I started placing the motherboard, GPU and PSU in the model, and designed a new internal frame out of 2mm steel.
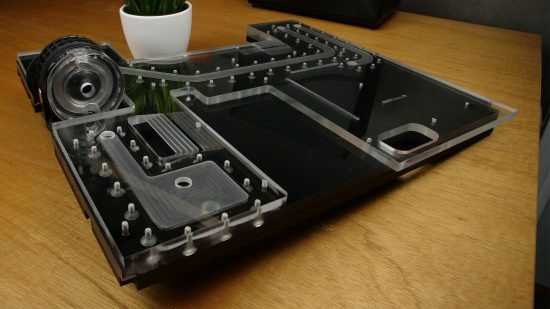
This frame needed to be placed into the case via the top, requiring me to only remove one panel in the case, minimizing the number of rivets I needed to drill out. Once the new internal frame was sorted, I went on to design the custom distro system for the build. The final step was the cable management plate that goes on top of the distro system.
I produced the new internal frame with the help of the company where I did my internship. The people there handled the laser cutting and bending of the 2mm steel for me, since I don’t have the tools for that work at home.
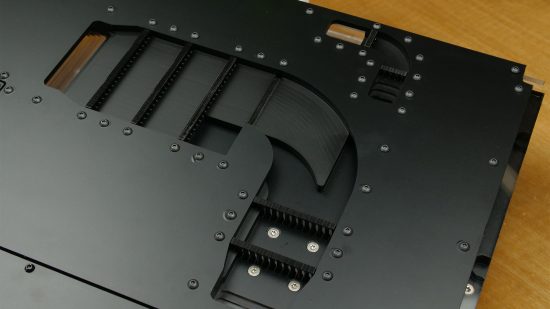
The custom distro and cable management plate was made with the help of a fellow Dutch case modder known as TheDutchmanModifies. He used his CNC machine to mill out all the liquid channels, O-ring grooves and mounting holes in the 10mm and 5mm sheets of acrylic that I used.
In total, the custom distro and cable management plate is 35mm thick and built up out of three layers of 10mm acrylic, with one final 5mm acrylic plate that’s wrapped in black vinyl to create a clean aesthetic.
The cable-tidying work is immaculate. How did you go about planning it?
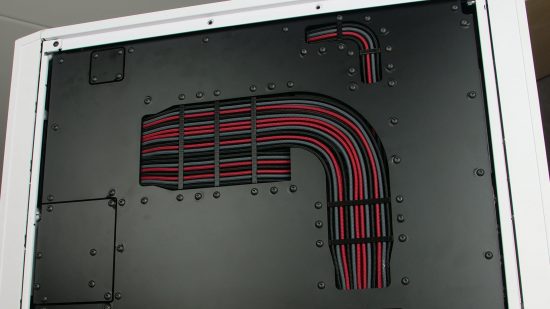
Jeroen: As you can see from the pictures, I do like clean cable management. What’s neat about having almost all of the build drawn in CAD is that it gives you a lot of freedom to explore multiple options and ideas before you fully commit to one.
At first I bought some sleeved cable samples, so I could figure out what kind of bending radius could be achieved, and I then combined this knowledge with the available space known from the CAD model to work out the best method for cable routing. I could then design my own cable combs and have them 3D printed by my college.
Some people with a keen eye might have spotted that there’s a cable route towards the back end of the case, but the PSU isn’t located there – it has its own space directly under the GPU and between the radiators. This is because I couldn’t make a bend tight enough with the sleeved cables, and I also needed a space to create a pocket to put all the splitter cables for the fans and RGB lighting – this is located in the central area behind the motherboard tray.
Custom PC: The motherboard ports are hidden inside the case. How do you access them?
Jeroen: With the Meshify S2, it’s really easy to take out the mesh from the front panels – it’s also possible to run the I/O cables into the case through a slotted hole at the bottom of the back front panel. From there onwards, it’s just like a regular PC when it comes to plugging cables into the motherboard and graphics card. You just have to make sure you do it when the PC is off, so your hands don’t hit any spinning fans.
Custom PC: How did you go about planning and installing the water-cooling loop?
Jeroen: Like most of this build, the planning for the water-cooling loop was done in CAD. This gave me time to think about how to assemble it all before building it. First, I mounted the custom distro plate on the back side of the motherboard tray (with the pump already attached).
Secondly, the motherboard and graphics card were installed, and connected with 16mm PEGT tubing. I bent these tubes based on the dimensions from the 3D model. The third and final step was mounting the radiators and fans, then connecting the tubes between the distro plate and radiators.
Custom PC: What type and color of coolant did you use?
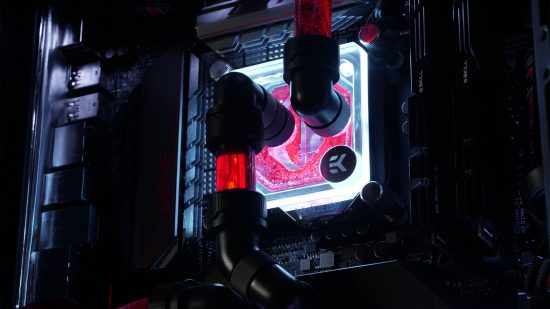
Jeroen: The coolant in the build is EK-CryoFuel Blood Red. I chose this, as I thought it would be a great match with the red accents on the heatsink of the Asus ROG Maximus VIII Gene board. The white lights make the red color pop inside the blocks, tubes and distro plate as well.
Custom PC: What sort of peak CPU and GPU temperatures do you get with two 360mm radiators?
Jeroen: Both the CPU and GPU max out at 60°C with a 20°C ambient room temperature. You could say this is on the warm side but I like my systems to be really quiet. The radiator fans are fixed at 550rpm, the top exhaust fans are fixed at 750rpm and the D5 pump runs at 50 percent (PWM) power.
Custom PC: What specs did you choose?
Jeroen: I was quite happy with the specs I had at the time – a Core i5-6600K, an ATX Z170 motherboard, 16GB of 2400MHz memory, a 500GB SATA SSD and a Gigabyte GeForce GTX 1080 Ti card. Still, some of these specs needed to change because of what I wanted to achieve with the build.
The Core i5 processor was swapped out for a Core i7-6700K, the ATX motherboard was swapped for a micro-ATX board to save space, the 16GB of 2400MHz memory was updated to 3200MHz, I changed the graphics card to an Nvidia GeForce GTX 1080 Ti Founders Edition and the 500GB SATA SSD was swapped for an M.2 one.
Most of the changes were made to save some well-needed space during the build. I bought the CPU, motherboard, RAM and GPU second-hand to save money, but they all still work great now.
Custom PC: Did you come across any difficulties?
Jeroen: Generally, the one problem was space. Since all the gear needed to fit inside the shell of the Meshify S2, there was only a set amount of room. This created some headaches during the design process, but nothing so big that it couldn’t be overcome with a good night’s sleep and a fresh look the next day.
Custom PC: How long did it take you to complete this build?
Jeroen: It took one and a half years in total, split into two phases for the build. The first phase was the design process, which ran from April 2019 until January 2020. This was the first time I’d done a full design in CAD first before building, and it was also my first custom loop.
As a result, I didn’t set a deadline for when I wanted to have the design finished, but instead decided to take all the time I needed. From January 2020 onwards it was time for building. Unfortunately, the whole world shut down soon after that, as we all know, but the build was finally finished mid-September 2020.
Custom PC: Are you happy with the result, or do you wish you’d done some of it differently now?
Jeroen: I’d paint the final cover panel on the back instead of using vinyl wrap, so I could create a smoother finish at the mounting points, but that’s it.
Tweaked Meshify S2 specs:
- CPU: Intel Core i7-6700K running at 4.2GHz on all cores
- Case: Fractal Design Meshify S2 White TG
- GPU: Nvidia GeForce GTX 1080 Ti Founders Edition
- Storage: 1TB Samsung 970 Evo
- Memory: 16GB G.Skill Trident Z 3200MHz CL16
- Motherboard: Asus ROG Z170 Maximus VIII Gene
- PSU: Fractal Design Ion+ 760P
- Cooling: Custom water-cooling loop, featuring the following components: EK-Quantum Velocity RGB Nickel + Plexi CPU waterblock, EK-FC GeForce GTX FE RGB Nickel GPU waterblock, 2 x EK-CoolStream SE 360 radiators, EK Classic Series 90-degree fittings and extenders, EK-Quantum 16mm HDC Quantum Torque fittings, EK-XTOP Revo D5 PWM Plexi pump, 6 x Noiseblocker NB-eLoop X B12-PS ARGB fans
The PC builder

- Name: Jeroen ter Horst
- Age: 24
- Occupation: Electrical engineer student with a part-time job at a company that makes X-ray imaging components
- Location: Aalten, The Netherlands
- Main uses for PC: Playing games, designing new builds in CAD and watching Twitch and YouTube
- Likes: Formula 1
- Dislikes: Nothing
That’s some real commitment to moving your motherboard, Jeroen – we’re amazed by the immaculate cable tidying and the custom distro plate. If you’re new to the world of water-cooling and want to have go yourself, then make sure you also read our full guide on how to water-cool your PC.
Check out our best gaming setups guide if you want to see more outstanding custom PCs, and if you’ve built an extraordinary PC of any description yourself, then we’d love to see it! Join our Facebook group if you’d like to submit your own work for consideration.
