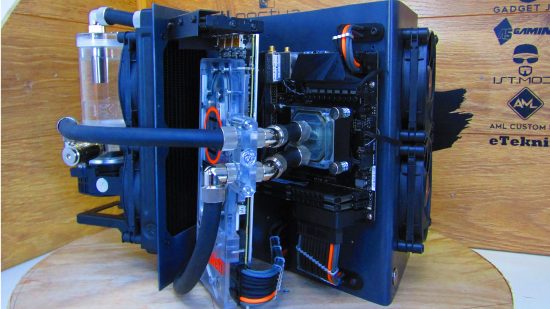
We’ve never seen a mini-ITX gaming PC quite like this one before. It features a custom open-air case made from steel panels that modder Michael Sheppard cut and bent to shape. It also features a full-size AMD gaming GPU and a custom water-cooling system.
Custom PC has been celebrating the best PC builds since 2003, and our Facebook group has over 300,000 members. We’ve seen many custom gaming PCs, from mods based on existing case designs to scratch builds. Here we talk to Michael about how he created this outlandish open-air mini-ITX system.
Custom PC: What inspired you to build this mini open-air PC, and what were your design goals?
Michael: The idea was to create an iteration of my previous project, Project Z. My main goal was to downsize the footprint using a mini-ITX motherboard and a full-sized ATX power supply, as well as making a few design improvements to make it more user-friendly.
Custom PC: Where did the design process start, and how did you go about planning this build?
Michael: Pen and paper is always my first choice when starting any project – it makes it so easy to quickly design and brainstorm new ideas. However, I would like to try digital drawing and 3D designing a little more, as I now have access to a small CNC machine.
As I had the original micro-ATX Project Z case at hand, I went straight to marking out locations for various components and marking holes for cables straight onto the case using a marker pen – this made it easier for me to visualize the end result.
Custom PC: That’s some lovely neat cabling! How did you go about planning the routes for the cables and tubing?
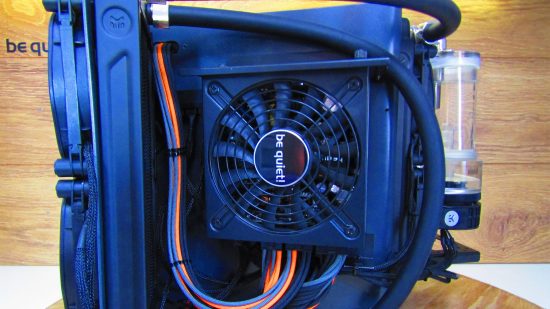
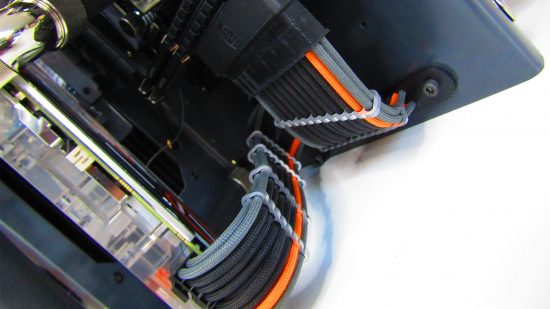
Michael: Cables are always an important aspect for me – they can make or break any system. I design and custom-make all my cables, as well as ones for local modders in the industry – this gives me a little experience with what does and doesn’t work within a system. The cable routes were dictated by the location of the motherboard and wherever was convenient – I just went with what made sense.
I also CNC-cut some panel-mounted combs – I wanted this upgrade, as in the last build, I fed the cables through each hole in the chassis. This new way was much tidier and gave me the ability to remove the cables in one go for easy maintenance or upgrades.
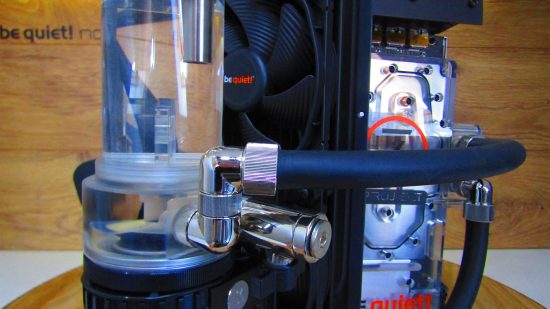
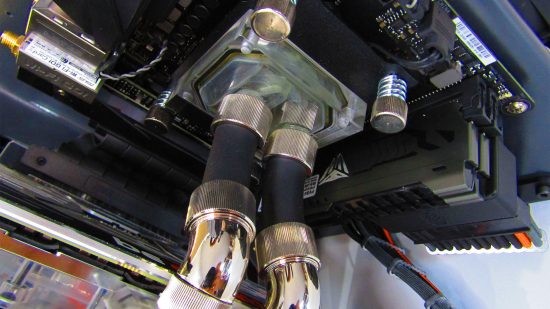
The runs of water-cooling tubing required a lot of visualizing, planning and sketching. I knew I had to take the tubing through the case rather than around it or over the top, and it made sense to put the radiator on the inside, reducing the footprint by 30mm. In the end, it made more sense to use a parallel loop, which gave the system a much cleaner and tidier look.
Custom PC: How did you get the custom logo design onto the GPU waterblock?
Michael: I purchased a vinyl cutter last year, which has opened up a whole world when it comes to making modifications. I’d spent a lot of money on stencils and stickers for previous builds, so it made sense to buy a vinyl cutter, as it would give me so much freedom with personalizing builds in the future.
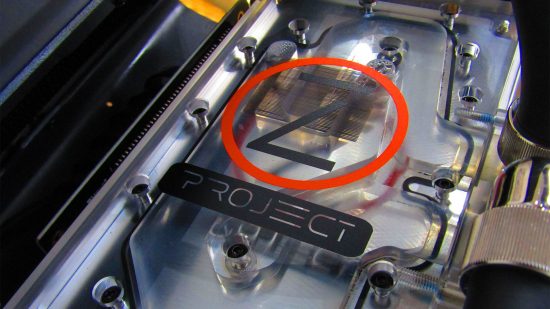
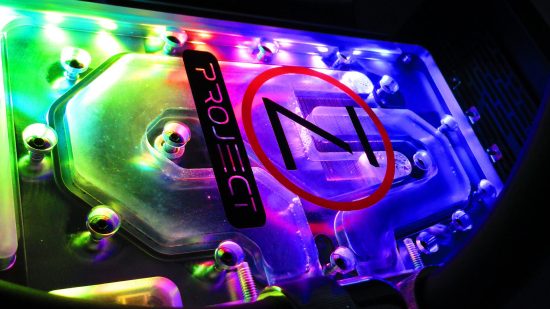
I went about making a backplate and waterblock decals by firstly taking a picture of my graphics card, in this case an AMD Radeon RX Vega 64. I then transferred the pictures to the software and cropped it to the exact measurements in physical form.
I then pretty much based my design around the backplate, trying to incorporate a similar look to the Star Wars light-speed stripe. I wanted to keep a factory-made look, as painting this lovely aluminum felt like a crime. I also put the Z and be quiet! logos on the top, and carried on the line and dash effect throughout the design.
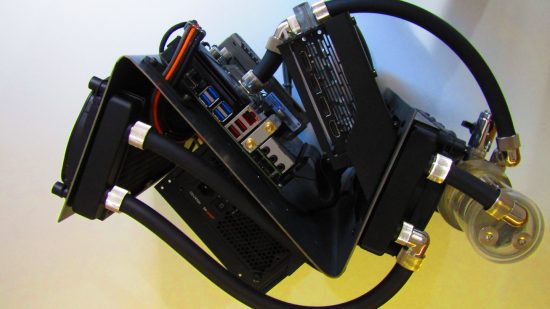
Custom PC: Why did you use soft black tubing and clear coolant?
Michael: The tubing is 16/10mm ZMT by EK Water Blocks, and this is the first soft-tubing build I’ve ever done. I chose soft tubing, as it’s a lot easier to manipulate around bends, which is definitely needed on a system this shape. The coolant was a toss-up between using clear or pastel orange. I went with clear in the end, as I thought it would look better with the RGB waterblocks.
Tell us about the build process.
Michael: I went with 2mm-thick steel sheet that I’d recycled from the last (Project Z) build. Basically, it involved me cutting 30 percent off the top, cutting off the pre-bent radiator side and rebending it to make it shorter. The end result made the case 6 x 10 x 12in (W x D x H).
I wanted to improve the location of the I/O panel by putting it on the top – in the original Project Z, the panel was too close to my desk, resulting in me having to use angled adaptors to plug in a mouse and keyboard.
The second major design improvement was adding holes for fan airflow – in the last build, the radiators were mounted on standoffs but they still didn’t get enough air. This whole process was done using an angle grinder, a small cutting disc on a Dremel, hacksaw blades, files and 240-grit sandpaper just to smooth out those lines.
Custom PC: Did you come across any difficulties?
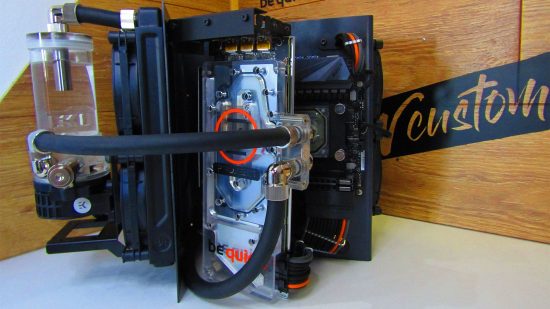
Michael: The main issue was that I didn’t quite have room to mount the graphics card in the way I originally planned, which was with no riser cable and going straight into the PCIe slot. I went through several new designs in my head and resorted to cutting down a PCIe riser bracket several times to reach its final form.
I knew the fit was going to be super-tight, so I ordered the smallest riser I could find, which was a Phanteks 150mm model, and then thought about how I was going to mount the bracket above the radiator. The idea was to show off the backplate and have it parallel with the front 240mm radiator, but this location was too tight for the riser cable, so I moved to plan B.
This involved using 23 x 43mm angled steel – I cut into the wider side at a 45-degree angle and bent in the shorter side to square up against it. I then took it to my local garage and put some welds in the join to add some extra strength. After that, it was a case of adding the PCIe riser bracket to that.
I think if the case had been 1in longer then the original plan would have worked fine. However, if I had made the case longer, I don’t think I could have made a parallel loop, which I think is one of the cleanest-looking aspects of the final build.
Custom PC: How many radiators and fans did you use?
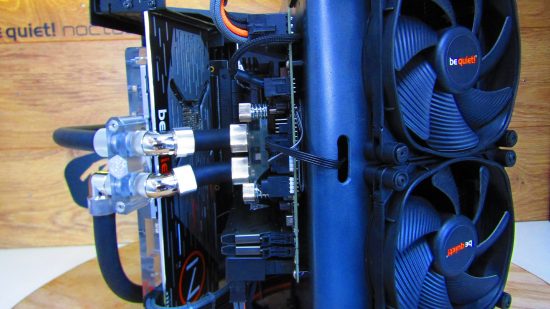
Michael: There are two 240mm EK Classic SE radiators – one on the inside rear and the other on the front outside, loaded with four be quiet! Silent Wings 3 fans. Both radiators are placed at the end of the loop, pulling air away, although airflow isn’t really an issue with the open-case design anyway.
Custom PC: How are the PSU and reservoir mounted on the main chassis?
Michael: The power supply is mounted using an ATX-to-SFX bracket, again attached to a piece of 23 x 43mm angled steel. The intention was to house a standard ATX power supply measuring up to 150mm, but with the ability to possibly go up to 165mm. The reservoir uses the standard EKWB UNI pump bracket for 120mm fan mounts. That’s then mounted to the radiator through the fans, with the vertical D5 pump clamp housing the reservoir.
Custom PC: What are the CPU and GPU temperatures like?
Michael: I’ve only been doing some 2,560 x 1,440 gaming since I completed this project, but they’re much better since the rebuild from my last mod, thanks to better airflow and better paste application. The maximum temperature of the CPU is 45°C, and the GPU temperature is lower – it’s generally in the high 30s. This is quite a surprise when you consider that the Radeon Vega 64 GPU can pull around 300W – the Bitspower waterblock does a fantastic job here.
Custom PC: How long did the build process take?
Michael: I started in mid-March and it was completed in early April. I did aim to for it to be started and finished in March, but lockdown and family life caused a few delays.
Custom PC: Are you completely happy with the end result, or do you wish you’d done some of it differently in retrospect?
Michael: I’m really over the moon with the end result. There are some revisions I’d like to make, such as extending the footprint to house the radiator on the inside and have the graphics card not plugged into a riser cable.
The idea is to be able to make these systems and fulfill custom orders from a single piece of aluminum and include custom cables. A VRM waterblock would also be a good addition or a fan over that area for cooling – it does get warm after long sessions.
Project Mini Z specs:
- CPU: AMD Ryzen 5 3600
- GPU: AMD Radeon RX Vega 64
- Storage: Crucial P1 NVMe 512GB SSD
- Memory: Patriot Viper Steel 3600MHz
- Motherboard: Asus Strix B450i AM4
- PSU: be quiet! SFX-L 600W
- Cooling: EKWB Velocity RGB CPU Block, EKWB Quantum Kinetic D5 Pump and Reservoir, 2 x EKWB 240 SE Classic Radiators, EKWB ZMT 16/10mm tubing, 14 x 16/10mm EKWB silver nickel fittings, 2 x 45-degree rotary silver nickel fittings, 4 x 90-degree rotary silver nickel fittings, Bitspower full-cover nickel/acrylic waterblock for Vega 56/64, 4 x be quiet! Silent Wings 3 fans
The PC builder

- Name: Michael Sheppard
- Age: 31
- Occupation: Chef
- Location: Sunderland
- Main uses for PC: Gaming, video editing and CNC design
- Likes: Food, PC, gaming and YouTube
- Dislikes: Sitting still and relaxing (time is money and life’s too short)
This really is a mini-ITX PC with a difference, Michael – you’ve thought outside the box in more ways than one and created a really powerful system with a small footprint – nice work.
Check out our best gaming setups guide if you want to see more outstanding custom PCs, and if you’ve built an extraordinary PC of any description yourself, then we’d love to see it! Join our Facebook group if you’d like to submit your own work for consideration.
