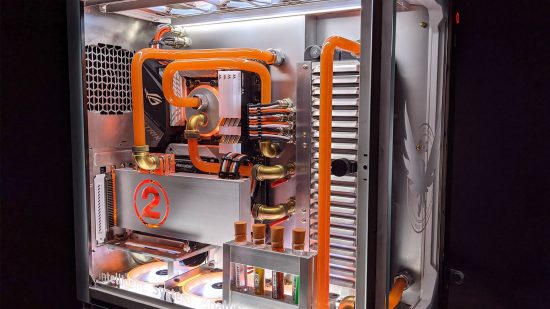
This water-cooled gaming PC has loads of custom details, including modified CPU and GPU waterblocks, a louvered panel on the radiator and some quality etching work. After sinking over 1,000 hours into The Division, Andy Makin built this system of two halves, inspired by the game’s Intelligent System Analytic Computer concept – it’s called Project ISAC.
Thanks to our rapidly growing PC building Facebook page, we’ve seen many custom gaming PCs, from mods based on existing case designs to scratch PC builds. You can even submit yours for consideration right here. Now let’s talk to Andy about how he made this gaming PC based on The Division 2.
PCGamesN: What was the inspiration behind Project ISAC?
Andy: I had applied to participate in the Thermaltake UK 2020 Case Mod Challenge, and after getting through the initial vetting, I was asked to submit a case mod design. After watching The Division’s ‘State of the Game’ weekly update stream, I was writing the recap notes for my clan’s Discord when it dawned on me that the Riing Quad fans we’d been given for the competition could be made to look like the ISAC ring in The Division and it just snowballed from there.
Having spent over 1,000 hours playing The Division, it seemed a fitting tribute to a game that had helped me to get through a really difficult year, after suffering complications following hernia surgery.
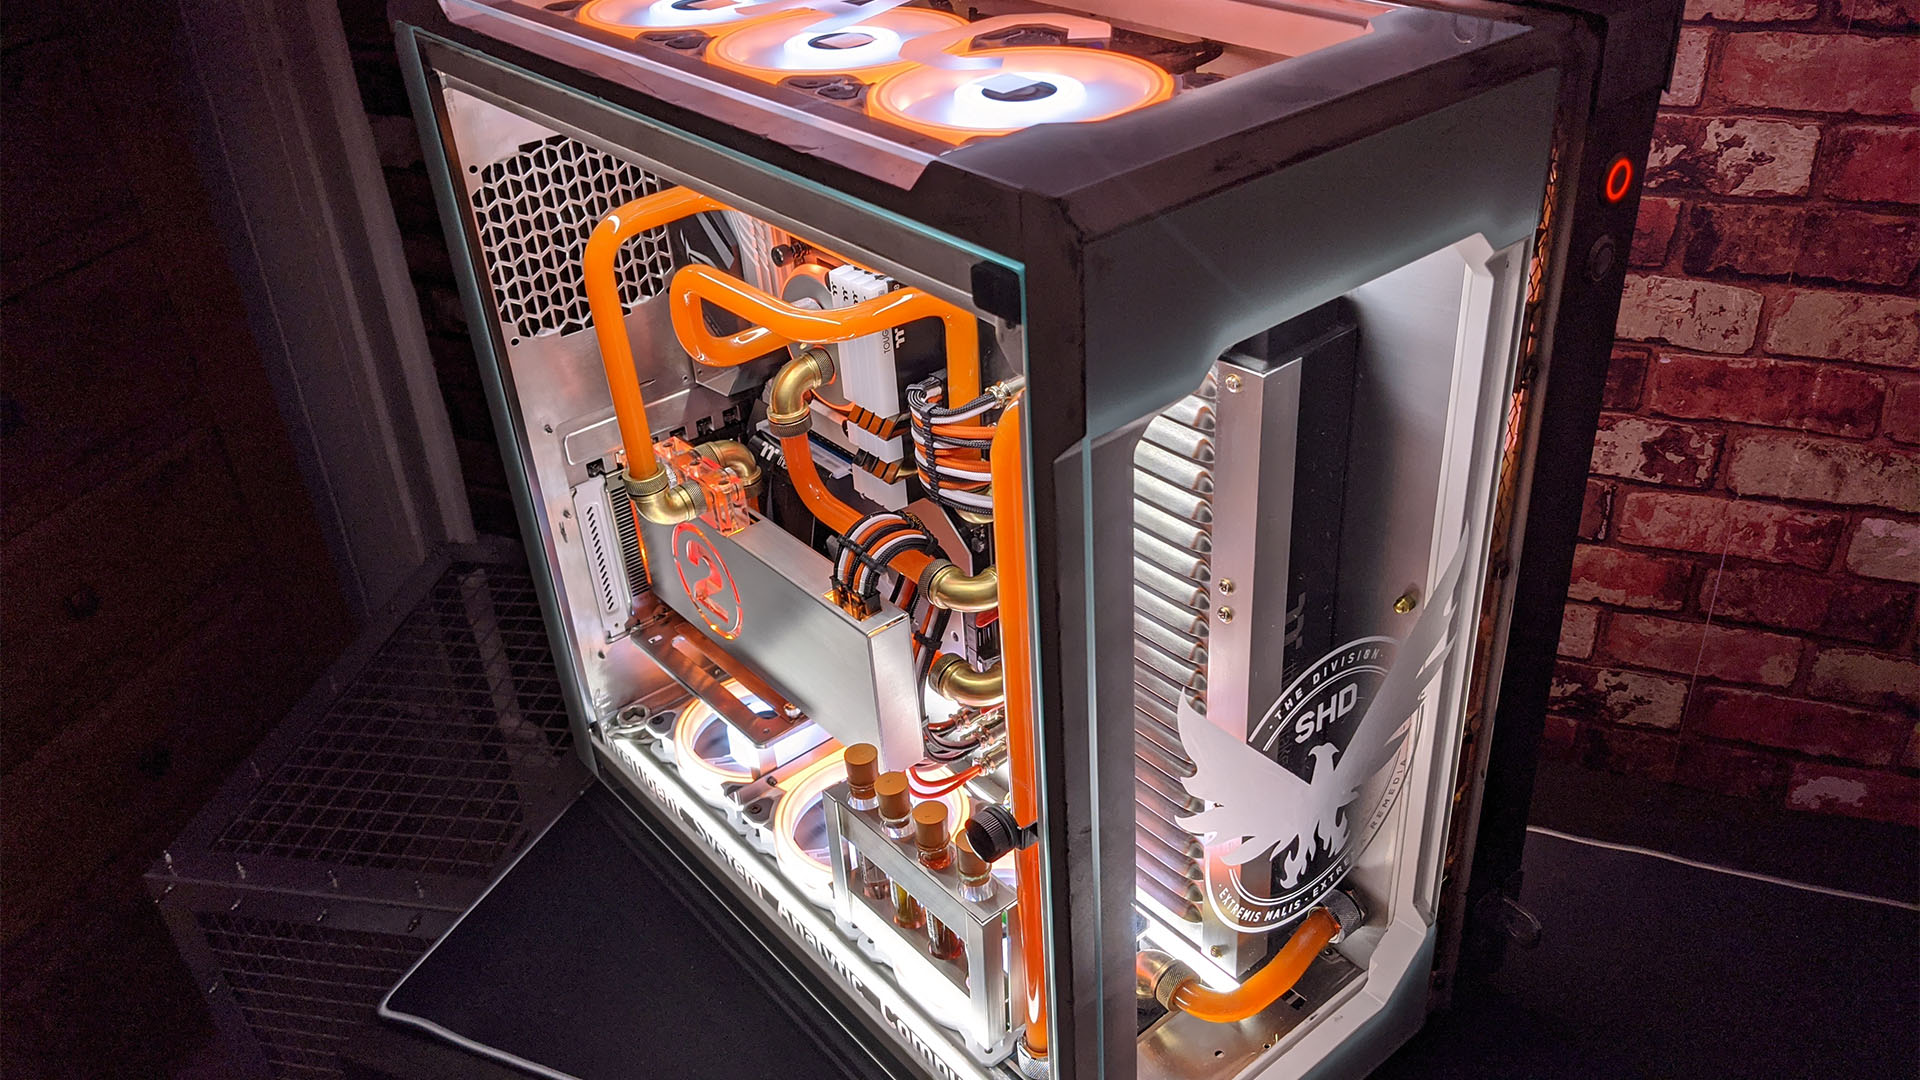
In The Division, ISAC (Intelligent System Analytic Computer) is a highly advanced artificial intelligence entity available to all active Division agents equipped with an SHD Tech transceiver. The transceiver, which is worn by agents on their shoulders, has an orange LED ring on it when activated, and it’s a prominent design feature throughout the game.
What were your design cues?
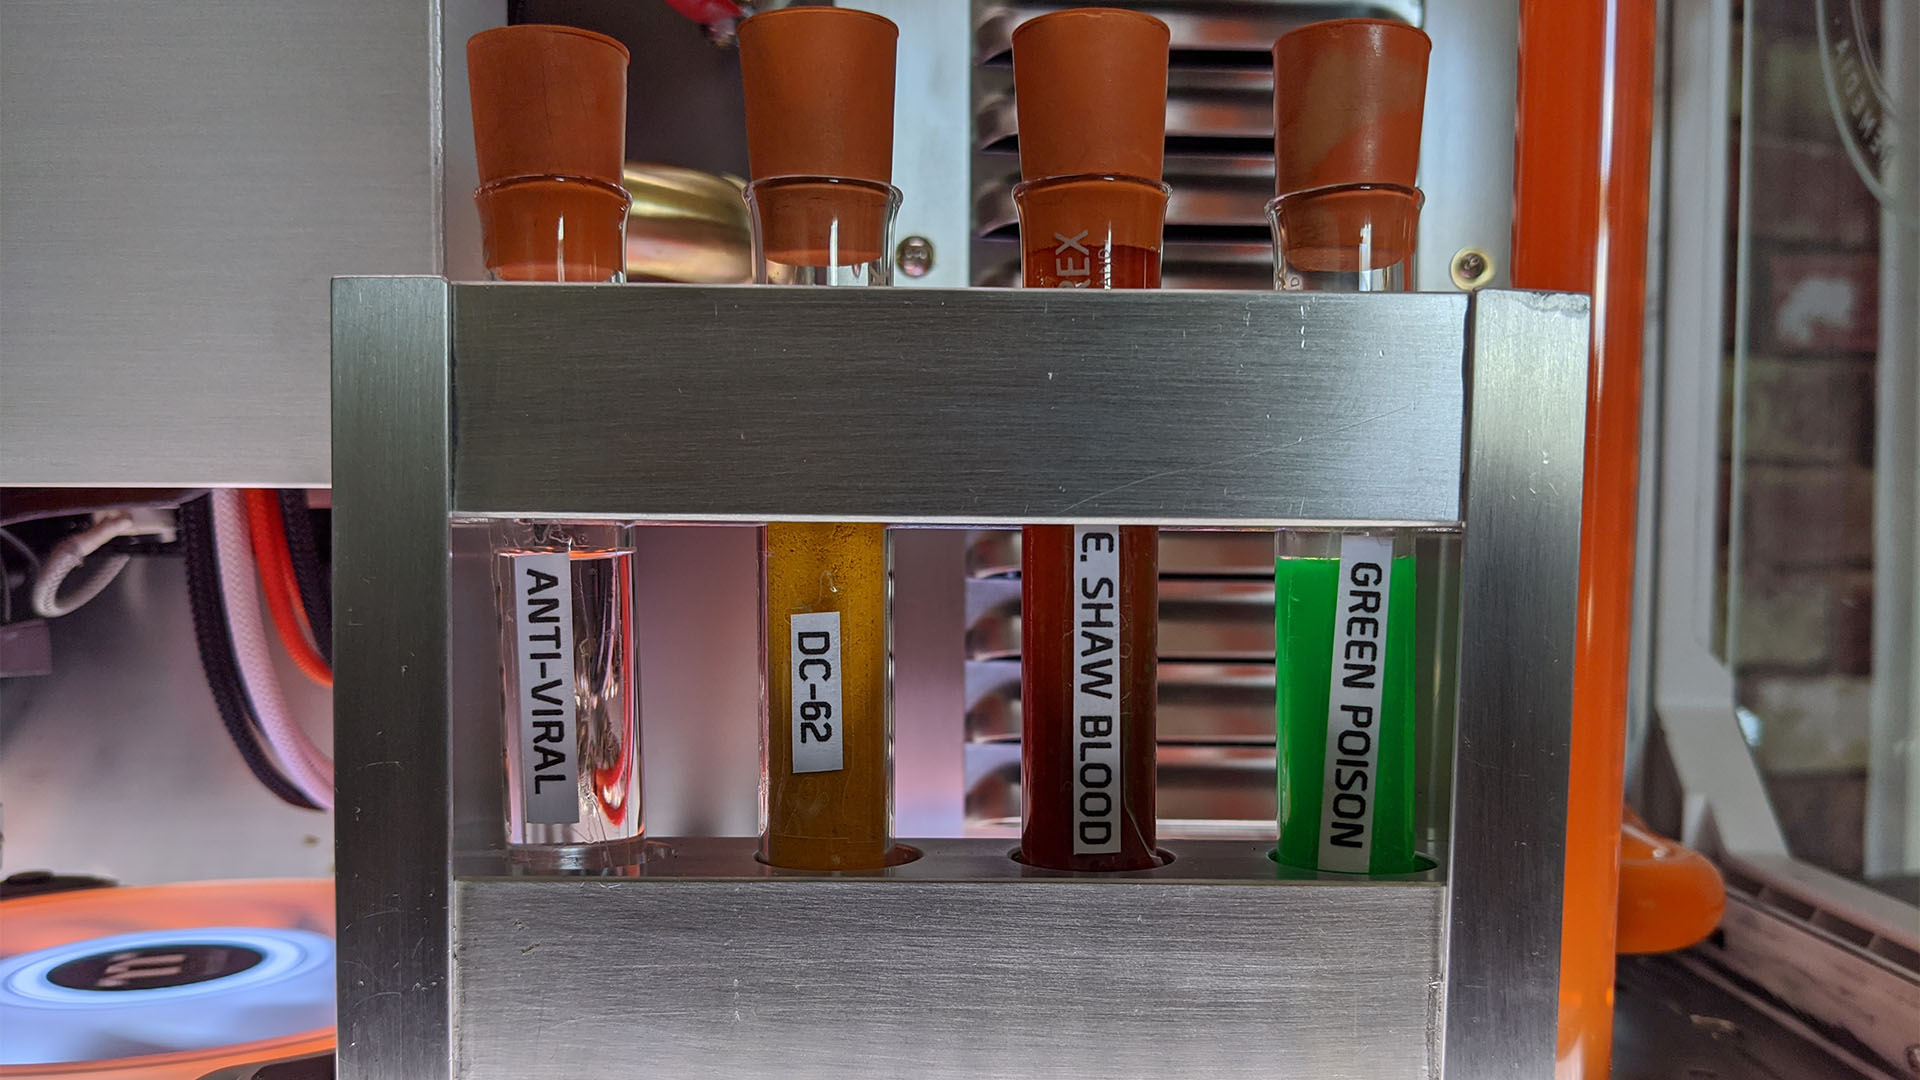
The general idea was that it would be a mobile lab, since a lot of the second Division game is based around finding a cure for the Green Poison virus. Being well into a global catastrophe that has brought down law and order, the exterior would be beaten up, damaged, dirty and rusted up, which would carry through into the rear chamber of the case for a boiler room feel.
Then the front chamber of the case would be much cleaner, like
a lab, with bare metal finishes and the water-cooling tubes running around like caricature chemistry experiments.
How did you mod the GPU waterblock?
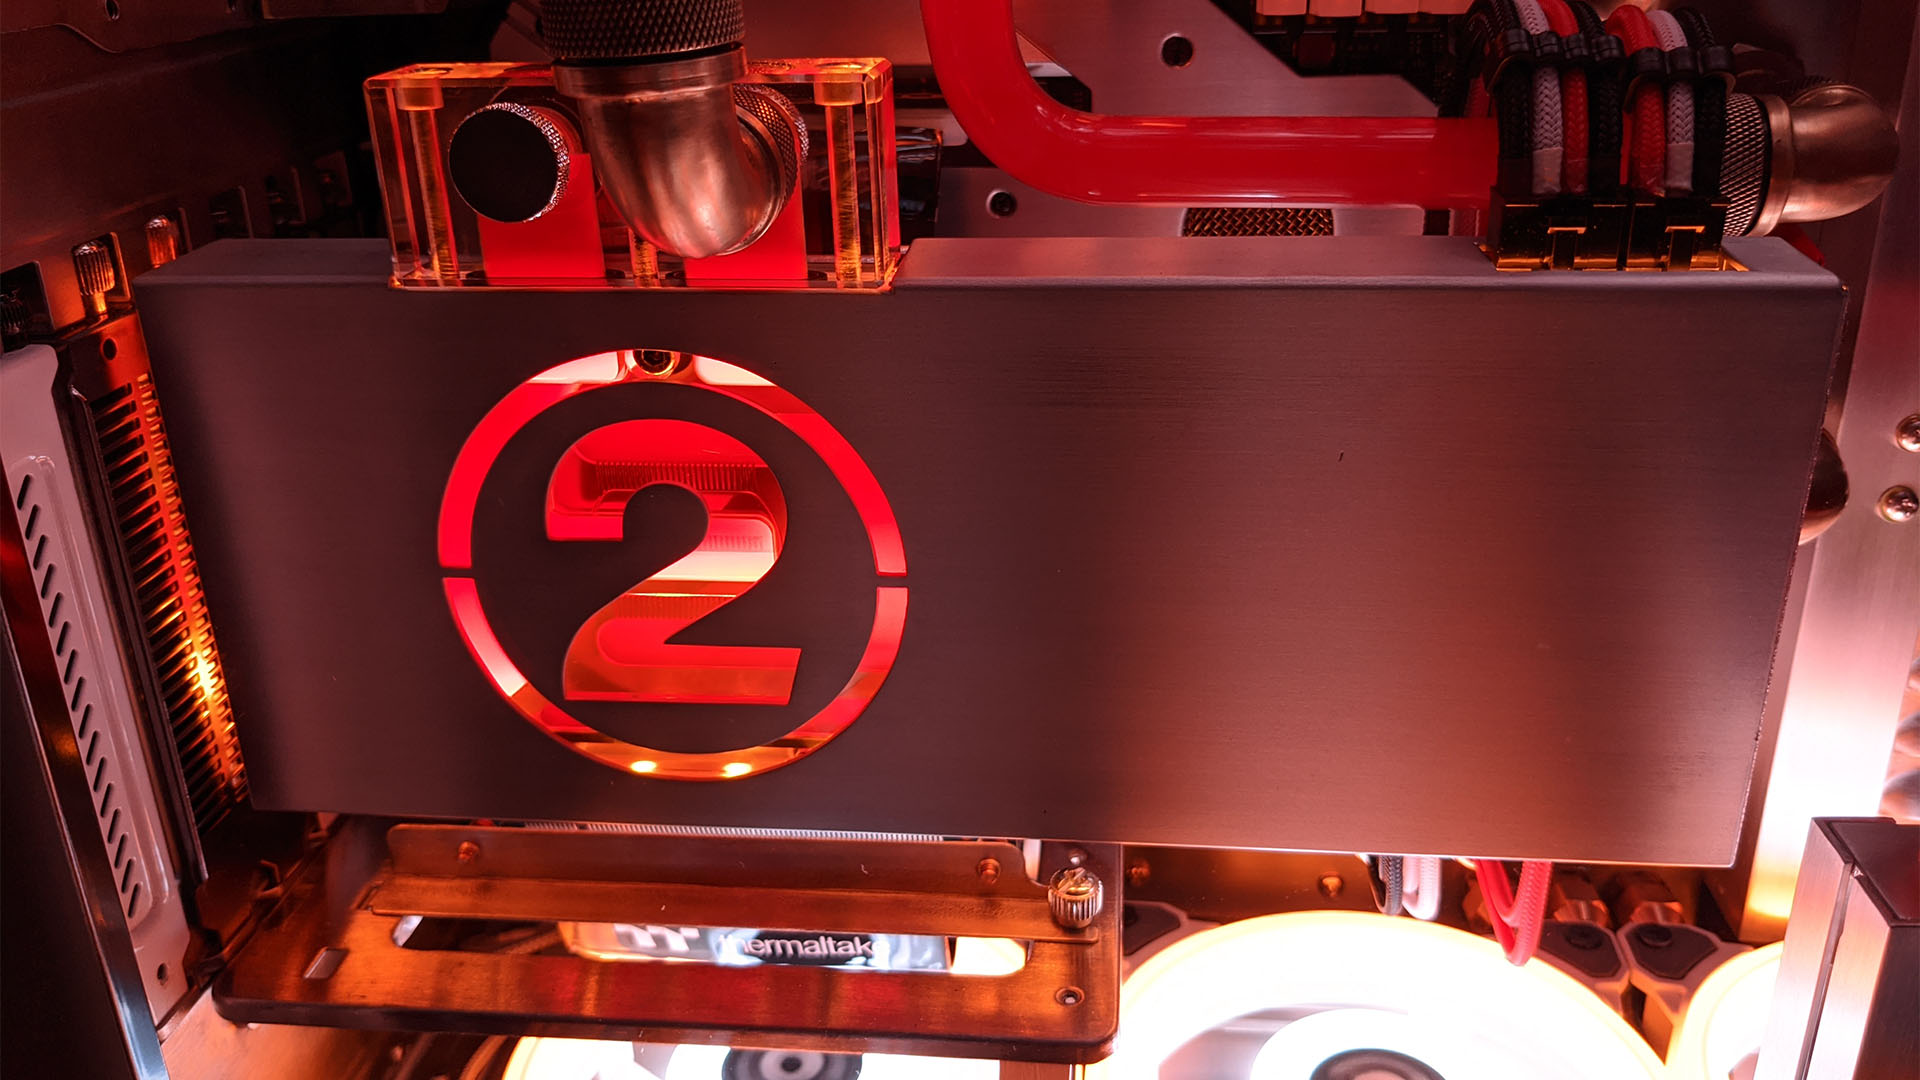
It’s a Thermaltake Pacific V-RX 5700 block that we were all given for the competition, which has a normal nickel-plated coldplate with an acrylic top block. To get it to fit in with the theme of the main chamber, I made a shroud out of 2mm aluminum, from which I cut out the Division 2 logo over the jetplate and fins of the block.
This was done by hand, using a drill to make lots of holes and then filing out the rest. I also made a cover for the CPU block and motherboard, complete with a brass mesh-covered chipset vent, again made by hand from 2mm aluminum.
What’s the story behind the custom silver radiator vent?
I’ve long liked the aesthetics of louvered panels, and I knew one would look perfect in this environment with the industrial lab theme. I bought some vent covers and two sets of louvers, with the idea that I could cut them out, sit them on top of each other and cover the full length of the radiator.
They were brushed stainless steel, so they would look perfect. In reality, though, the stainless steel was really tough to cut and file, and the louvers made clamping and getting the cutting tools into the right places really difficult. A scroll saw or angle grinder would have made mincemeat of them, but it wasn’t so easy with just a jigsaw and a Dremel.
How did you achieve the brass pipe effect on the fittings?
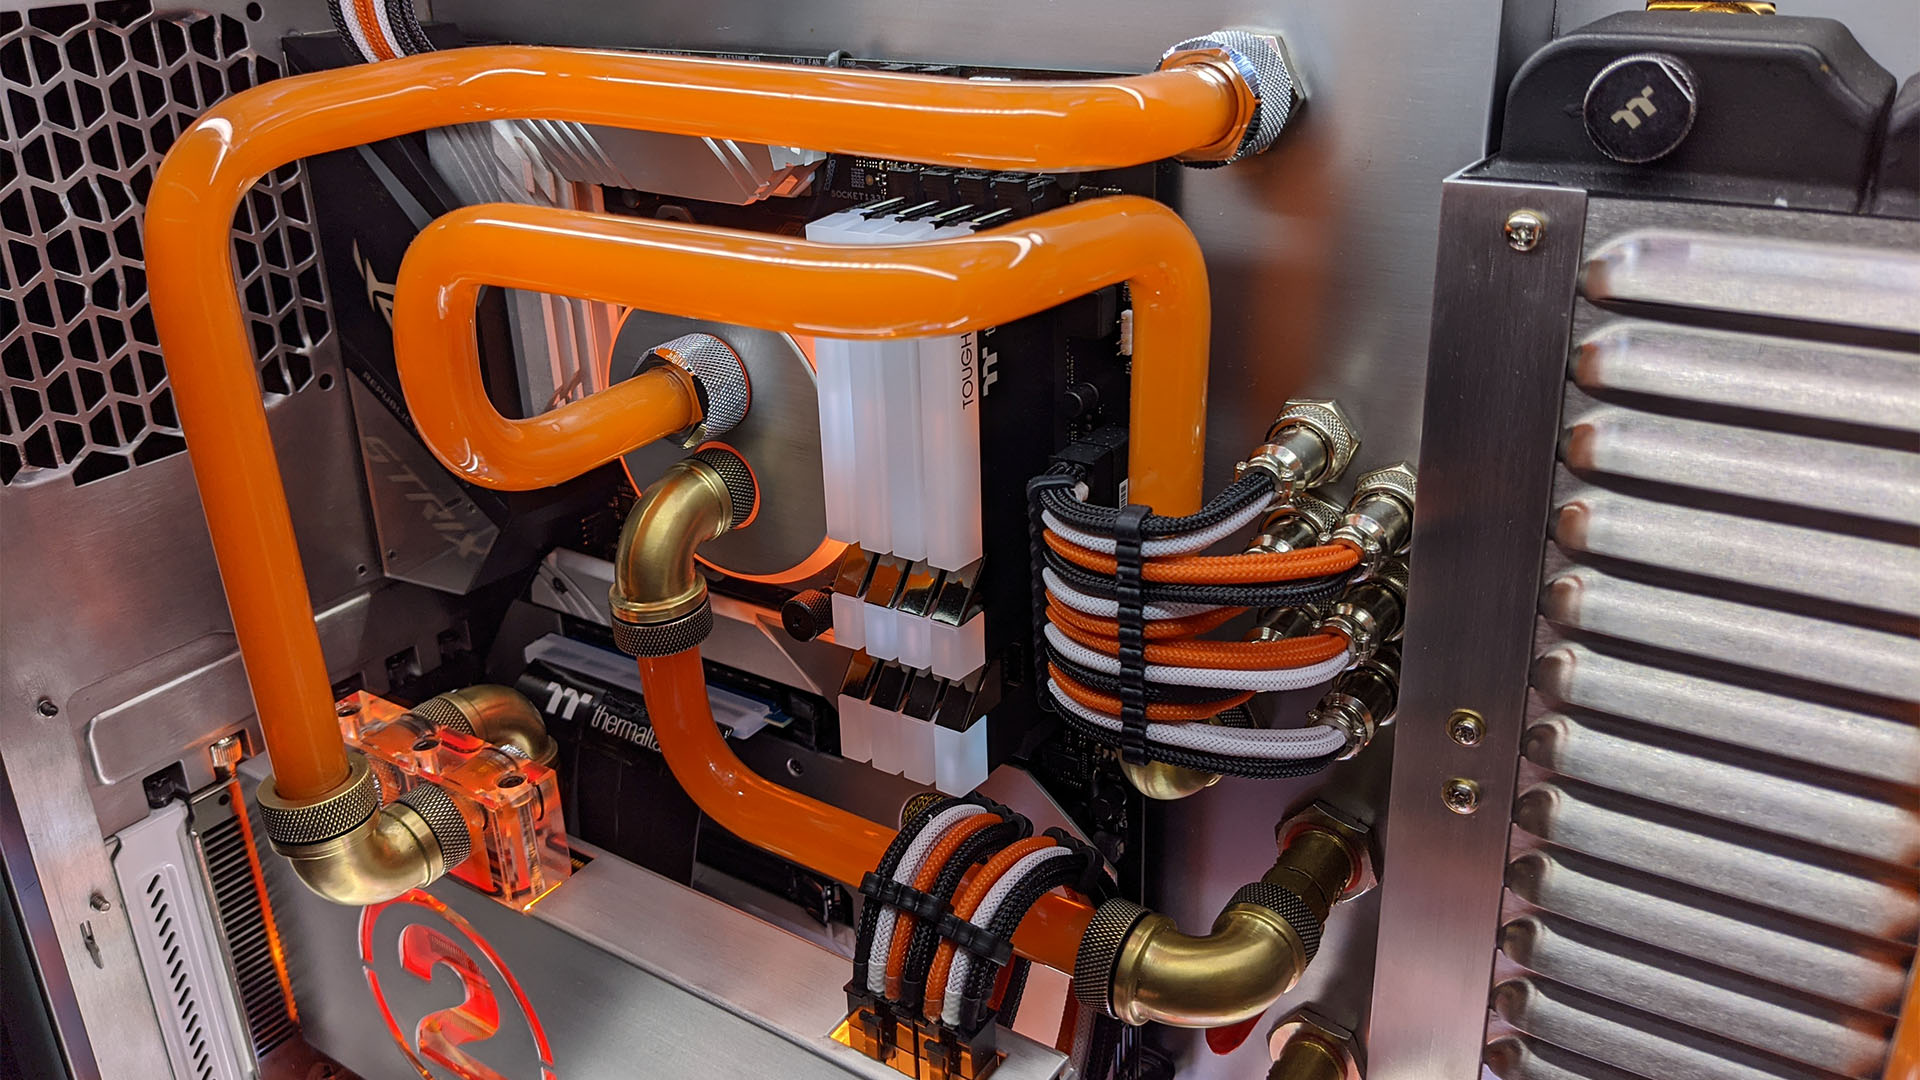
Thermaltake sent me some black fittings, but I knew that fittings were usually made of brass and, sure enough, a little scrape with a knife showed just that. I used some abrasive wheels on the Dremel to remove the paint, and then went back over them with a finer grit to smooth and even out the finish. They came out way better than I’d anticipated.
How did you plan the water-cooling loop?
I planned out how I wanted the piping to work in MS Paint (high tech or what?), but once I’d made the new steel motherboard tray/dividing wall and put all the gear where it would finally sit, it didn’t all line up quite like expected. I set all the pass-throughs for water cooling and wiring around the motherboard, and moved them around like chess pieces until I found an arrangement that worked practically and looked good.
I used 16mm OD PETG, which was supplied by Thermaltake. This was my first time using hardline tubing, and I thought it would be easy, but it’s a lot trickier than you imagine, especially when you’re putting a few bends in a single run. Even with a simple 90-degree bend, there’s definitely an art to it.
My first few were okay, but you could see a kind of pinch line where the bend started and ended because I wasn’t heating enough of the tube. Through a bit of trial and error I found I needed to heat 3-4″ of the tube to create a smooth, seamless bend.
I used a bending mandrel and another piece of tube to help measure where I would need to start a bend to get the correct spacing, and then I marked it with masking tape. I could then take it away, to heat, bend and cool. It took a while to nail the technique, and I ended up redoing most of the runs after getting a good system going.
What’s the story behind the metal connectors for the power cables?
The original design had the cables bunched and sleeved in steel braiding. However, when lockdown set in, my source of steel braiding dried up and I couldn’t find it anywhere. In my hunt for alternatives I found the aviator (or GX) connectors and I knew instantly that they were the answer.
They would look awesome, and allow me to separate the front and rear cables as I wanted. There would be clean color-coded sleeving around the front with the female connector, then cables that looked like dirty drain pipes going from the PSU to the Male bulkhead connector.
Working with them was quite tricky – both sides needed soldering and I was a soldering novice. It took me quite a long time to do all the soldering and sleeving, particularly because the nerve damage I have makes it impossible to sit at a desk or table for more than half an hour, so most of it was done on the sofa. I watched half a dozen or so tutorials on YouTube about how best to tackle these particular connectors; first putting solder into the connector cups, then tinning the wires, before heating them together to make a connection.
How did you plan the cable routing?
I’ve always tried to have really tidy cabling in my systems. After all, it’s the hardware you want to show off, right? All the non-power cables come through two holes behind the motherboard, then around the edge of the board and back into the main chamber, so there’s as little cabling on show as possible.
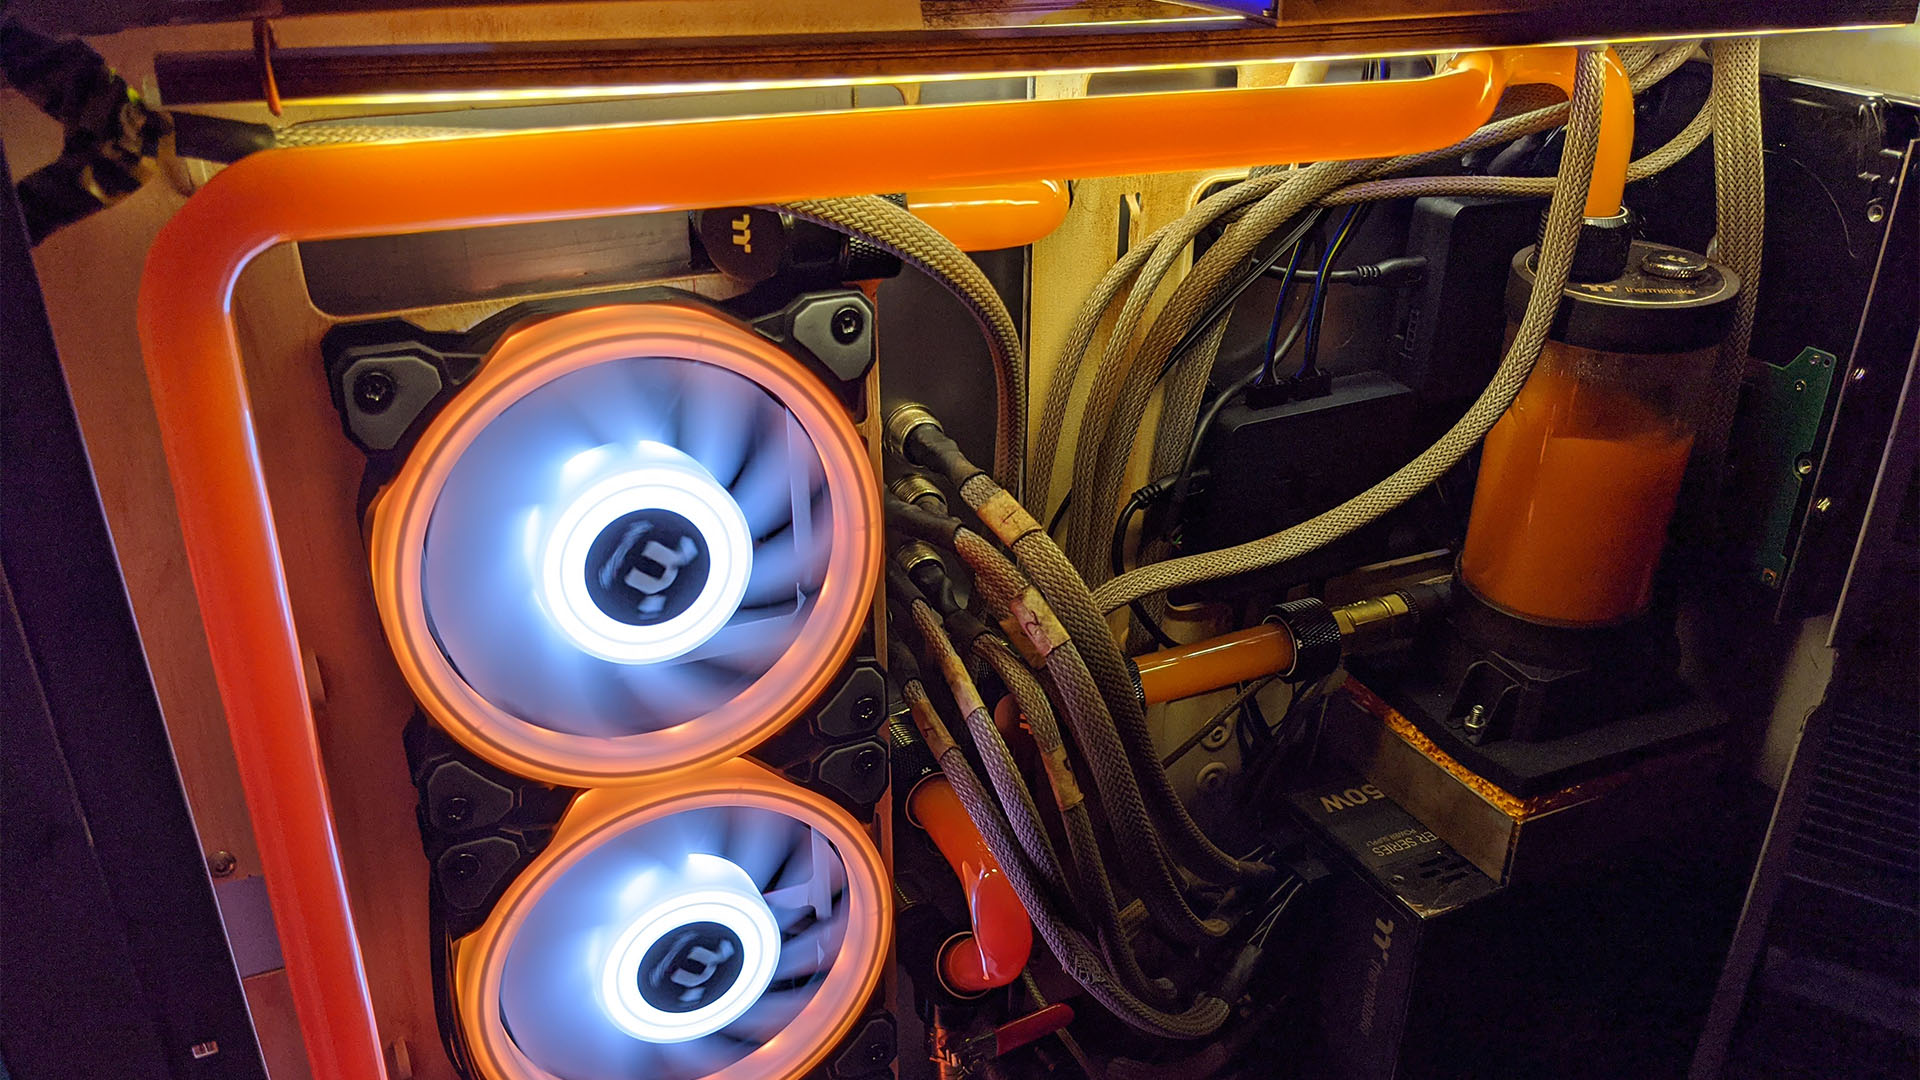
The cables for the two LED strips and three fans in the bottom of the case go through their own pass-through holes along the bottom of the new motherboard tray, which have brass plumbing fittings for a little extra bling.
However, in this mod it didn’t feel right to have pristine cabling in the dank dirty boiler room section, so I muddied and frayed it in places – there’s loose heatshrink and electrical tape – it looks nasty.
However, at the same time, all the cables flow to the right places in a reasonably ordered, natural-looking fashion, all without a cable tie in sight and that’s not by accident. All the wires were twisted and soldered in just the right way, so they hold their own once the bulkhead connector has been fastened into place.
How did you make the etchings on the panels?
They were made using Armour Etch cream, which turned out to be surprisingly easy (check out our guide on how to etch glass PC case panels to see how it’s done). The designs were simple enough – the text on the top and side panels required a little research into the font used in the game (Borda), and I just calculated the font size I needed, then I needed the SHD Emblem from the game for the front. I contacted Hamish Bode, the content lead on the game, and he couldn’t have been more helpful about getting a copy of it for me.
Once I had the designs, I looked around a few places that do custom vinyl stencils and found 4D Model Shop, which cut the vinyls and delivered them in just a couple of days.
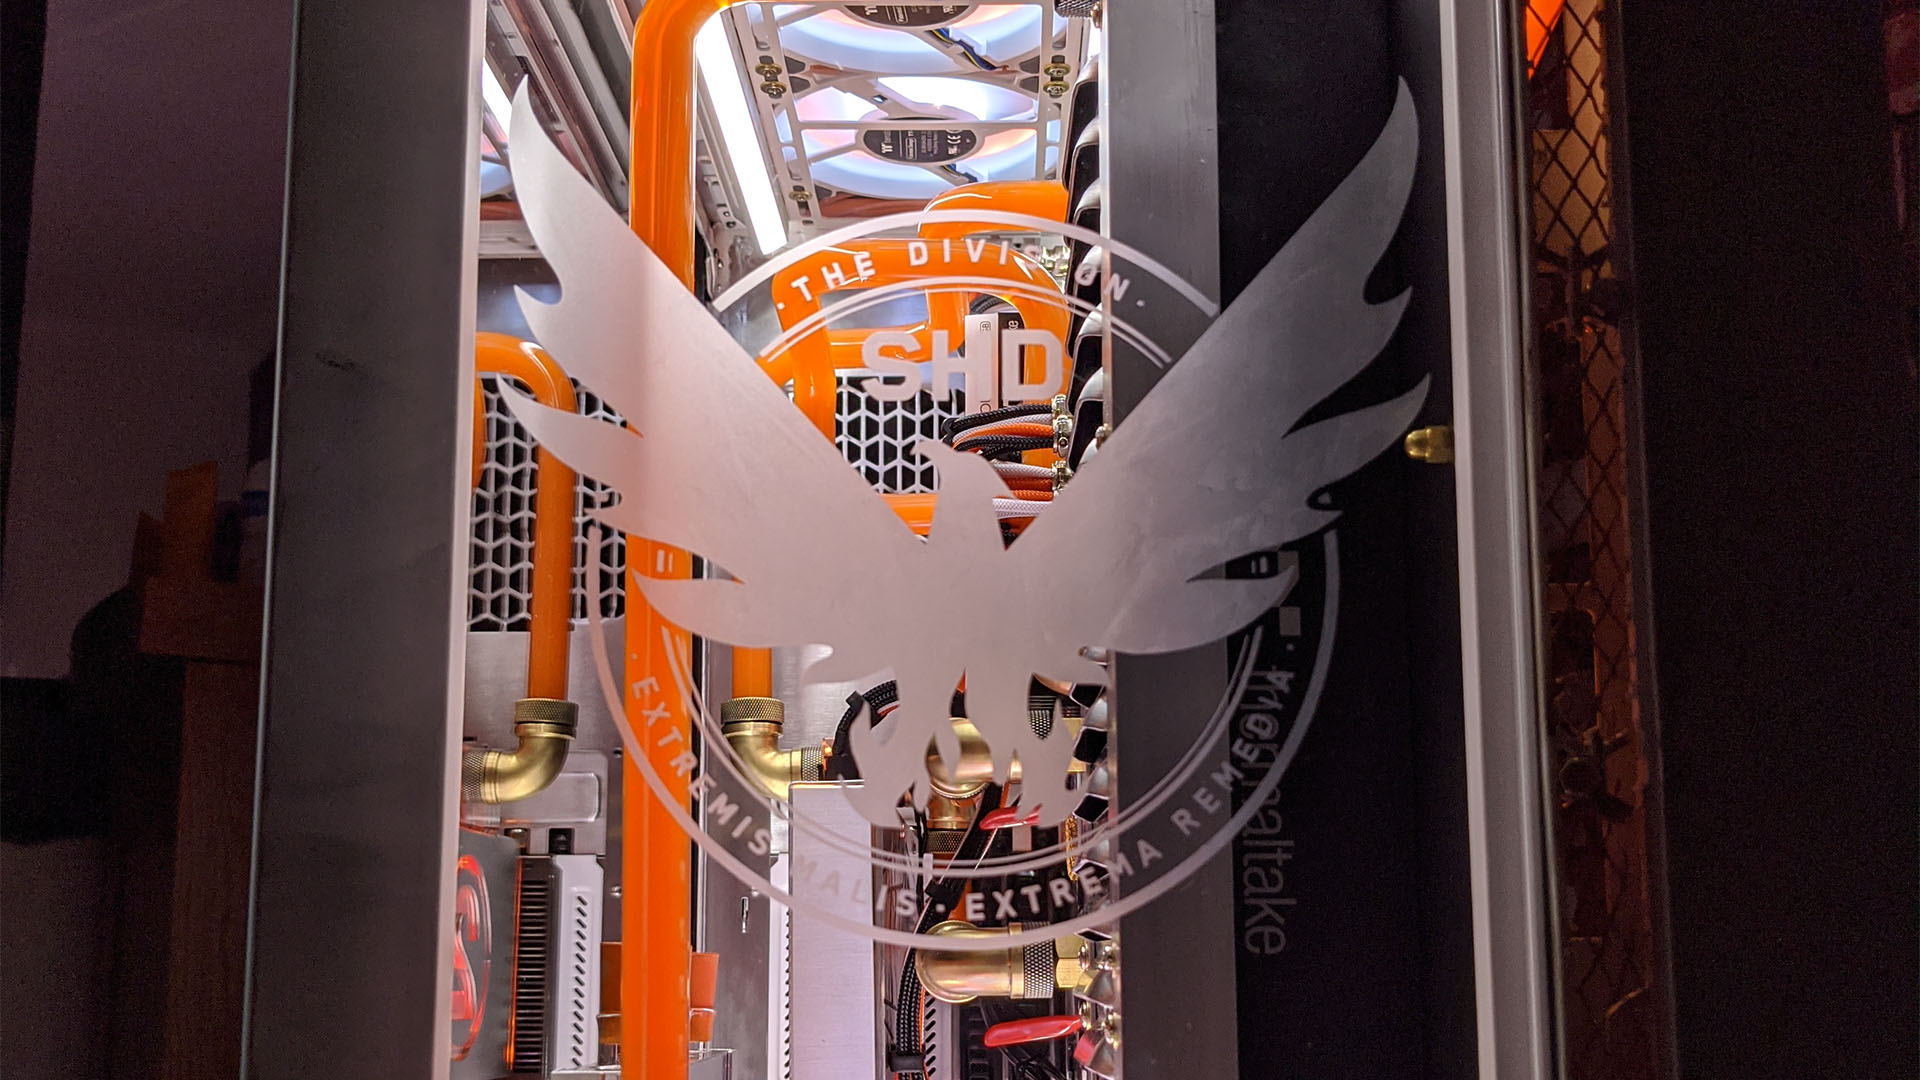
To do the etching, I first measured and marked where the stencil would go by placing some masking tape as a guide, with a couple of lines drawn on both the tape and stencil to get it in exactly the right spot. Once the stencil was stuck to the glass, I used a rubber caulk tool to push out any bubbles along the edges.
Then I just blobbed on a thick layer of the etching cream with a spatula, making sure it got into all the crevices. After a couple of minutes, I gave it a bit of a dab with a paintbrush for good measure, then removed the cream with a wet cloth after five minutes. I then rinsed it in warm water, and it came up really well when it was fully dried. I couldn’t believe how quick and easy it was.
Are you happy with the end result?
Yes. I’m really happy with how it came out. In all honesty, I never thought I was capable of building anything like this, and the reaction online has been amazing – it was even featured on The Division’s ‘State of the Game’ stream. There are a few little things that got left on the cutting room floor because I ran out of time.
I’d like to make an additional rear I/O cover, because I shifted it 1cm forward there’s a gap behind the motherboard, and the black plastic stock one looks a little out of place. The fan cables are also currently bare and rather long. I got some tinned metal braided sleeve to put on them, but when I came to do it, I hadn’t slept for three days, and my hands were crippled at that time, so I just had to abandon it and get the build completed.
Project ISAC The Division PC specs
- CPU: AMD Ryzen 7 3700X
- Case: Thermaltake View 51 Snow
- GPU: Asus Radeon RX 5700 8GB
- Storage: 500GB Seagate FireCuda 520 PCI-E 4 SSD, 14TB Seagate IronWolf Pro hard drive
- Memory: 32GB (4 x 8GB) Thermaltake Toughram RGB 3000MHz
- Motherboard: Asus ROG Strix X570-F Gaming
- PSU: Thermaltake Toughpower GF1 850W
- Cooling: Custom water-cooling loop, featuring the following Thermaltake parts: Pacific W4 ARGB CPU waterblock, Pacific V-RX 5700 Series Plus GPU waterblock, Pacific PR15-DDC pump/res combo, Pacific C360 radiator, Pacific CL360 radiator, Riing Quad 120mm fans (six white, three black), C-PRO 16mm OD fittings in chrome and black, Pacific Black 90 and 45-degree adaptors, Black 90-degree 16mm compression fitting, V-Tubler PETG Tube 16mm OD
Wow, so much work and love has gone into building this PC Andy. The glass etchings and waterblock modifications look great, but our favourite touch is the metal power connectors for the PSU cables – that’s a pig of a job, and it shows real commitment to your aesthetic. If you’re new to the world of water-cooling and want to have go yourself, then make sure you also read our full guide on how to water-cool your PC.
This post originally appeared on Custom PC, which has been covering amazing setups for over 20 years and is now part of PCGamesN. Join our 500k member Facebook group to discuss this build.
If you consider yourself to be an expert PC builder, you can submit your own custom PC build to us today for a chance of being featured on PCGamesN in the future.
