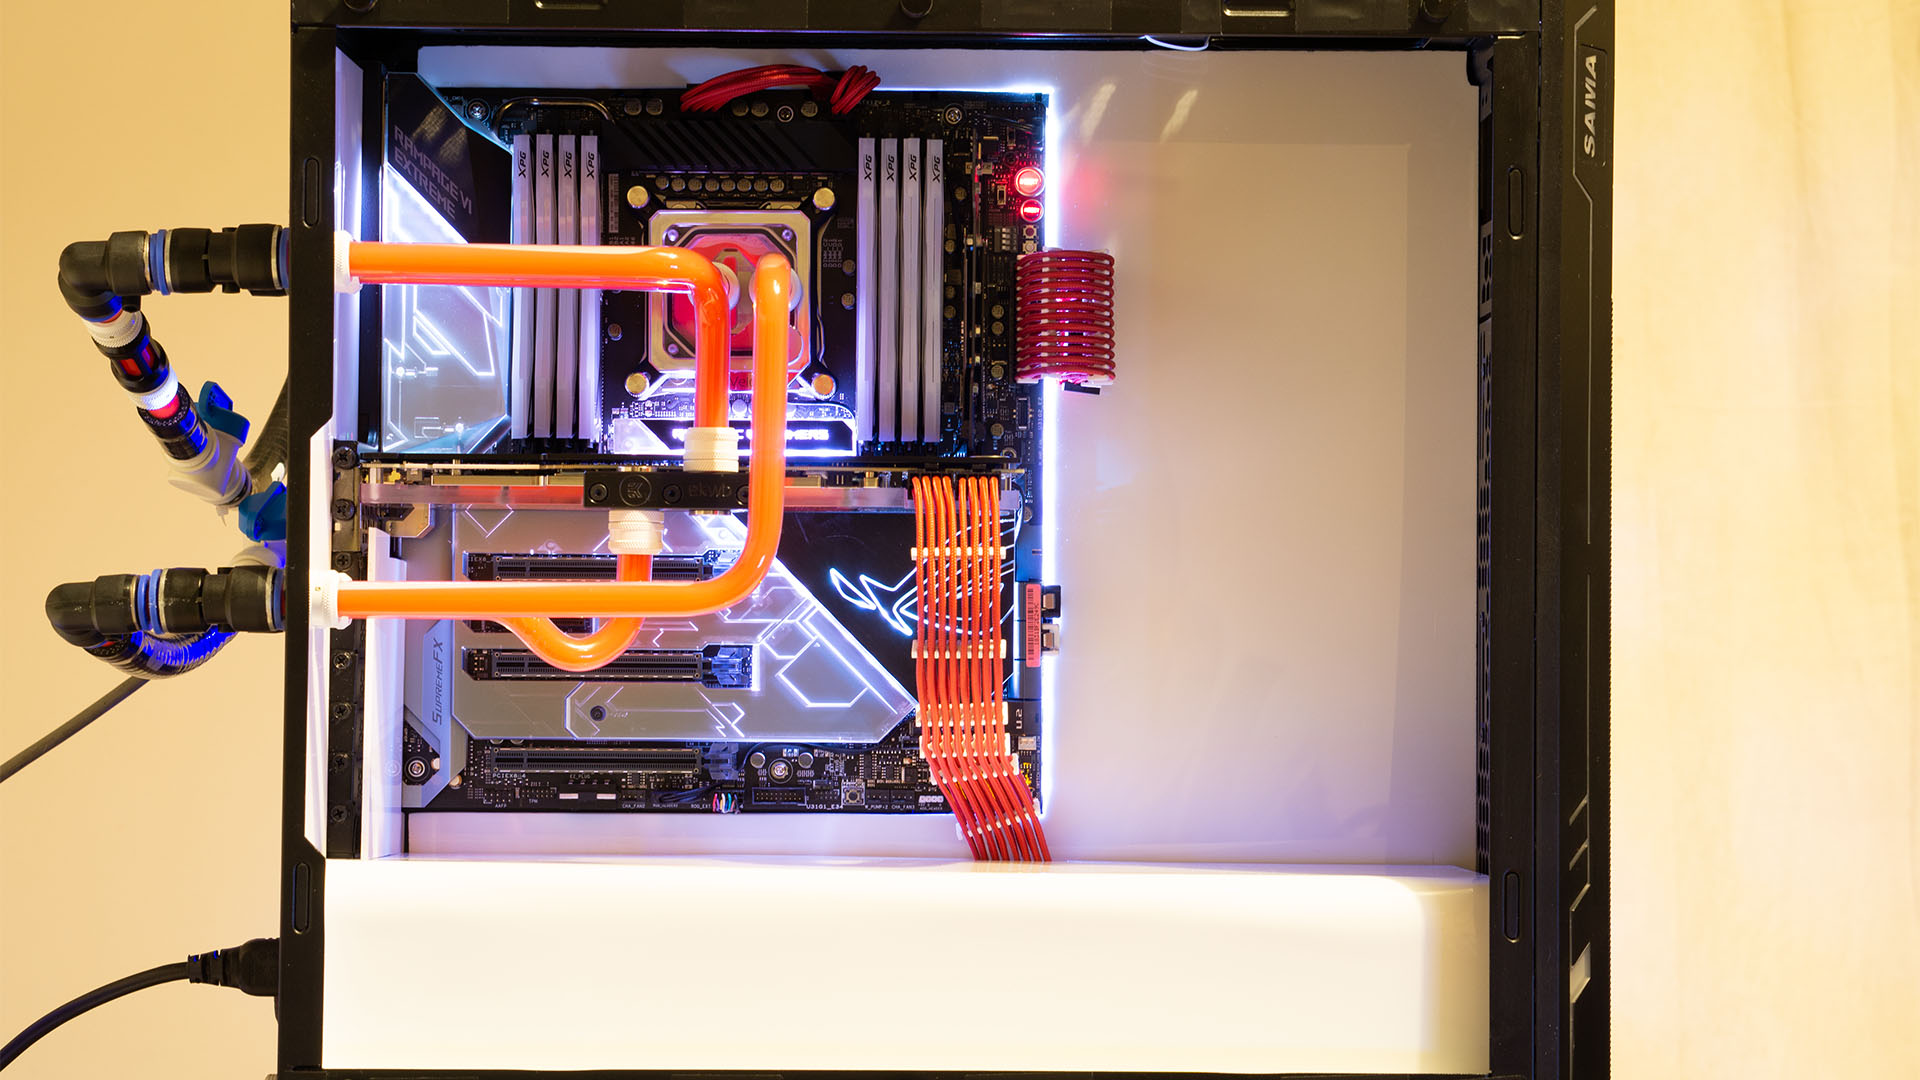
There’s no radiator, pump or reservoir inside this water-cooled PC. Instead, refrigeration engineer Matt Marshall had another idea – chilling the coolant inside an external icebox instead. The result is this icebox-cooled gaming PC build, which has a really clean and uncluttered interior, not to mention super-cool temperatures.
Thanks to our rapidly growing PC building Facebook page, we’ve seen many custom gaming PCs, from mods based on existing case designs to scratch PC builds. You can even submit yours for consideration right here. Here we talk to Matt about how he made this fridge-cooled PC build.
PCGamesN: Let’s start with the initial inspiration. What made you want to build a PC with an external refrigeration system?
A mixture of my refrigeration career and an obsession with building computers.
The interior looks amazingly clean. Did you make that PSU shroud and interior cover yourself?
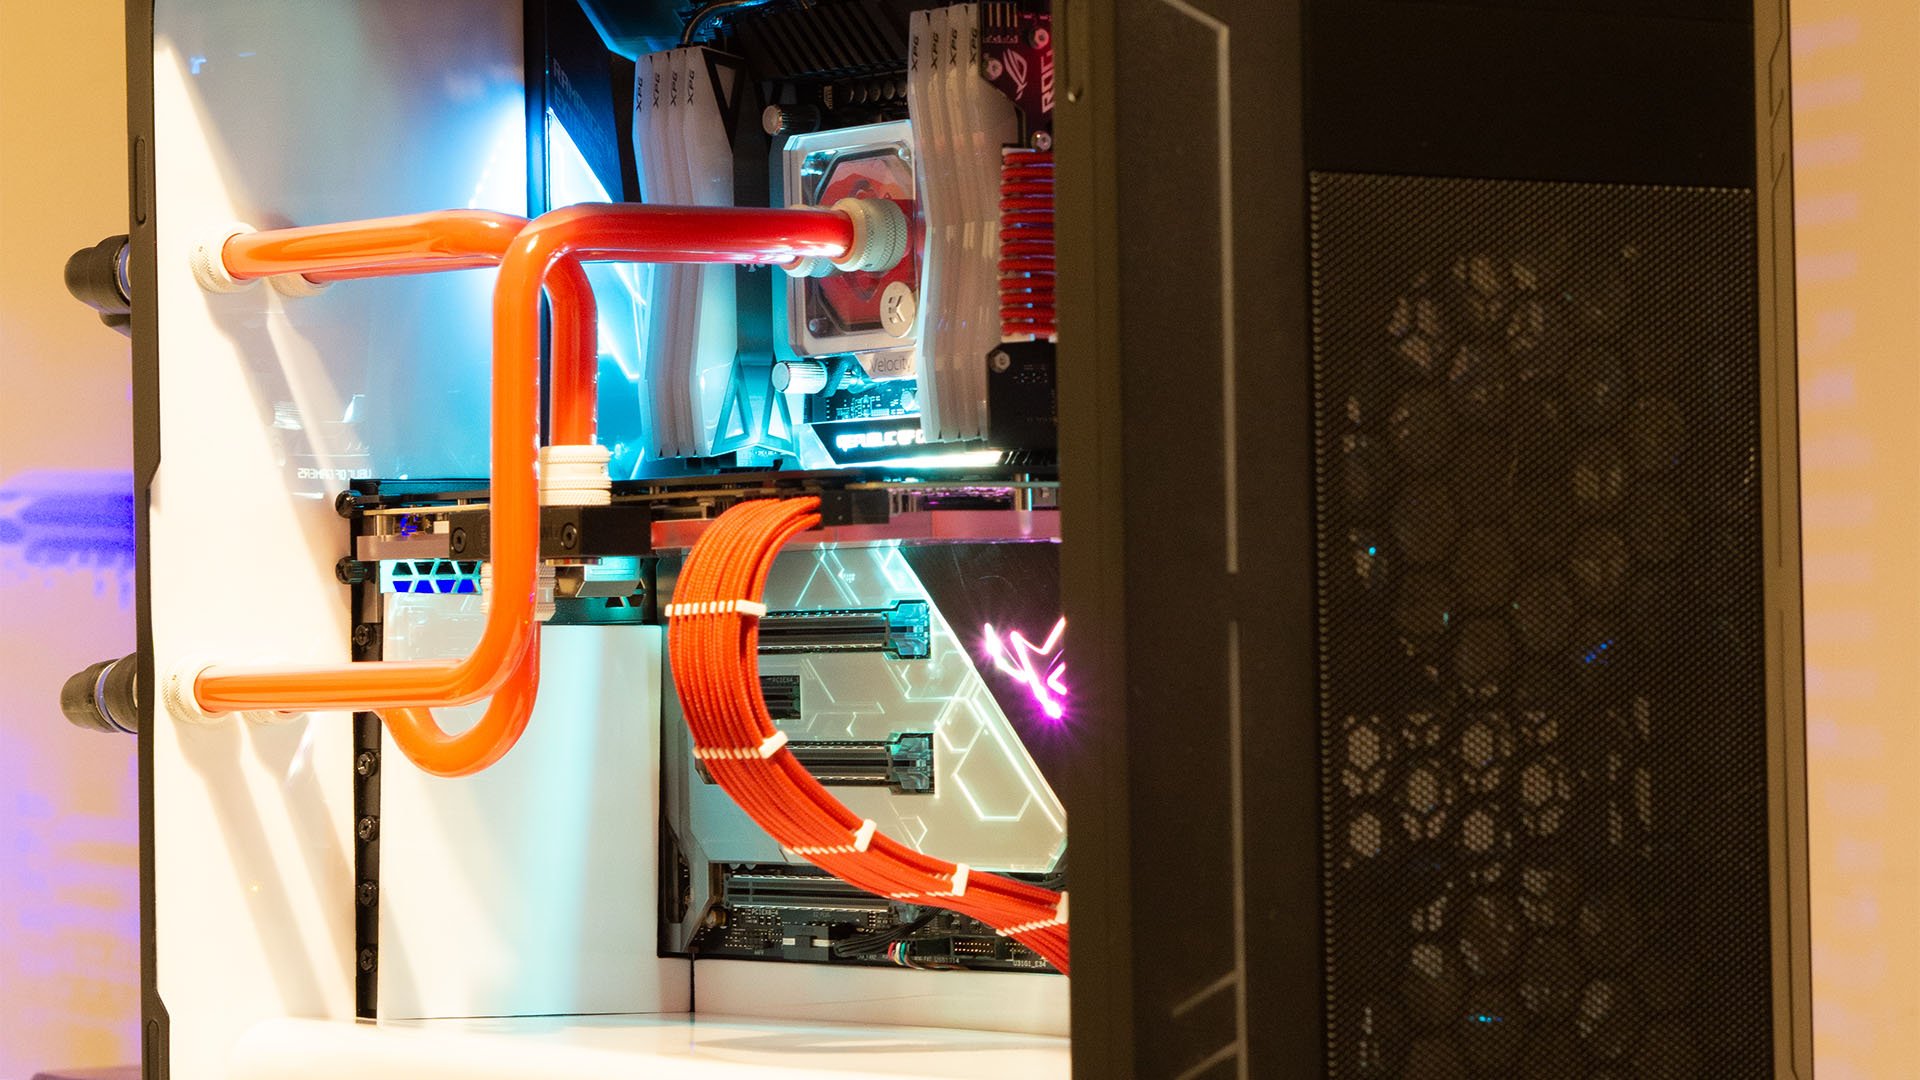
Yep, it’s all made from 3mm gloss white Perspex, and involved lots of measuring and making templates. PC cases are always full of mesh and holes, but I want a clean, flush look, so I had to hide it all. Gloss Perspex was perfect for this, as it does a beautiful job of reflecting all the colors. The shroud was bent to shape using the curved edge of my kitchen work surface and a heat gun.

We love the way the power cables just seem to slot into the case – you can barely see any cable-routing holes. How did you achieve this effect?
The Sama Ark is already a great case for cable routing anyway, but to make it perfect I removed a lot of the metalwork inside the case. All the cables come through a hole under the motherboard, where they then meet the hidden Corsair PSU.
Tell us all about the external refrigeration unit! How is it connected, how does it work and how does it cool the coolant? How much noise does it make?
It’s actually an old laboratory circulator. I stripped it down, and removed the heating element and old control system. I fitted an Eliwell controller and probe to control the temperature, and then resprayed the whole thing in BBQ black and fitted an RGB LED strip led to finish it off!
The refrigeration unit basically cools a bath, and an internal pump circulates the fluid from the bath through the PC. It’s connected using thick car hose and 14mm push-fit fittings. A Y-splitter on the inlet ensures that the CPU and GPU both receive coolant at the same temperature, and then another Y-splitter is used to run a single pipe back to the chiller. It’s very quiet when it’s running – it’s just like a normal fridge really.
There’s no radiator, reservoir or pump in the case; it’s all handled by the external chiller. This setup also helps to keep down the ambient temperature in the case. For my next build, I’m going to use a slightly bigger case and fit the refrigeration equipment in the bottom of it in a thermally isolated compartment, making a one-box refrigerated PC.

In the old days, overclockers used to directly attach refrigeration units to CPUs with devices such as the Vapochill. What made you decide to combine a water-cooling loop with a refrigeration unit instead?
I actually still have one of those Vapochill units! I’m currently working on another project using a custom cascade refrigeration system, which can cool a special fluid down to -80°C, and will be ideal for hardcore overclocking. The benefit of using a fluid loop over a direct system is efficiency. I run the water at 8°C – before the hard tube starts to condensate ever so slightly – if it was any lower then the pipes would need insulation.
Tell us what materials you used for the tubing, and how you cut and bent it to shape.
I used 14mm of (10mm id) Barrow tubing for its excellent insulating properties. The cutting and bending kit comprised a Barrow pipe bender set, some imperial pipe cutters, a Clarke heat gun and a good old-fashioned tape measure.
How practical is it to move a PC with an external refrigeration unit? Is it best left in place?
Moving it is no problem, as the pipes that connect the PC to the chiller are flexible, and they also have isolation taps for complete disconnection when required.
How long did it take you to complete this build, from start to finish?
It took roughly four days to complete both the PC and the chiller unit.
Did you come across any difficulties?
Cutting the Perspex for the interior required a very tight fit inside the case, which presented the issue of actually getting it into the case. I had to cut off extra bits in places a few times, and be especially careful not to allow any gaps.

Are you completely happy with the end result, or do you wish you’d done some of it differently in retrospect?
I’m extremely happy with the end result! The only thing that didn’t initially go to plan was that I bought two litres of red fluid, when I really needed three. I had one liter of white fluid spare, and I couldn’t wait to order redder, so now I have pink cooling fluid! I would like to give a shout-out to my wife for supporting my PC-building hobby, and to Liam for the photos.
Icebox PC specs
- CPU: Intel Core i9-7900X overclocked to 4.7GHz
- GPU: Asus GeForce RTX 2080 Ti
- Case: Sama Ark
- Storage: 256GB Samsung 960 Pro, 1TB Samsung 970 Evo Plus
- Memory: 64GB ADATA XPG Spectrix 3200MHz
- Motherboard: Asus ROG Rampage Extreme VI
- PSU: Corsair HX1200i, BitFenix Alchemy cables
- Cooling: Scientific Refrigeration icebox, EK Velocity CPU waterblock, EK Classic GeForce RTX 2080 Ti GPU waterblock
This is some proper old-school custom cooling and we love it – this takes us right back to the days of Vapochill and Prometeia phase change cooling. Matt’s done a great job of integrating it as well, with a really clean and uncluttered interior backed by an external icebox. Make sure you read our full guide on how to cut and bend hard tubing if you want to have a go at creating a hardline water-cooling loop yourself.
This post originally appeared on Custom PC, which has been covering amazing setups for over 20 years and is now part of PCGamesN. Join our nearly 500k member Facebook group to discuss this build.
If you consider yourself to be an expert PC builder, you can submit your own custom PC build to us today for a chance of being featured on PCGamesN in the future.
