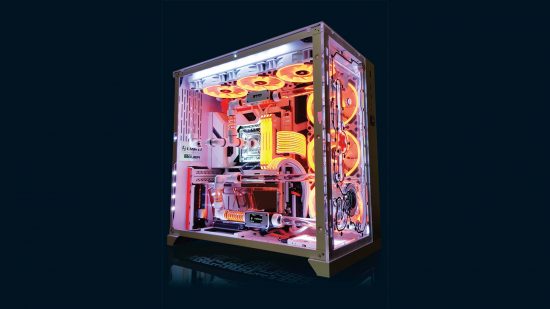
Who doesn’t love a good Star Wars reference? We certainly do, and we’ll start by saying that this BB8 gaming PC might actually be the droid you’re looking for. PC modder Kamil Lee combined his love for orange and white color schemes, as well as cute Star Wars droids, with this super-clean water-cooled PC build, featuring a custom distro plate design and several coats of white paint.
Thanks to our rapidly growing PC building Facebook page, we’ve seen many custom gaming PCs, from mods based on existing case designs to scratch PC builds. You can even submit yours for consideration right here. But first, let’s find out how Kamil built this gaming PC.
PCGamesN: How did this project start?
Kamil: I’ve built quite a few custom PCs. Computers have always been my passion and hobby. The inspiration came from the Star Wars movies – my build is based on the BB8 robot, plus white and orange are also my favorite colors. I’d previously always used big towers for my builds, but this time I wanted to make a little change and try something smaller, which is why I chose the Lian Li PC-O11 Dynamic. It looks sexy and different, and it’s had great reviews – it has a unique and stout look.
Not all of those parts are white out of the box. Which parts required painting?
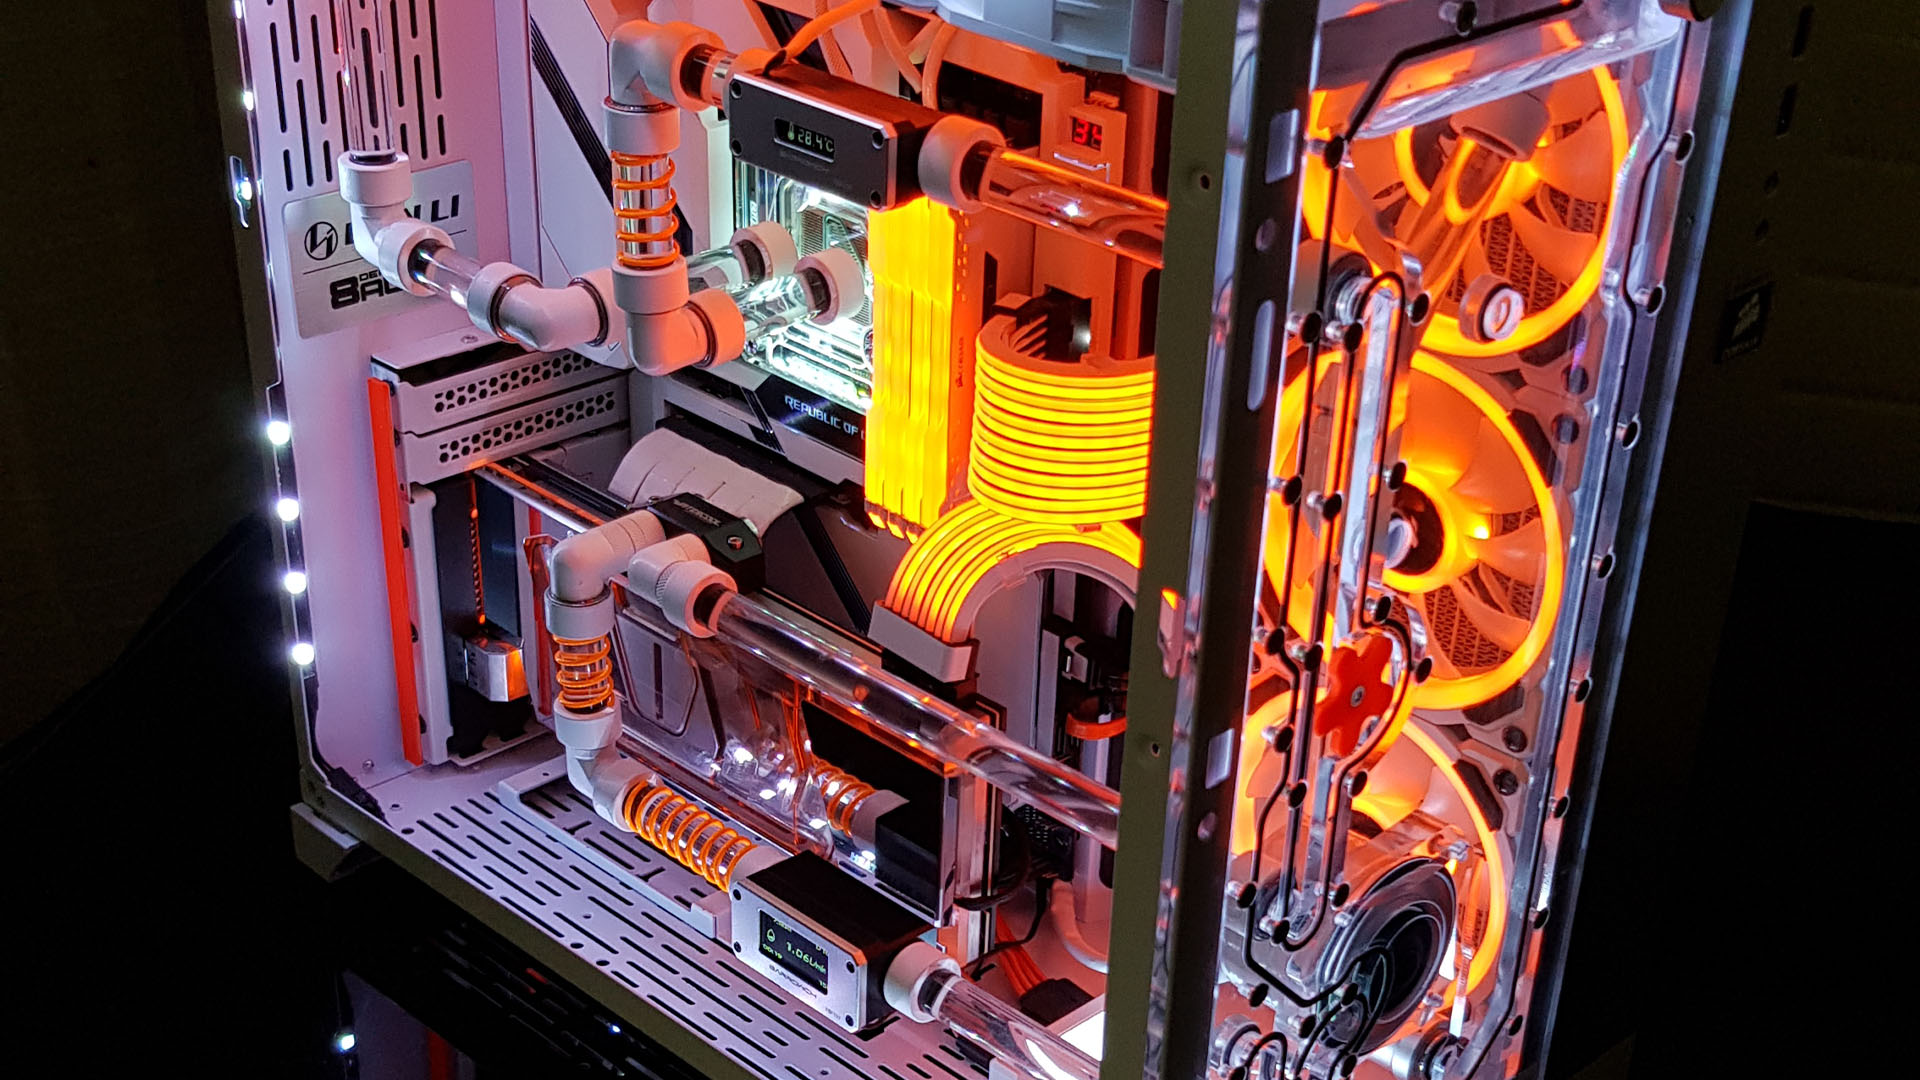
Yes, I did paint a few of the few parts. The most challenging and time-consuming part to paint was my motherboard – I applied three coats of paint to it in order to achieve the desired results without any blemishes. I also painted the graphics card PCIe riser, D5 pump and all the fittings, using matt white spray paint.
Did you make the front distribution plate yourself?
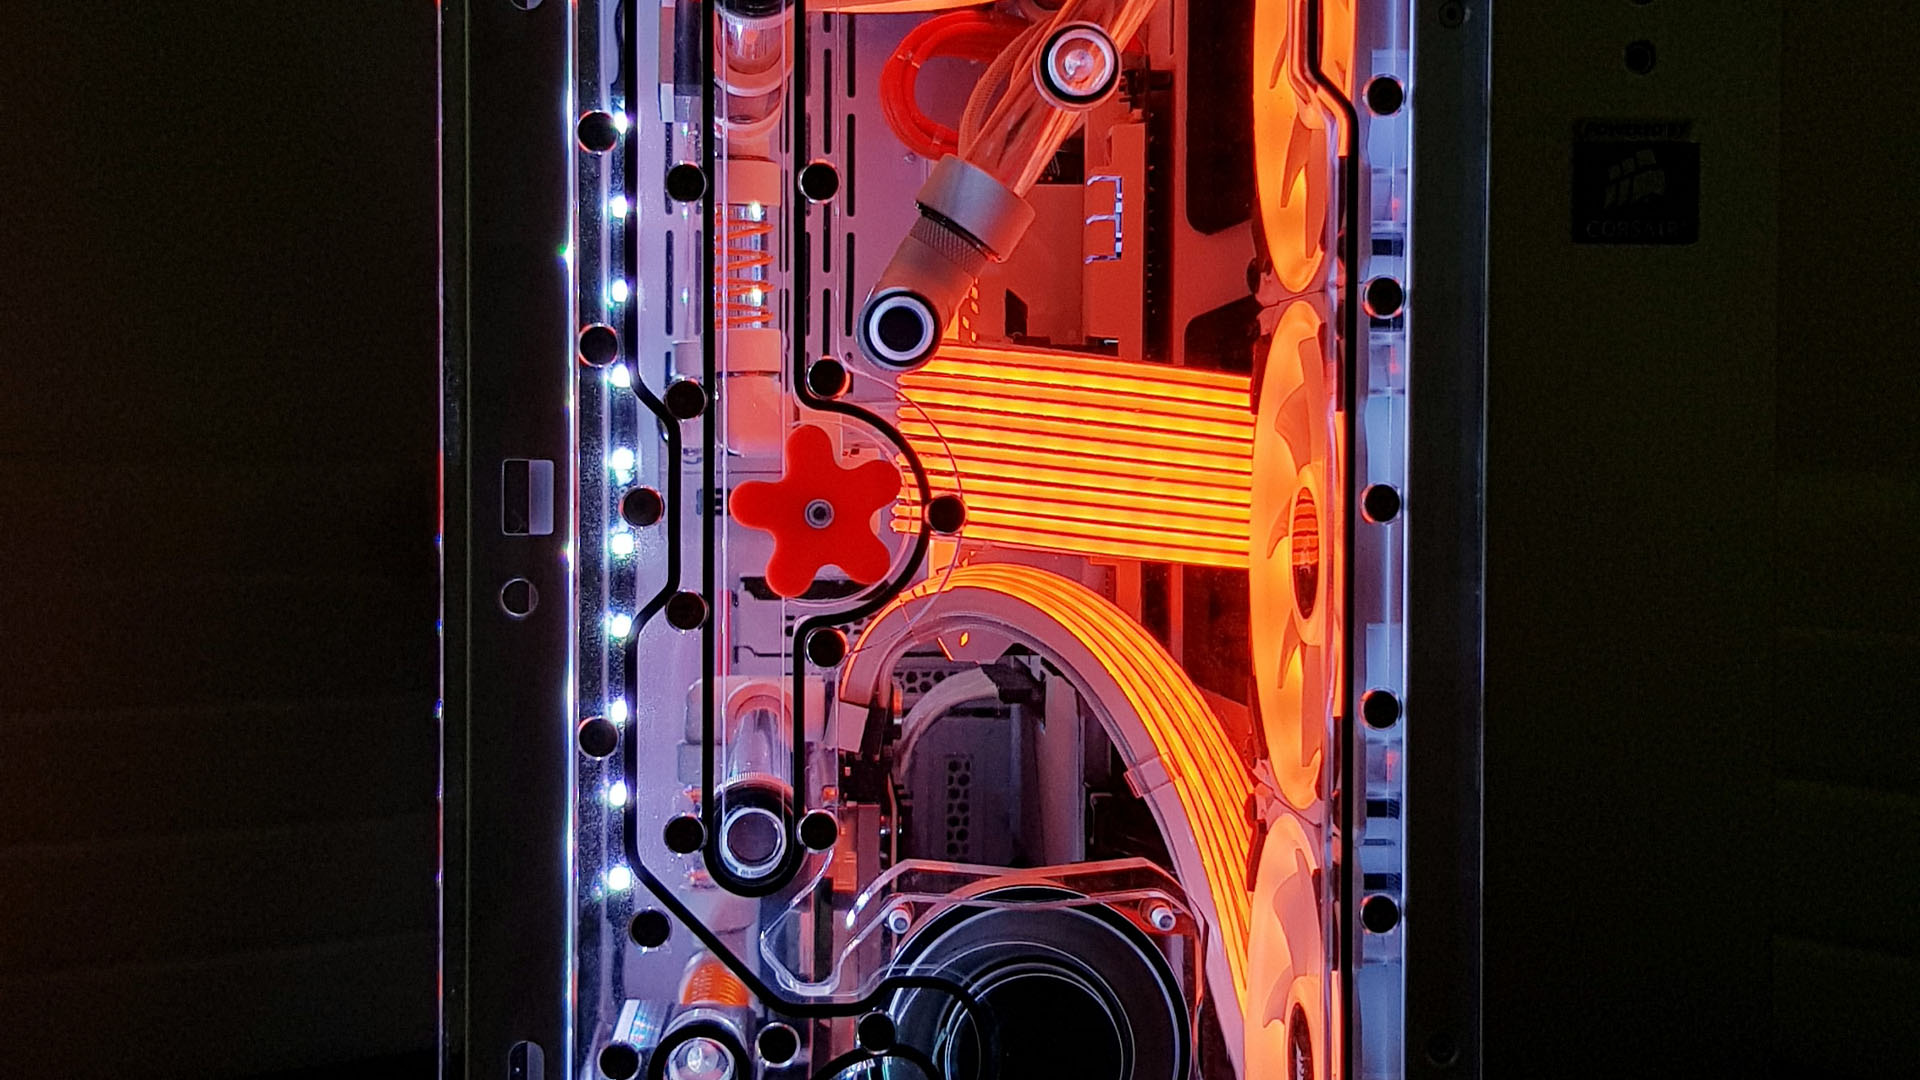
Kind of. It’s a custom-made distribution plate, which was based on my design. I ordered it from WV Mech in Malaysia. In order to achieve straight-looking tubing, your measurements must be perfect, and I actually ended up ordering three of them before the final model. The earlier models didn’t have the orange propeller, which works as
a flow indicator.
It looks incredibly neat from the front – how did you go about hiding the cables, and how does it look from the back?
I’m a little bit of a perfectionist, and I hate messy cases. I wanted to have as near to a cableless case as possible. I also added some white sleeves to some of the wires, and the vertical graphics card mount hides some of the cables at the bottom too. On the other hand, my cabling at the back isn’t so good, although you can’t see it anyway!
Where did you get the orange PSU cables from, and is that a Lian Li Strimer Plus on the ATX and GPU power cables?
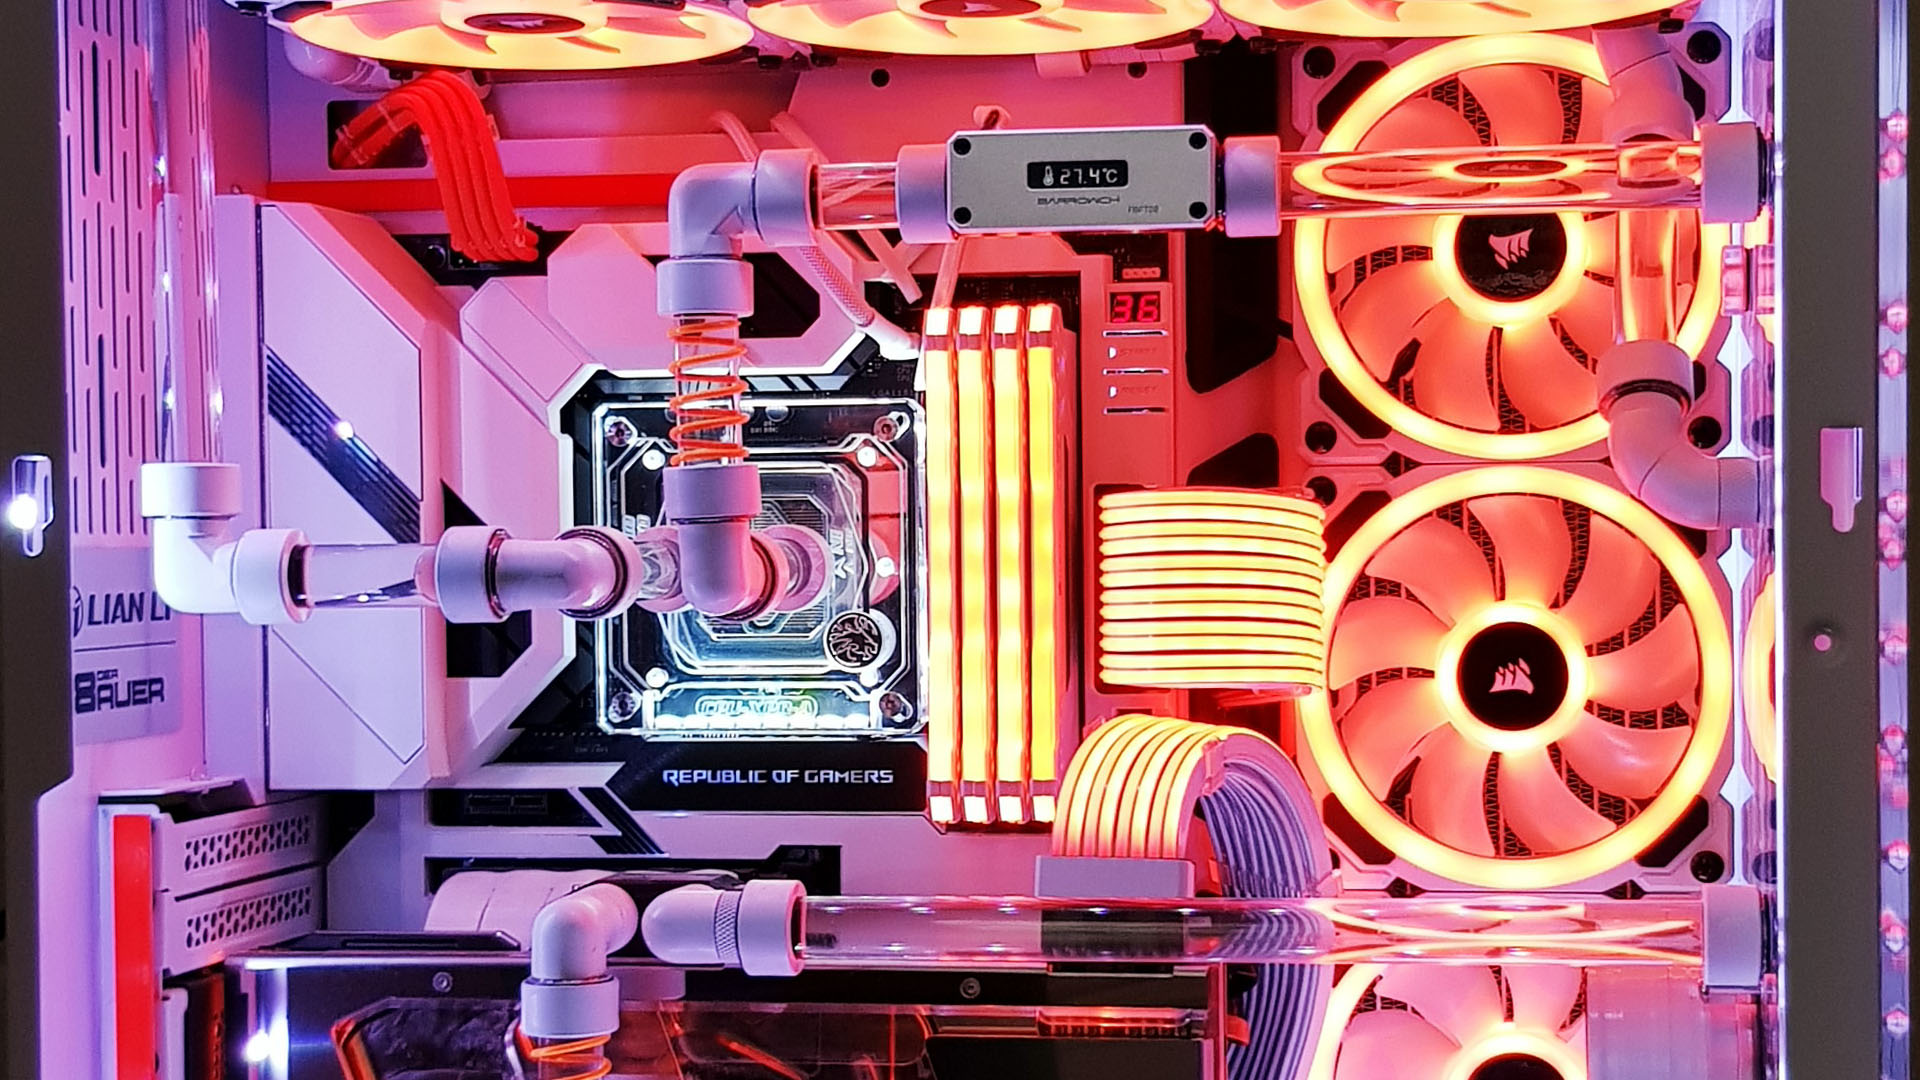
I bought the orange PSU cable from eBay – you can get them very cheap from there. And yes, the ATX and GPU power cables use the newest Lian Li Strimer Plus, and boy, I must say they look incredible.
How did you go about planning, cutting and measuring the water-cooling loop for this setup, and why did you avoid tubing bends?
I need to be honest with you here – I planned it as I was going along and putting it all together. I wanted to avoid covering the main components with the tubing, so I went around parts such as the RAM and cables. I also wanted to show off that RGB goodness. I went for angled fittings instead of bends – in my view, it looks better (more like plumbing).
On the plus side, this decision also made the build easier, as I didn’t have to work with a heat gun to try to make perfect 90-degree angles. If any of my measurements were wrong, I only had to cut another straight tube to replace the wrong one, rather than worrying about making another angle again.
What material was used to make the tubes, and how did you cut them to size?
They’re made of PETG plastic, and I simply used a metal hacksaw to cut them to size, which is quick and easy.
Take us through the water-cooling system.
I have two radiators – a Black Ice Nemesis 360GTS and an XSPC Slim TX360. I chose them because they go perfectly with my build, and because they have a good cooling capacity. I use EKWB fittings for my 16mm tubes, as I like thick and chunky tubing, and I wrapped some of the tubing with Primochill UV anti-kink coil, which I had spare from a previous build.
The GPU waterblock on the GeForce RTX 2080 Ti is made by Heatkiller – I wanted a GPU cooler that covered the entire graphic card. The CPU waterblock on the Core i7-8700K is made by Bykski – I like see-through waterblocks that cover the whole CPU space. Meanwhile, the two boxes in the loop are made by Barrowch – one is a coolant temperature sensor, and the other is a digital flow meter. I picked them as they look cool, but they also do a perfect monitoring job.
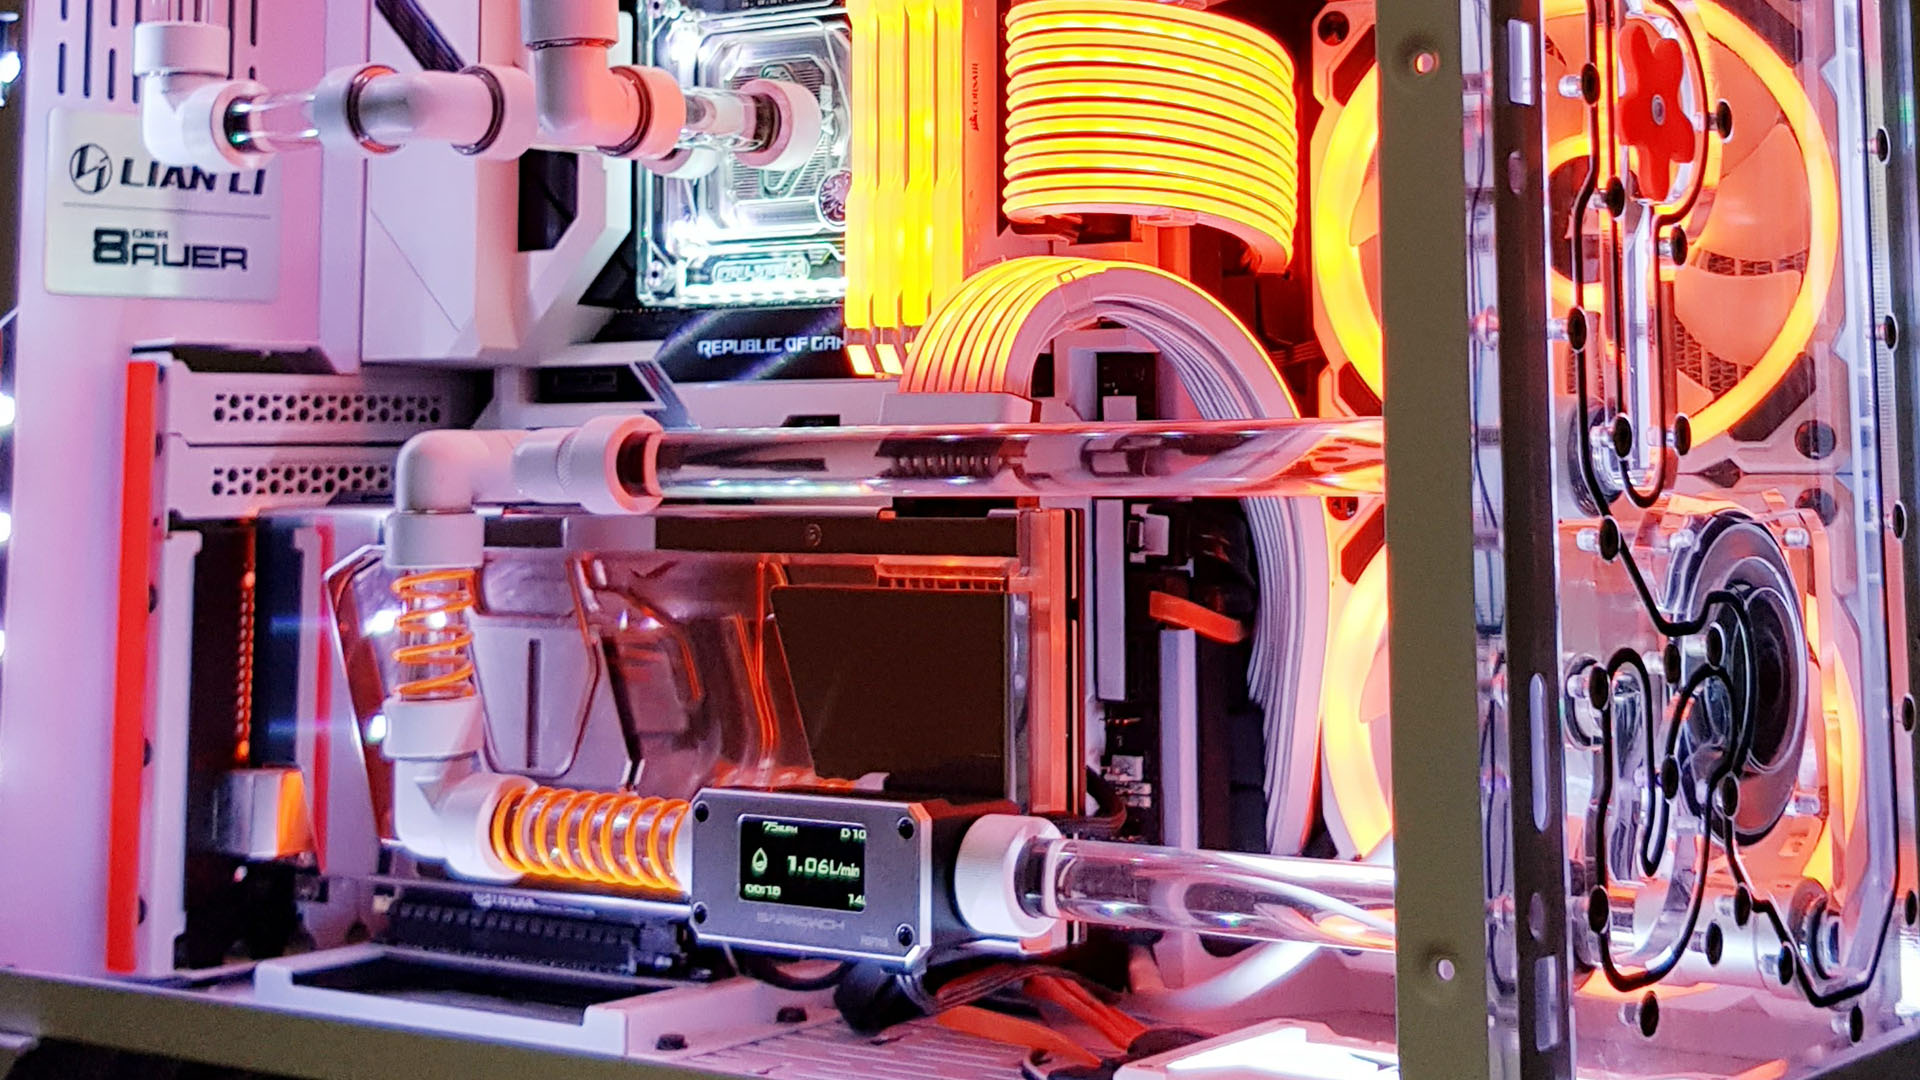
Does the water-cooling system allow a decent overclock, or is it more optimized for quiet operation?
Yes, it does allow a good overclock, although I don’t really overclock my PC a lot. The only part that I overclocked in my system is the GPU. When I play a game, the system is very quiet. The GPU temperature never goes over 49°C, and the coolant temperature is under 35°C. When I’m not playing games, you can’t hear the PC at all.
How did you plan the lighting?
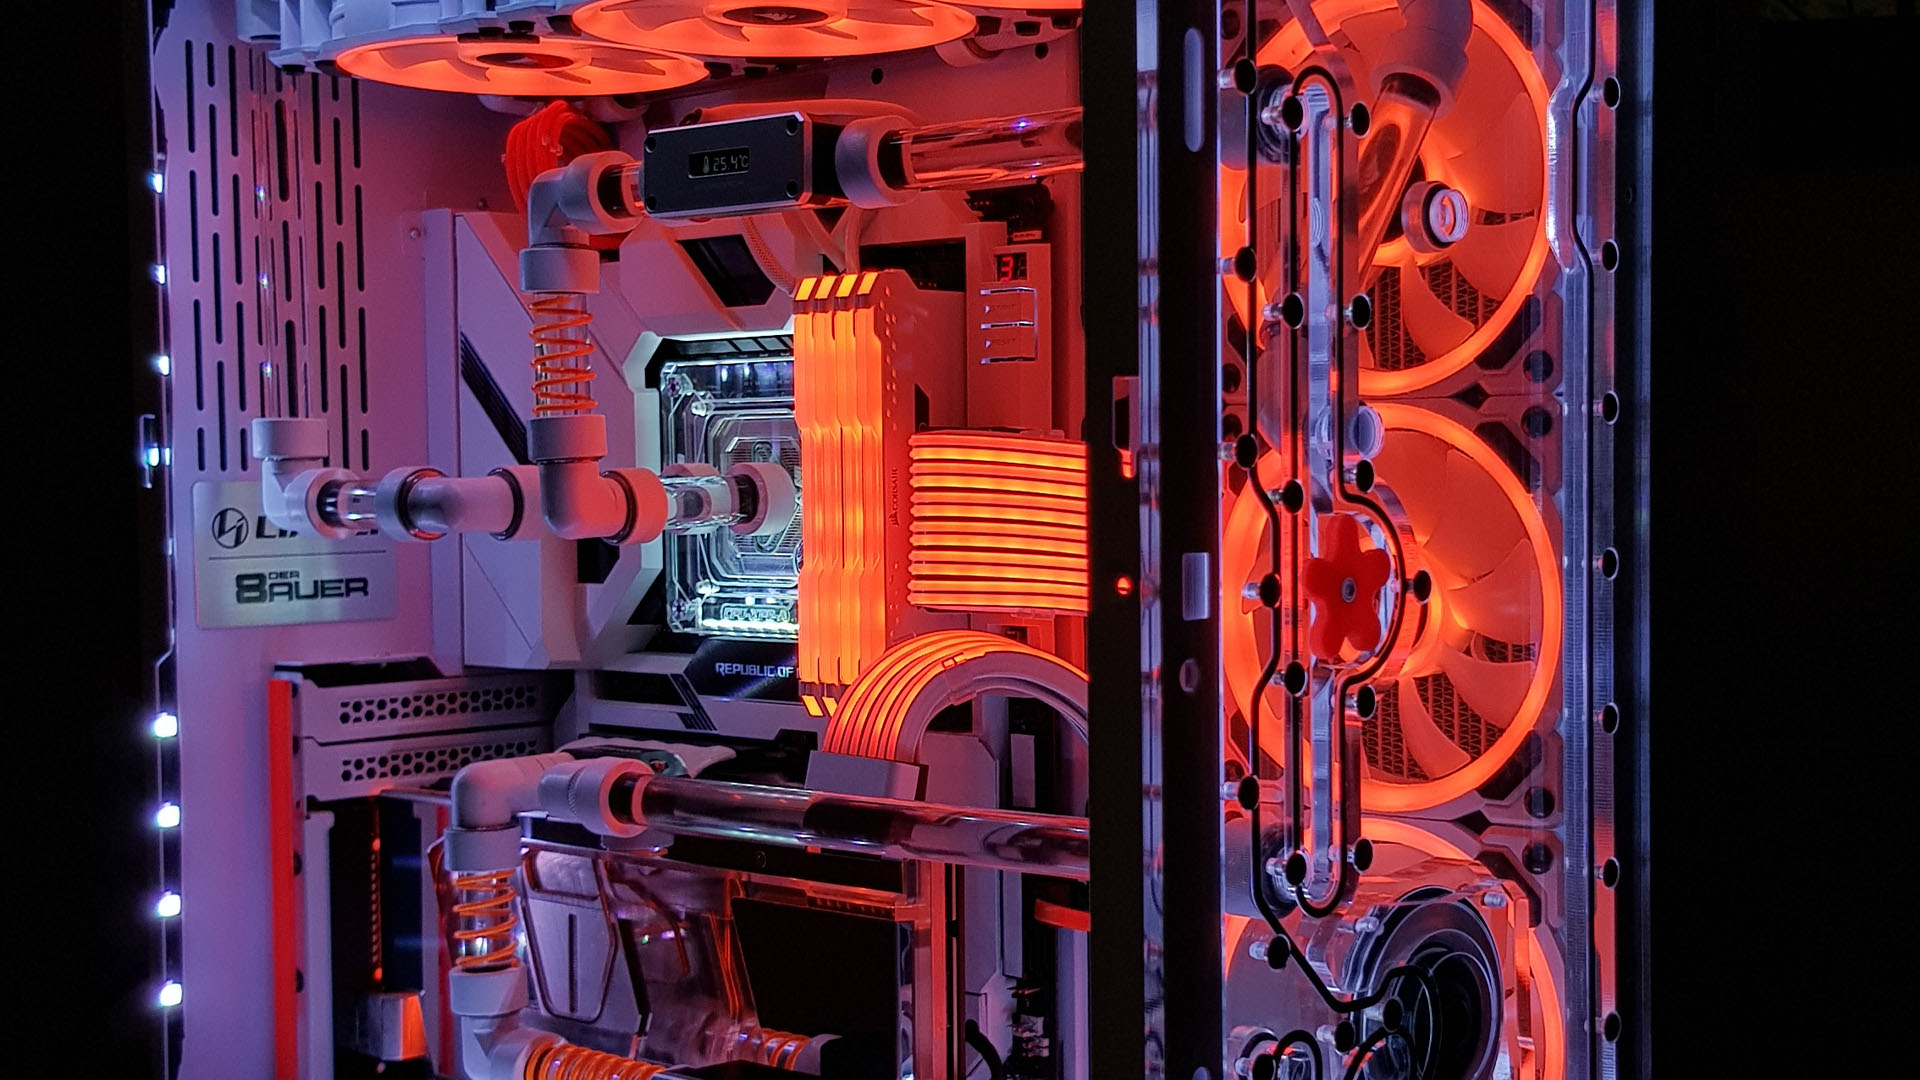
As I mentioned before, I love orange and I also love BB8 from Star Wars. To create the orange lighting, I used six Corsair LL120 RGB fans, four Corsair RGB lighting strips, Corsair Vengeance RGB Pro memory and Lian Li Strimer Plus kits on the PSU cables.
All the above lighting is controlled via Corsair’s iCUE software, while the RGB lighting on the CPU and GPU waterblocks, plus the SSD, are controlled via Asus Aura. There’s also a white LED strip that goes around the case’s edges – it provides some contrast and effectively brightens up the orange color.
Did you come across any difficulties? If so, how did you solve them?
Yes, I did come across some difficulties, but I’m now quite an experienced PC builder, so I resolved them pretty quickly. For example, fitting the rear radiator required me to carve out the rubber-lined cable-routing holes. Plus, there were also challenges with painting the motherboard and designing the distribution plate. It would be nice if more motherboard manufacturers made white motherboards in the first place!
How long did it take you to complete this build, from start to finish?
It took me longer than I planned, mainly because I had to change and test different parts. Overall, it took me three months.
Have you got any tips for readers who might be interested in building a system with hard-tube water cooling?
Always plan your project before you start building it, make sure you pick the right parts, watch tutorials, and read instructions. Most importantly, make sure you have all the exact measurements so that your parts will fit perfectly without any obstructions.
Are you completely happy with the end result, or do you wish you’d done some of it differently in retrospect?
I’m pleased with the end result, but nevertheless I’m still planning my next build already. This time I’m thinking about using another super-cool case – a Thermaltake Core P3.
BB8 water-cooled PC specs
- CPU: Intel Core i7-8700K at stock speed
- Case: Lian Li PC-011 Dynamic
- GPU: Nvidia GeForce RTX 2080 Ti, with GPU core overclocked to 2025MHz
- Storage: 256GB Crucial M550 SSD, 256GB Samsung 850 Pro SSD, 480GB SanDisk Ultra II SSD, 500GB TeamGroup T-Force Delta RGB SSD
- Memory: 16GB Corsair Vengeance RGB Pro 2666MHz
- Motherboard: Asus ROG Maximus XI Code
- PSU: Corsair HX1000i
- Cooling: 6 x Corsair LL120 RGB fans, XSPC D5 pump, Black Ice Nemesis 360GTS radiator, XSPC TX360 Slim radiator, EKWB tubing, Heatkiller IV GPU waterblock, Bykski XPR-A CPU waterblock, Barrowch coolant temperature sensor, Barrowch digital flow meter
This is one of the cleanest PCs we’ve seen Kamil – the cable tidying is immaculate, the hardline water-cooling system looks fantastic and the orange lighting really works. Never underestimate a droid!
This post originally appeared on Custom PC, which has been covering amazing setups for over 20 years and is now part of PCGamesN. Join our nearly 500k member Facebook group to discuss this build.
If you consider yourself to be an expert PC builder, you can submit your own custom PC build to us today for a chance of being featured on PCGamesN in the future.
