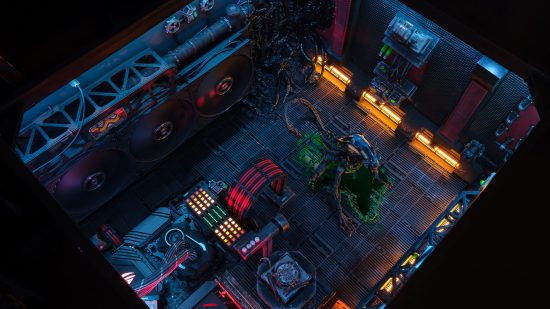
This gaming PC setup is a bit different from the usual boxy case. Not only is it a desk PC, but it’s based on the interior of a spaceship from the Aliens film franchise. This sci-fi gaming PC is called Alien Breach, and it was built by PC modder Mick Black, who wanted to recreate a dark and gritty spaceship interior, with rust, stains and oil spills.
Thanks to our rapidly growing PC building Facebook page, we’ve seen many custom gaming PCs, from mods based on existing case designs to scratch PC builds. You can even submit yours for consideration right here Here, Mick takes us through the process of building this desk-based build inspired by the Alien universe.
“From a young age I’ve always been drawn to the Aliens universe. I remember my mum leaving me to dog-sit one evening and I couldn’t find anything to watch. I picked up the VHS of Aliens and threw it in our toploader thinking it would be fun. Being only 13, I was absolutely terrified, but I made it to the end. It left me intrigued and in total awe of such a brutal creature.
“My old PC had done me proud over the years but it was starting to struggle with today’s triple-A titles, so it was that great time to build another. I have seen many, many builds over the years, but they all have (mostly) one thing in common – a square box with colorful fans in it. I wanted to push my capabilities.
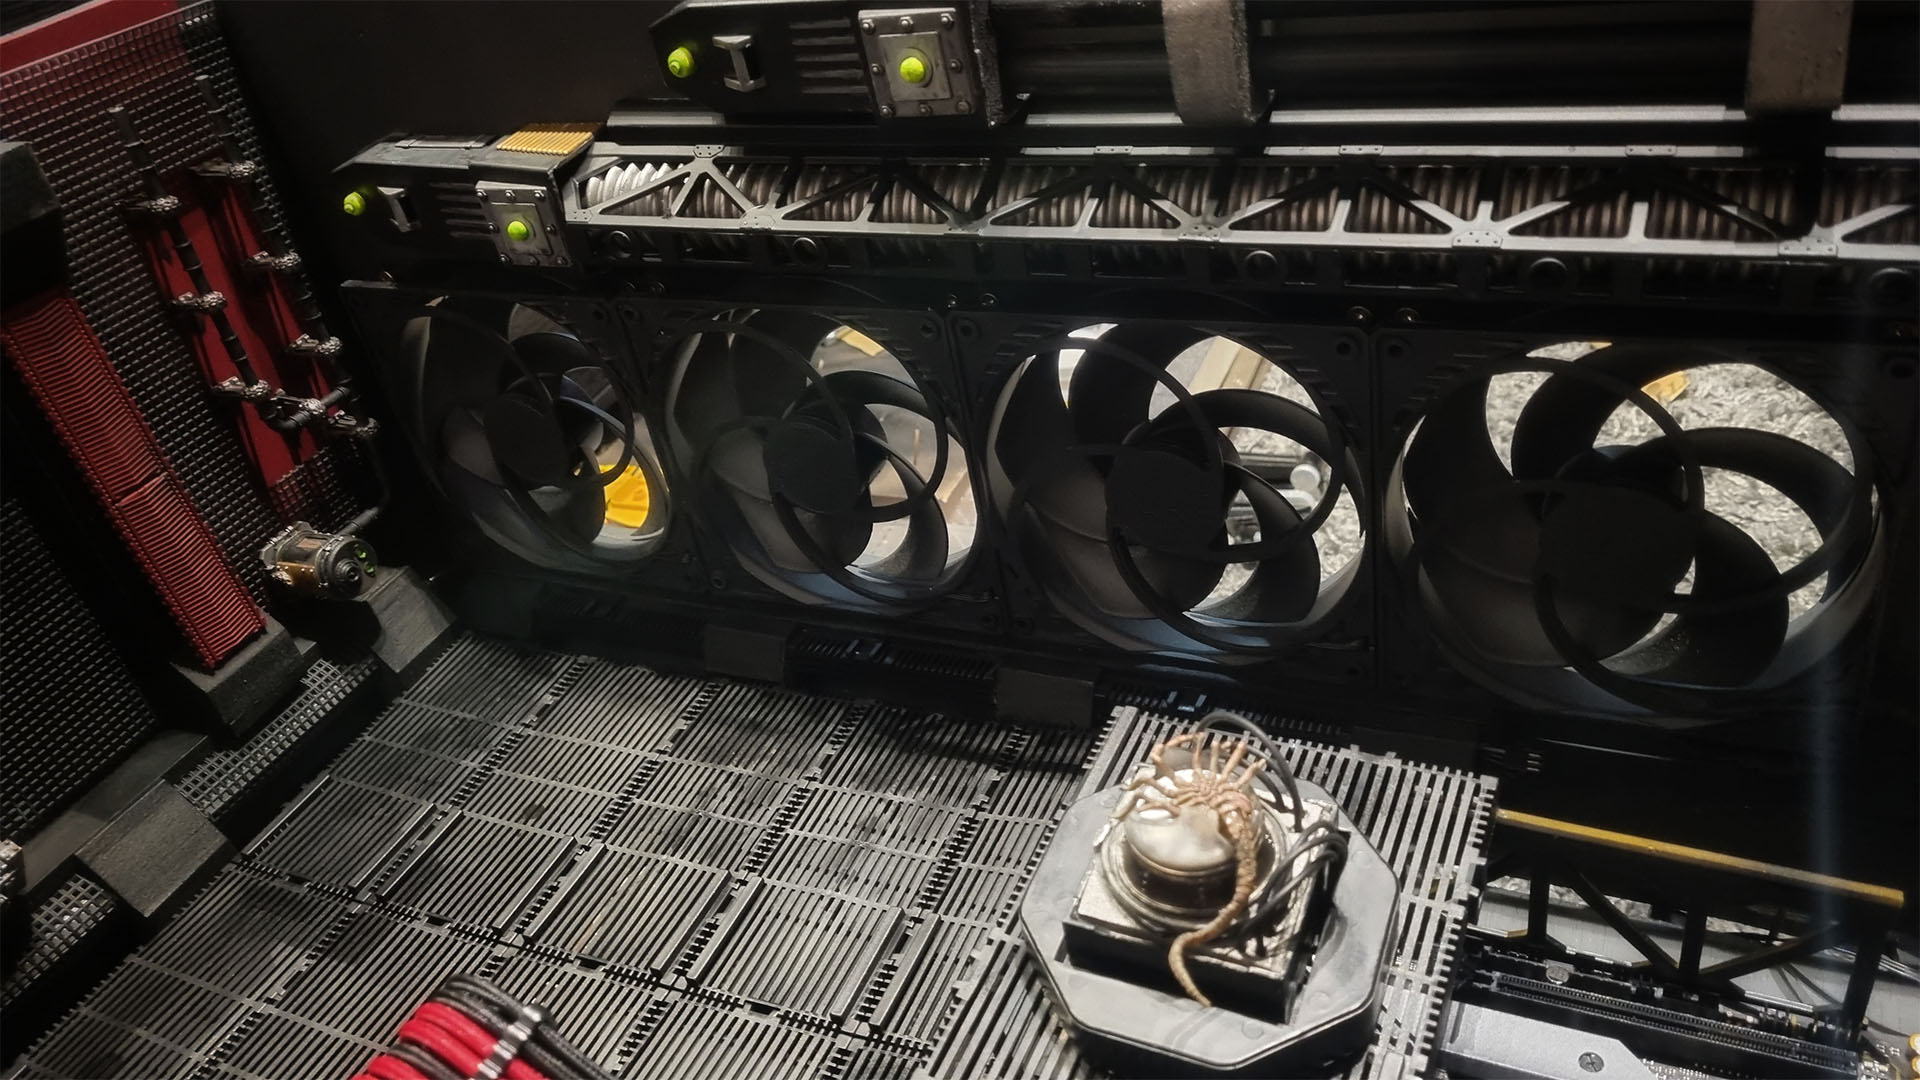
“Firstly, I will state that I am no carpenter, artist or wizard. I took my time, and built it bit by bit. Lots of test pieces and prototypes were thrown at walls in the process! It was trial and error. I wanted to make a machine that was dark, dirty and gritty, to move away from the clean, shiny builds with perfect edges. I wanted catwalks that were twisted, pipework that was bent and rusted, oil spills and stains. I wanted to almost hear the hum of powerplants and steam leaking from decaying boilers and of course, the distant screams of terror echoing down the halls.
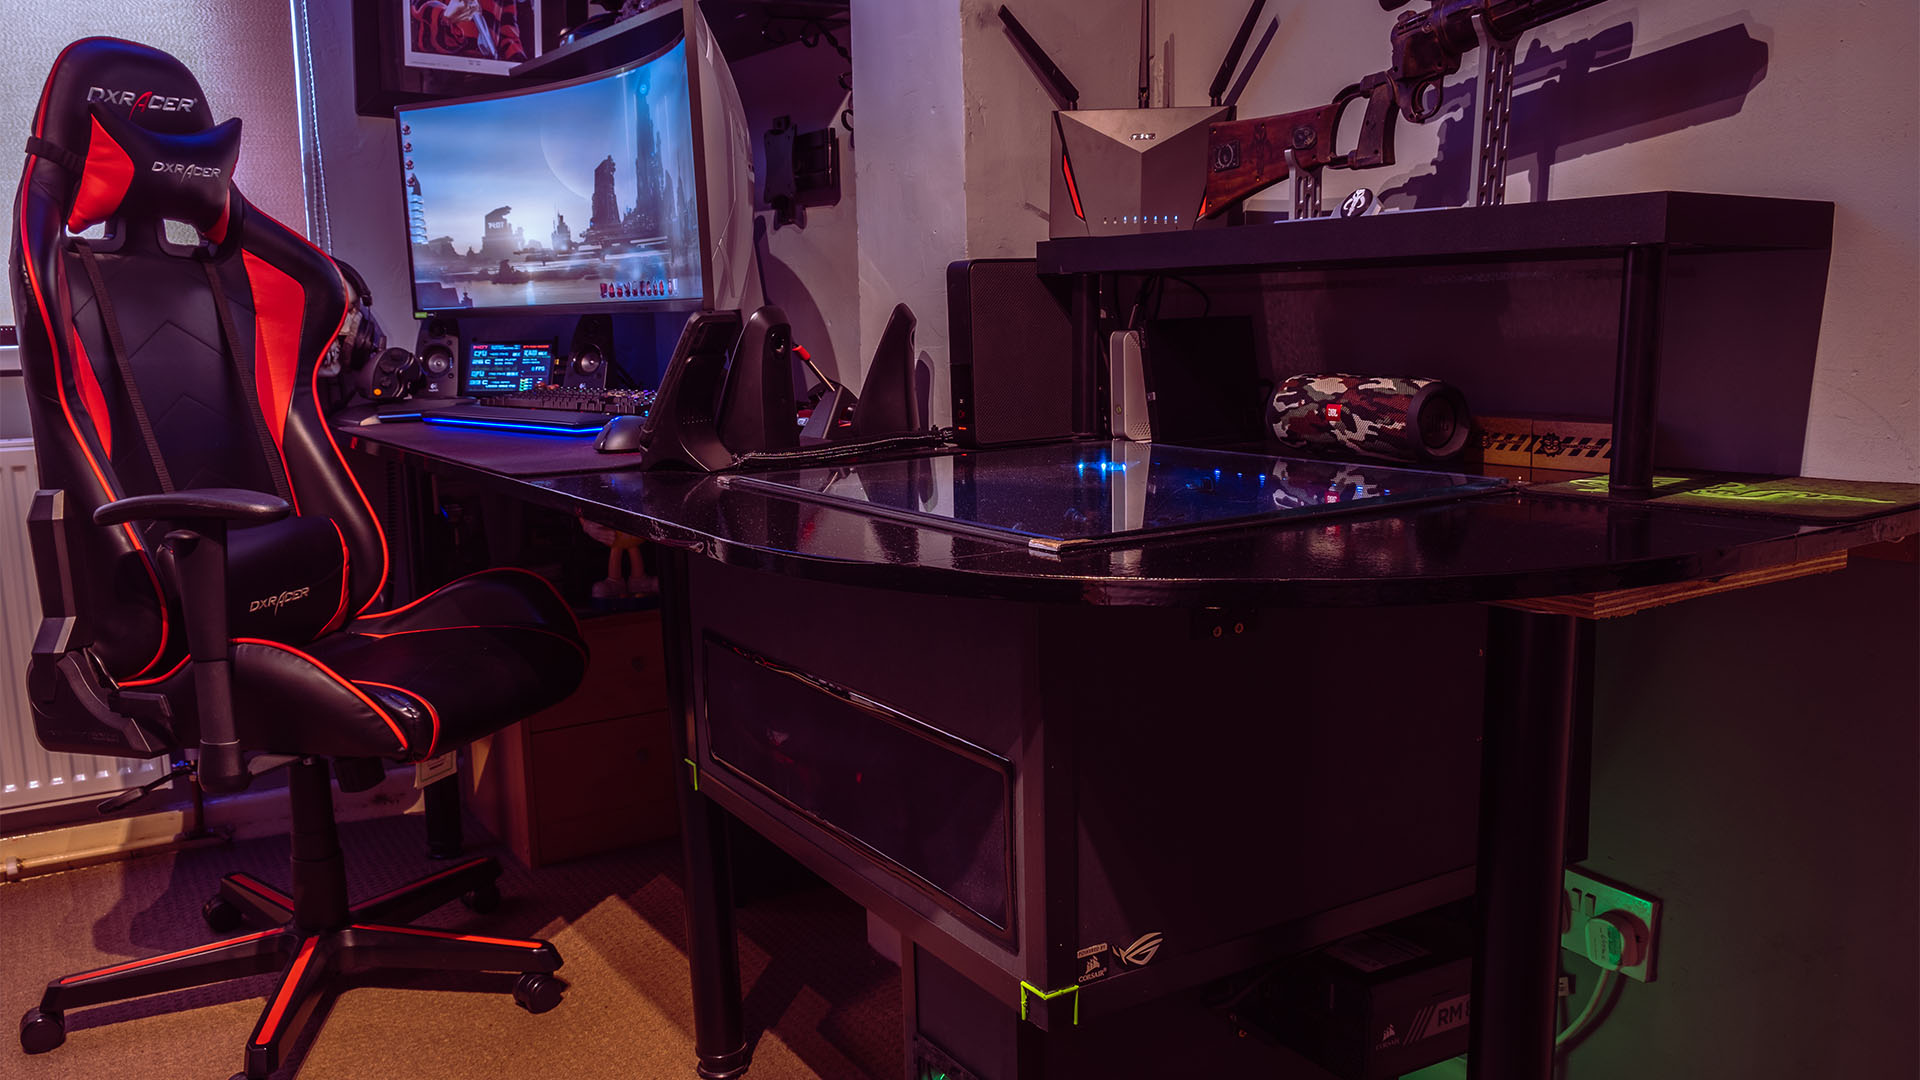
“A few years ago, I was frustrated that I couldn’t find a suitable desk for my PC room, so I went out and bought the largest piece of wood I could fit in my van. I made my desk one afternoon, and it reached from the door along the whole wall to the window. This was later to be my canvas. I started out by measuring the largest square I could cut into the desk without affecting its structural integrity.
“I then made this shape out of thick white cardboard. After researching the components I wanted, I then made basic cut-outs of them from the same cardboard, began arranging them and brainstorming ideas. Originally all the components were going to be housed inside the same piece, but it would have looked very cluttered, which would have distracted from the overarching effect. As a result, I mounted the PSU externally.
“The next job was working out where to house the graphics card. It was taking up valuable real estate in the area I had, so I looked at risers, and found that you could get 1m riser cables. I bought a high-end Akasa XL 1m riser cable, which opened up a whole new design element to consider.”
Hot as hell in here
“After a few days of thinking I decided to add another layer to my build. The base structure of the build is 0.5in plywood made into a box. I then built a separate layer for the graphics card. My design always had two fundamental rules to which I returned if I became indecisive.
“The first was to make sure that PC performance came first. Each component was bought because it was the best at what it did and what I needed it for – not because it had cool RGB lights, flashy-looking fans or LCDs. The CPU AIO liquid cooler, for example, is an ARCTIC Liquid Freezer II 420mm. No gimmicks, no RGB, just decent cooling. It was also handy that it’s dark and fits the build.
“The second rule concerned cooling. I was very aware that pieces of modeling work were going to be fitted around components, and could become very hot. I was already removing the PSU and graphics card out of the main housing, but I also I rigged four 140mm ARCTIC P14 fans (again, no RGB) at the front pulling fresh air into the machine, with the fans on the 420mm radiator at the back pushing out the warmer air. The motherboard is also raised 0.5in from the floor to allow airflow underneath it.
“The PSU is side-mounted on the case, with all its cables running through a conduit around the back, because cable management tight! Meanwhile, I wanted the graphics card mounted under the main display area, but to be visible. After much toing and froing (and maybe a whiskey), I cut a massive hole in the floor of the main housing.
“The graphics card resides in its own cavity beneath (what will be later) the star attraction. It has its own Lian Li AL120 fans in front and behind to push/pull over the card (and yes, these ones have RGB!). I was lucky enough to snag a GeForce RTX 3080 Founders Edition at MSRP. I was holding out for one, as I believe they offer the best bang for buck you can get in these times.
“However, this card doesn’t sport much in the way of lighting effects, and it was very dark down in the graphics card cavity. After a few hours of watching reviews on YouTube, I liked not only how well the AL120s performed, but also the amount of flexibility with lighting options they offered.
“I wanted a haunting green glow that faded in and out of the area, and I also changed the orientation of my sound card. I liked the round top opening showing the circuitry inside, so I bought a riser cable for it. I sprayed it black and then went to work painting and detailing it. This is the component you can see above the PCI-E slots. It also hides the 1m GPU riser cable that disappears through a hole underneath it.”
Show me everything
“Next we come to the modeling. I wanted this piece to look as if it came from the universe that terrified me as a kid, with sci-fi bulkheads, floor lighting, catwalks and rusty pipes. I grabbed another whiskey and watched hours of modeling YouTube videos learning tips and tricks. I used fish tank filter grids for the floor. They were perfect – cheap, easy to cut and already black. I found a kit from a tabletop gaming company that sold industrial model pieces, so I stocked up on pipework.
“I then checked on local selling pages for old toys I could cut apart and use. I found a large broken toy crane, some of which forms the rusted pipe shroud above the AIO coolers radiator. I also repainted and weathered a kids’ build-your-own straw kit to form yet more pipework. I used foam boarding and a Dremel saw to craft shapes for the bulkheads to give the area that sci-fi feel. I sealed this with Mod Podge ready for painting.
“When it comes to the floor lighting effect, I used Phanteks ARGB strip lights. There are two strips connected via a controller hidden under the floor grille. Again, I wanted nothing flashy for this, just a yellow hue to cast across the floor to signify a warning light. I originally planned for this light to be red, but that ended up looking too dark and too much of the build was already lost in darkness, so I went with yellow instead.
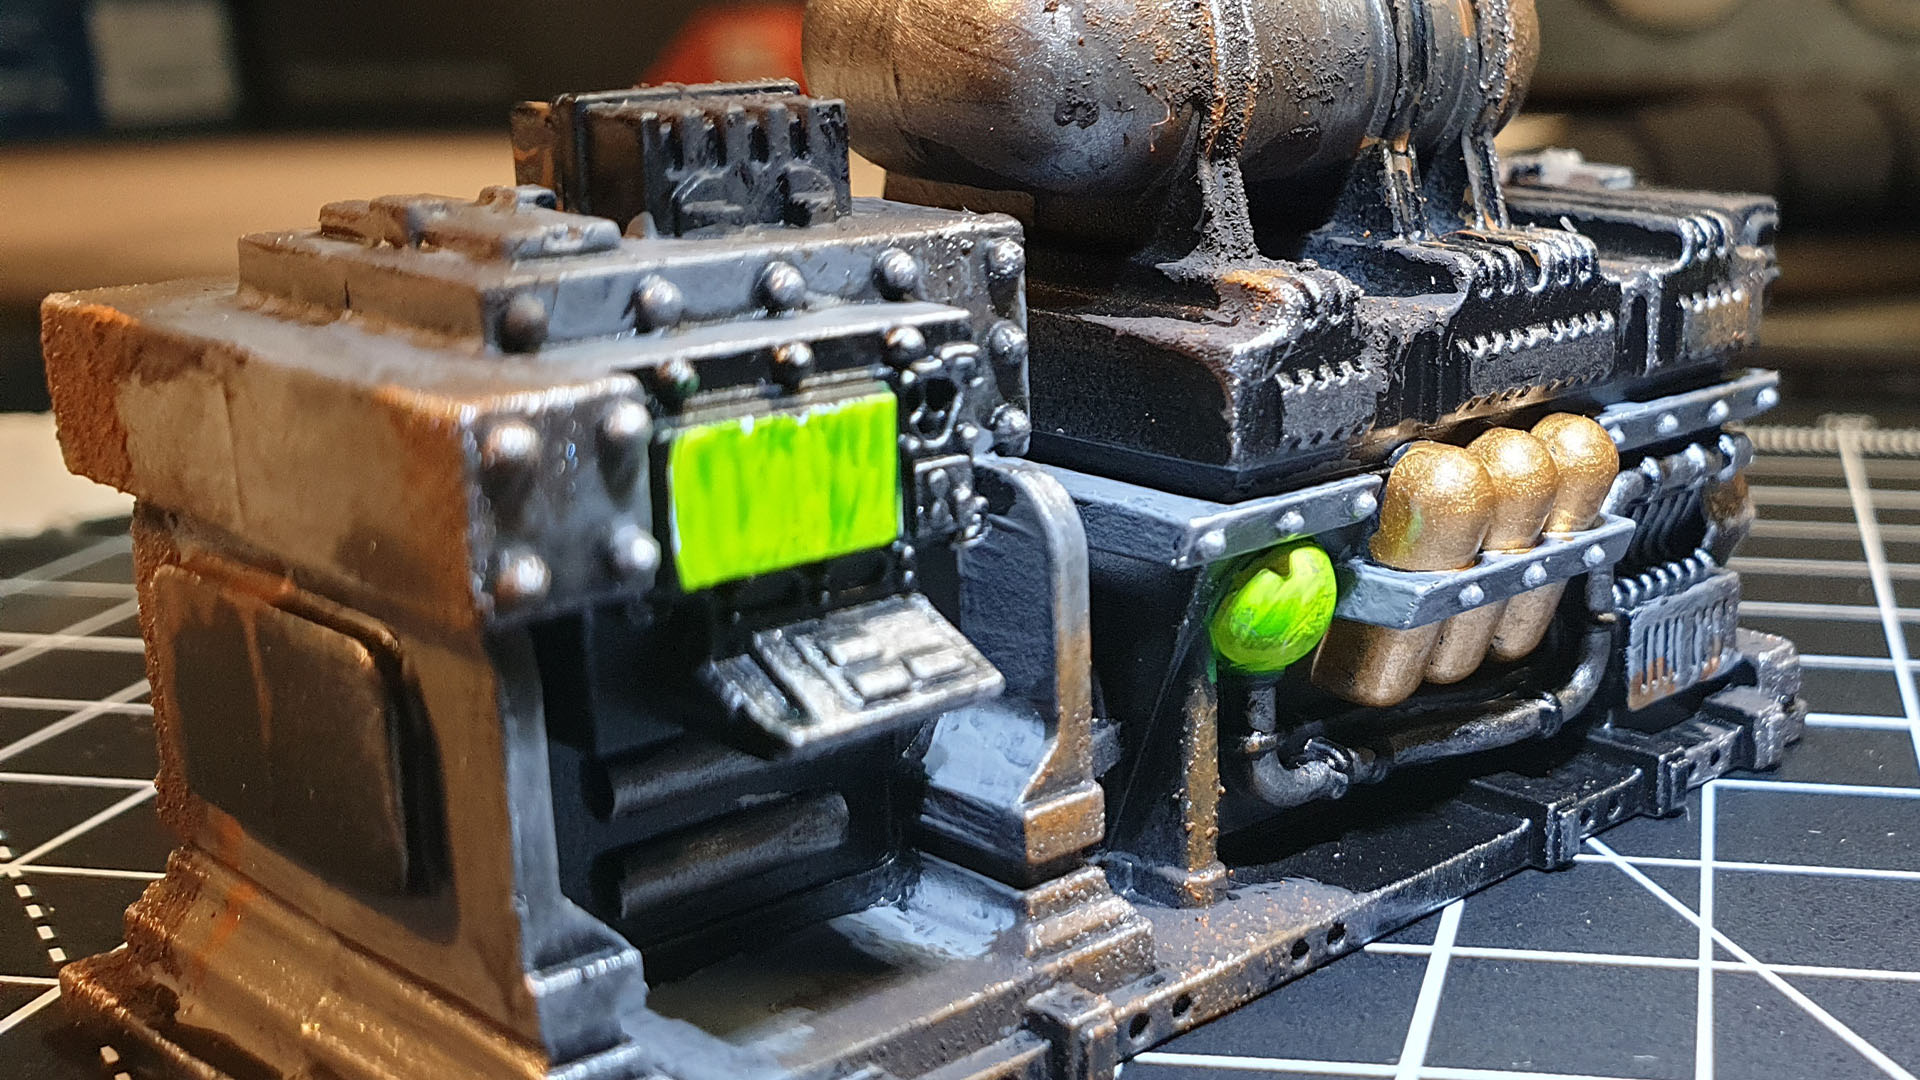
“I then went back to YouTube for painting and detailing school. I used Citadel paints for the modeling work, and I really enjoyed layering paints and testing different effects. I built up rust over many layers, using washes and Games Workshop’s technical paints to get gritty and worn effects.
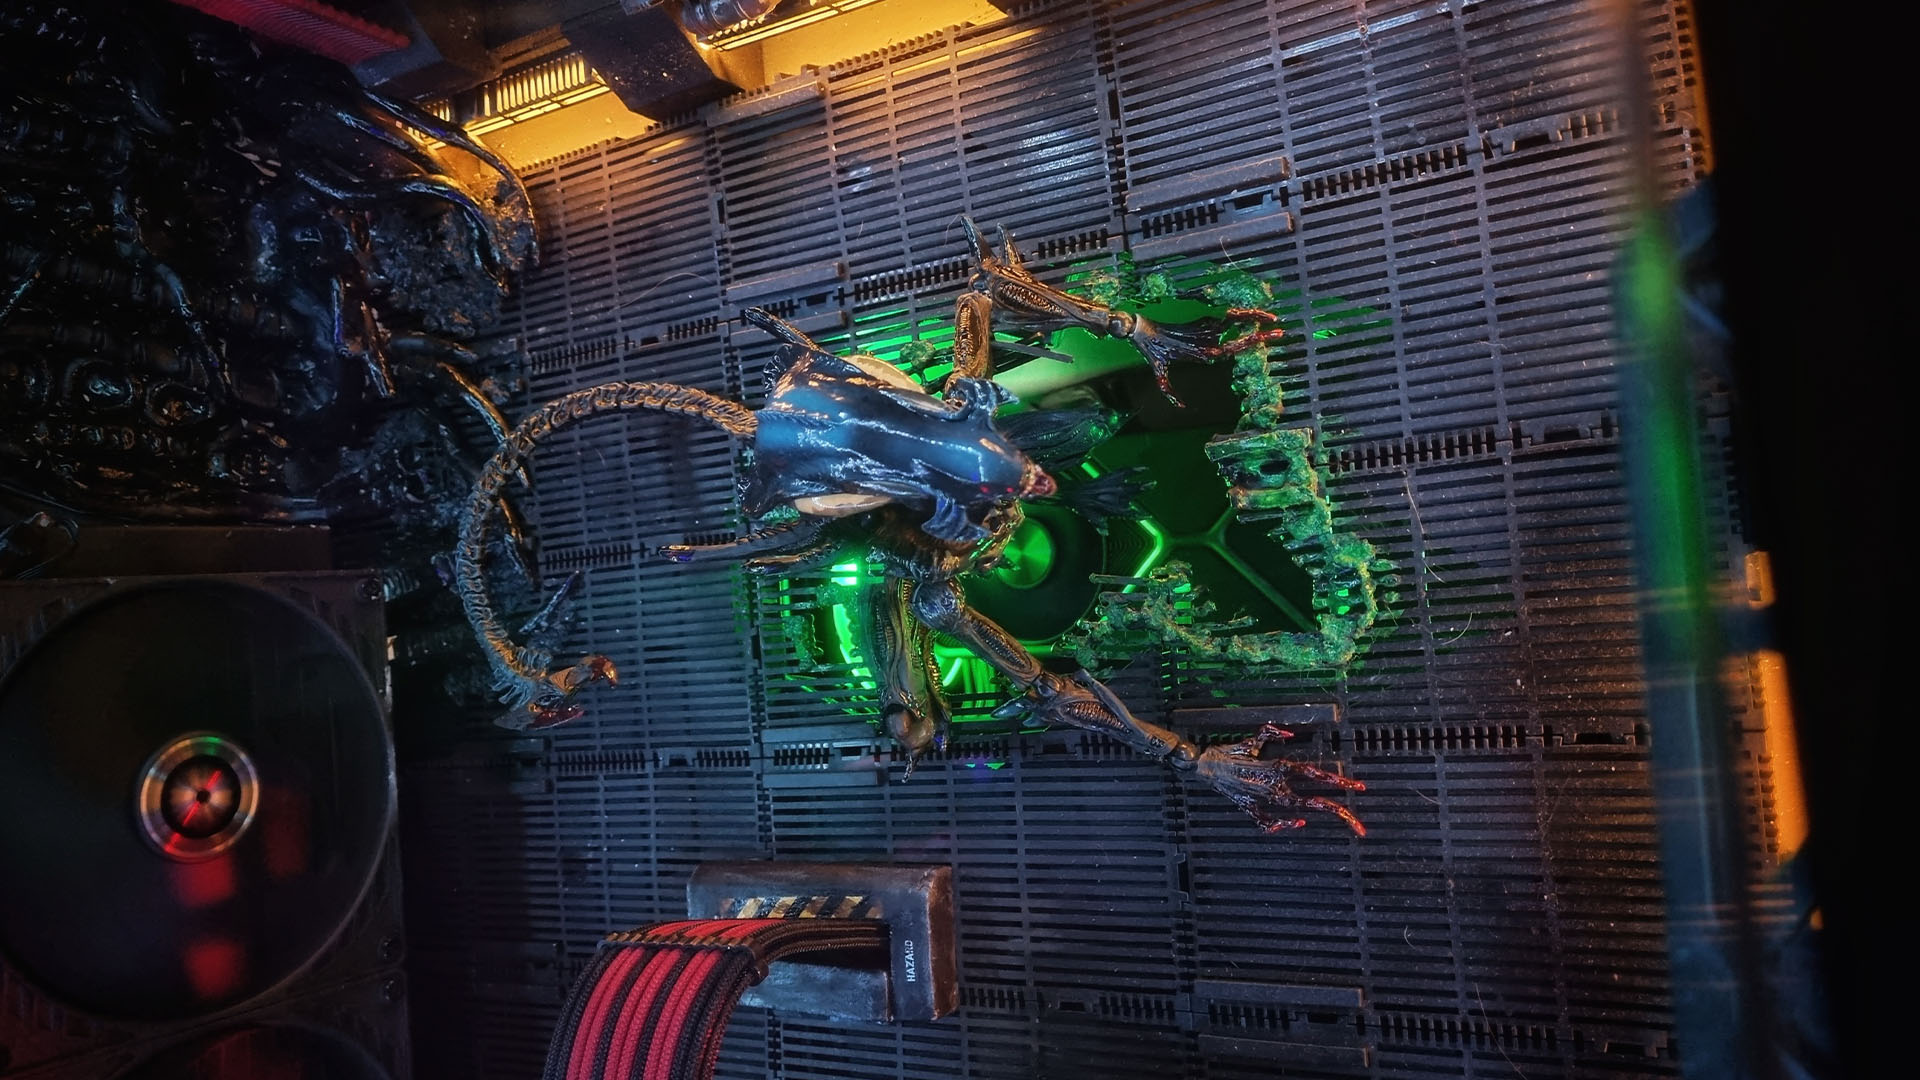
“One of the main effects involved mixing green paint with Mod Podge, and leaving it in a pool overnight to see if I could create a green acid puddle. It was a success, and I cut away the filter grid above my graphics card cavity and melted the edges with a gas lighter.
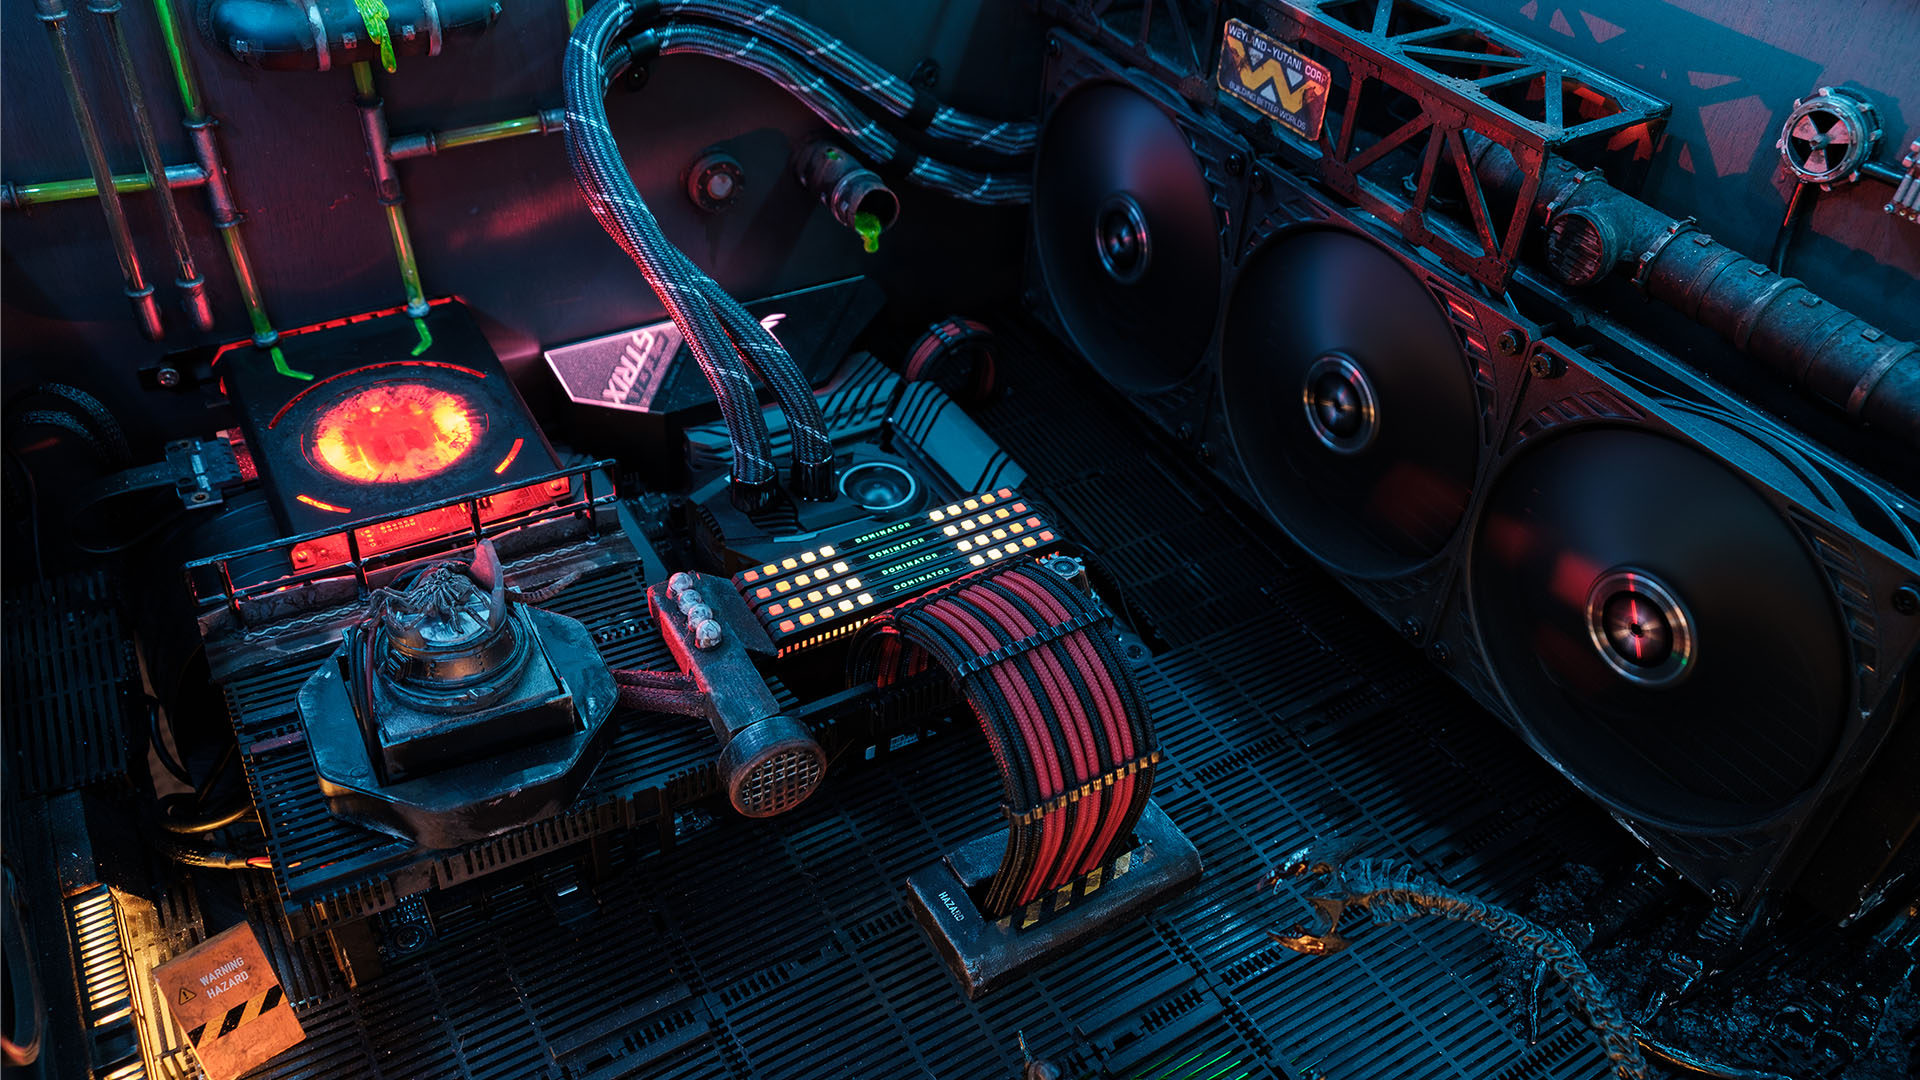
“I then layered up the edges of the filter grid with a sandy textured gritty paint, left it to dry and then began adding the green – I finished it off with gloss varnish to create that wet look. A similar effect was used for the dripping pipes – Mod Podge mixed with green paint, which I allowed to run out of the pipes and then stole my wife’s hairdryer to set it. I finished off the drips with some Citadel Technical paint to create that acid deep effect.
“Next was the dreaded Alien hive mucus, for which I went back to YouTube. This was one of the hardest parts to get right, and I still may revisit it. I couldn’t find an Alien diorama that anyone had got quite right. People had tried using expanding foam, and old pieces of cables, but none of the examples I saw looked good enough.
“I bought some airdrying clay, and after a week of cursing, trips to the shop to buy more, scrubbing stains out of the carpet and, yes, many whiskeys, I put together something that satisfied me. I painted it all black with more gloss varnish to create that nice wet look. I used some PVA glue poured into thin strips allowed to dry the peeled off my work surface to use as detail for the hive mucus.”
They’re coming out of the goddamn walls!
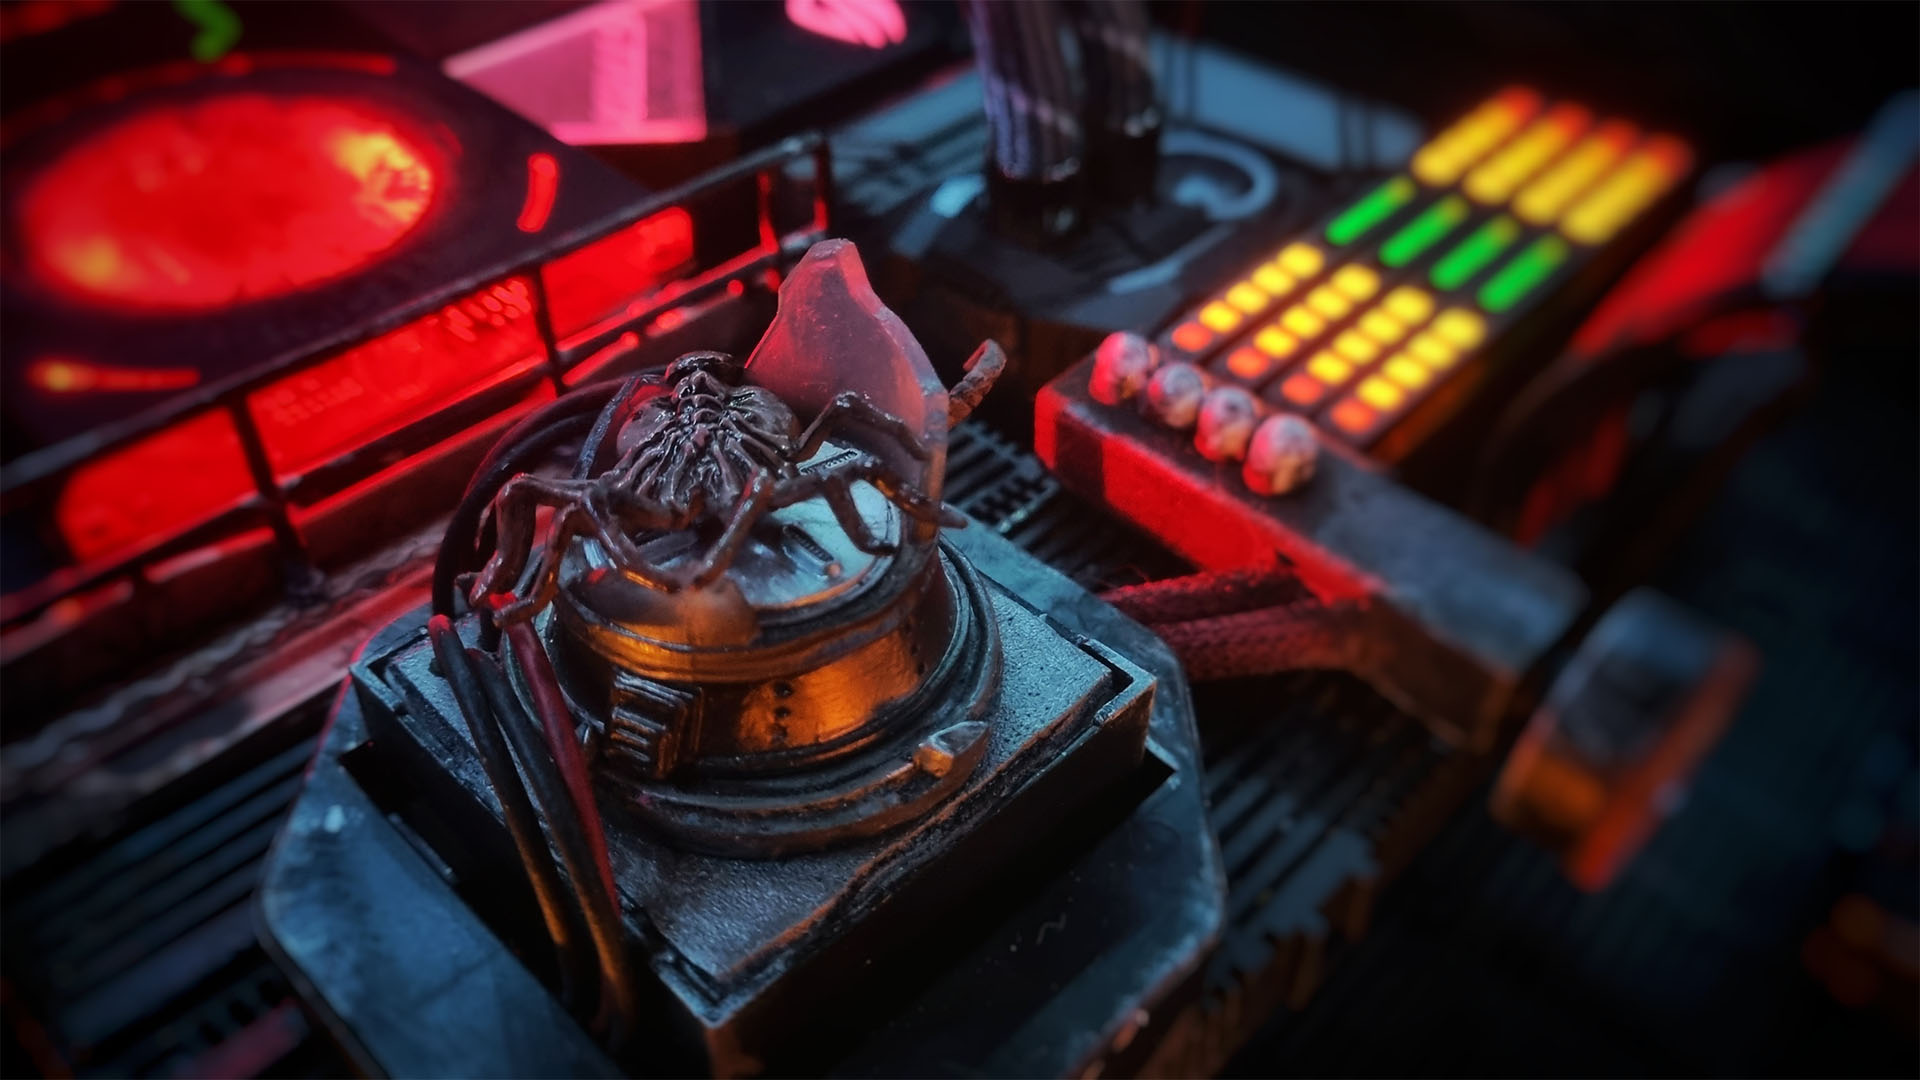
“It was then time for the centerpiece, for which I needed the right Alien model. To be honest, this was one of the first things I bought. After flicking through Google Images searches of Alien action figures I found that most fell into the ‘kids toy’ bracket. I wanted something that looked detailed and monstrous. I came across one made my Square Enix and I knew the build quality would be top-notch, as I have a Boba Fett statue made by the same firm and love it.
“The only problem is that it’s quite rare. I had to ship it direct from China and it took weeks to arrive. I was very pleased with the figure when it arrived, but I still had to put my own twist on it. I repainted parts to accent the acid running inside and through its veins. I also added a wet blood effect to its jaw, claws and blade-like tail.
“I finished the piece with a wash of varnish to give that it that wet and slimy effect. I then formed his limbs into the right positions and placed him into his final location, climbing out of the melted acid floor above the graphics card cavity. Sealed below 12mm of custom-cut toughened glass, he waits silently for his next sacrifice…
“I enjoyed making this build from start to finish. I enjoyed the challenges that I encountered and spending hours, sometimes days, figuring out how to solve them. Sometimes I went to bed frustrated that something else didn’t fit, or look right.
“Other nights I went to bed excited that I had just completed a part that looked awesome and I wanted to do some more. I hope this build inspires others to make that jump, to step outside their comfort zone and try something different. Just take one small step at a time, slowly build up your parts and don’t rush anything. The only limit is your imagination.”
Alien Breach custom gaming PC specs
- CPU: AMD Ryzen 7 5800X
- GPU: Nvidia GeForce RTX 3080 Founders Edition
- Storage: 500GB Samsung 970 Evo Plus (OS), 1TB Samsung 970 Evo Plus (game drive), Samsung 870 Evo (storage drive)
- Memory: Corsair Dominator Platinum 32GB 3600MHz
- Motherboard: Asus ROG Strix F570-F
- PSU: Corsair RM850x Gold
- Cooling: ARCTIC Liquid Freezer II 420mm AIO liquid cooler, 4 x 140mm ARCTIC P14 fans, 2 x Lian Li AL120 fans
That is some brilliant modeling work, Mick! We love the glowing floors, custom control panels and the goo – it feels like you’re really exploring the Nostromo. Thanks for taking us through how you built it.
We love your commitment to making the build of your dreams, Mr. Mass – we’re in awe of the fact that you even made your own CNC machine so you could fabricate the parts, and the custom distro plates look amazing. The result is a really clean build in a tight form factor, with beautiful symmetry.
This post originally appeared on Custom PC, which has been covering amazing setups for over 20 years and is now part of PCGamesN. Join our 500k member Facebook group to discuss this build.
