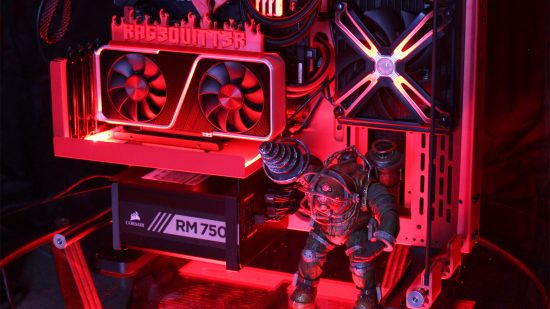
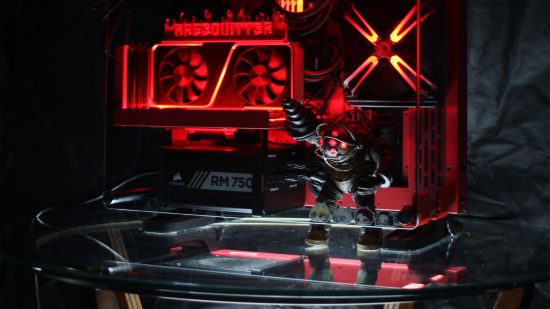
We love a bit of 3D printing action when it comes to PC modding, and PC builder Steve Grever has pushed the boat out with this fiery open-air build. Wanting to get away from the standard black box, Steve built this touch-screen-equipped PC in a red Thermaltake P3 chassis, featuring several custom 3D-printed PC parts made with matching red filament. There’s also a Big Daddy from BioShock keeping an eye on the flames.
If you want to learn how to make your own 3D-printed PC parts, then make sure you check out our full guide on how to make PC parts with a 3D printer, where we take you through the process of designing a reservoir in CAD and getting it printed.
Custom PC has been celebrating the best PC builds since 2003, and our Facebook group has over 375,000 members. We’ve seen many custom gaming PCs, from case mods to scratch builds. Here we talk to Steve about how he made this Thermaltake PC build.
Custom PC: How did this build start?
Steve: The Thermaltake P3 case caught my eye from the moment it was released, and I finally pulled the trigger and purchased one last year. I didn’t want a basic black case, so I made a bold choice to go with the red version, which will stand out great on my desk and at LAN parties.
I embraced the red color scheme and 3D-printed some custom parts (some functional, some decorative) to match the overall design. I decided to use matching red and black power supply extension cables and minimal RGB lighting via 140mm Zalman fans and magnetic RGB light strips – I didn’t want the case to be too bright or distracting while gaming or working from home.
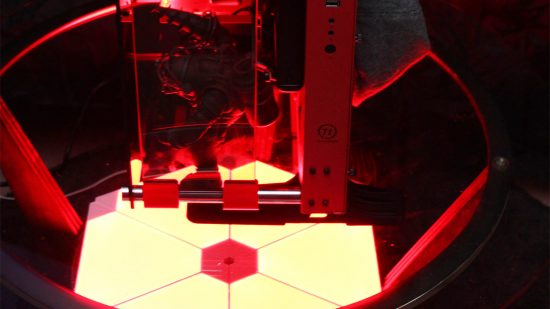
I’ve also been a PC gamer since 2002, and I wanted to share my love of games such as BioShock, Cyberpunk 2077 and so on, so I made room at the bottom of the case to swap out different gaming figures I wanted to show off. I created custom graphics for two small LCDs (one on the all-in-one liquid cooler and the 7-inch touch-screen) to display my favorite game characters and sometimes funny memes (Ed: We like what you’ve done with it in the photo below!).
Custom PC: What made you choose the Thermaltake P3 as the foundation?
Steve: The Thermaltake P3 case was great for me, not only because of its open-air design, but also because of its versatility for customizing the orientation of the entire case. In addition, it offers a variety of placement options for different hardware, such as the graphics card, power supply, and water-cooling components. With this case, the sky was the limit in terms of how I wanted the hardware to be displayed – I even had the option to mount the entire case on the wall to save desk space.
Custom PC: How did you create the custom parts, such as the surround on the cooler’s pump unit?
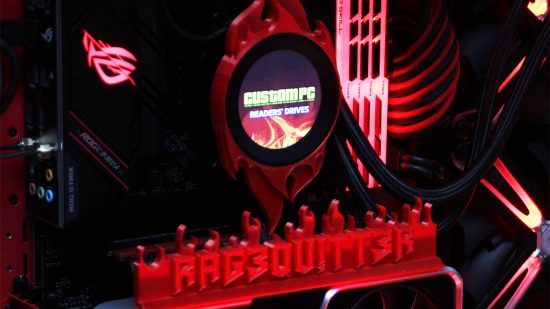
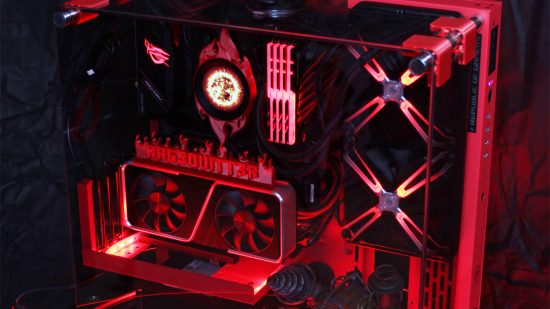
Steve: I designed the custom shroud for the NZXT Kraken Z63 cooler in Autodesk Tinkercad, and I created the STL files using Ultimaker Cura. I also found some shiny silk red filament on Amazon that matched the case really well. The shroud took around four hours to print on my Ender 3 V2 3D printer. I was really happy with how it turned out, so I added the same fire theme to my gamer tag plate, which I attached to the top of the graphics card.
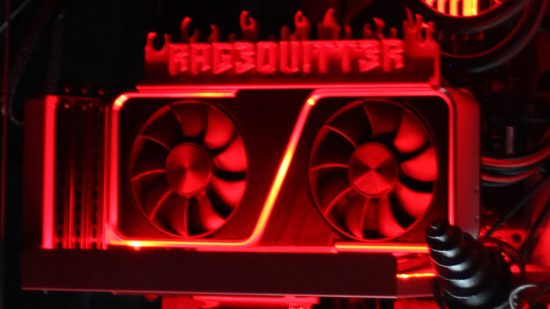
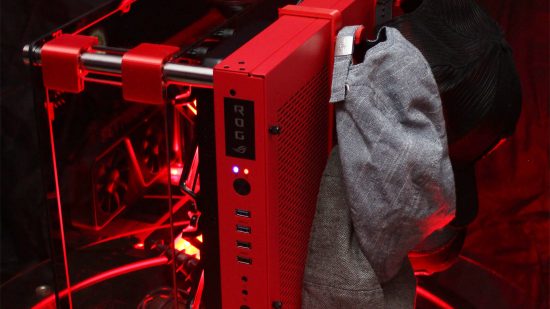
There are lots of other 3D-printed parts in this build with the same matching red filament, including the 7-inch touch-screen housing, gamer tag plates, hat and headphone hangers, and tempered glass brackets. I wanted to add a few more tempered glass sections to the front and top of the case. This was partly for safety, but also because I wanted room on the top of the case to add more gaming figures and other stuff.
I was able to find a custom glass fabricator online that helped me to find the right tempered glass to match my case. Thermaltake also has a great resource website with 3D printing assets for its P3 cases, which is where I found the brackets to attach the tempered glass to the case. I also found some red and black-sleeved power supply extension cables to keep the theme consistent between the case, components and cables.
Custom PC: Tell us about the touch-screen.
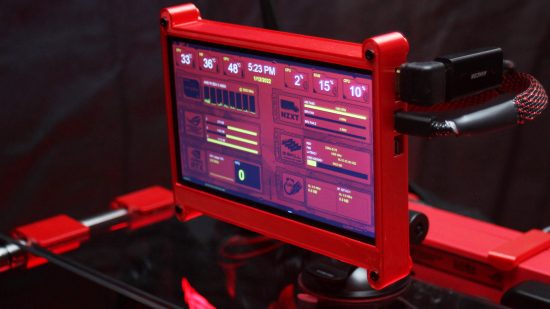
Steve: It’s a Kuman 7-inch capacitive touch-screen that has a 1,024 x 600 resolution. I use it to monitor PC temperatures, fan speeds and gaming frame rates. It interfaces with Windows via HDMI and is running AIDA64 Extreme software, which allows me to customize the entire layout and design of the monitoring panel. I found a panel design that matched the cyberpunk look and modified it to fit my needs.
Custom PC: What’s the story behind the BioShock Big Daddy model in the bottom?
Steve: BioShock was one of the first series of games that got me interested in PC gaming. The Big Daddy character had such a unique style, and the figure I purchased has eyes that can glow red, yellow or green. It can stand on its own, and it’s just the right size to place it at the bottom of the case.
Custom PC: How did you plan the lighting for this build?
Steve: I wanted the RGB lighting to be as minimal as possible, so I only added a 12in magnetic RGB strip in front of the graphics card, and used the lighting on the Zalman SF140 fans that covered the radiator.
I got really lucky finding these particular fans. The Kraken Z63 cooler requires 140mm fans, which can be difficult to find in different styles and designs. However, I came across the Zalman SF140 140mm RGB fans on Newegg, and immediately knew they would fit my design concept.
These fans add accent RGB lighting, and also have two sets of open-air fins per fan, which push more than enough air through the radiator to cool the CPU. The combination of an open-air fan design and X-shaped RGB lighting made the fans pop in my P3 case.
I then used the Asus Aura Sync app to create a custom lighting profile for the case. I really liked using an all-red hue across all the RGB components. The setup adds enough ambient light to brighten up the case a bit, but it doesn’t overpower the LCD on the CPU cooler or the touch-screen.
Custom PC: What specs did you choose and why?
Steve: I’ve always liked AMD processors, and the Ryzen 5000 series of CPUs were getting great reviews for their gaming speeds and overall performance. I also had to consider my budget, which was around $2,000. I focused on getting mid-range to high-end hardware for my processor, CPU cooler, motherboard and graphics card, and then used the rest of my budget on the power supply, system memory and storage.
This was a bit challenging with the PC hardware shortages at the time (and I didn’t want to pay scalper prices), but I managed to piece together an AMD Ryzen 5 5600X processor, NZXT Kraken Z63 cooler, Corsair RM750x modular PSU, 32GB of G.Skill TridentZ 3200MHz DDR4 RAM and an Asus ROG Strix B550-F Gaming Wi-Fi motherboard. Luckily, I was also able to acquire an Nvidia GeForce RTX 3060 Ti Founders Edition at MSRP from Best Buy using the Stock Drops Discord channel.
All of the hardware I chose is great for daily tasks, such as word processing, internet browsing and photo/video editing, but the PC is also excellent for gaming at 1,920 x 1,080 and 2,560 x 1,440 – I haven’t had any issues running games such as Horizon Zero Dawn, Outriders and Battlefield 2142 at High or Ultra settings (depending on the game).
I work from home as a web designer and content creator, so I use my PC daily for Photoshop, Illustrator and Dreamweaver. After work, I spend quite a few hours playing Rocket League, Halo Infinite and Battlefield 2142, to name a few games. I also design 3D parts in Tinkercad and dabble a bit in Blender too. At night, I also let my PC do some basic crypto-mining using Nice Hash with my RTX 3060 Ti.
Custom PC: Did you come across any difficulties?
Steve: The main challenges during the PC build process were cable management and placement of the 7-inch LCD touch-screen. The case has plenty of room for your main components, but the only area left open for the touch-screen was at the bottom of the case, or on the top using a suction cup mount that I secured to the glass. I also had difficulty routing the cables from the touch-screen to the back of the case.
I overcame the latter by finding right-angled HDMI and USB adaptors, which helped to move the cables toward the back of the case and give my PC a cleaner look.
Custom PC: How long did it take you to complete this build, from start to finish?
Steve: The initial build took only a few hours, but creating and printing the custom 3D parts took another week or so. I also had to wait almost two weeks for the custom tempered glass parts to be cut and shipped.
Cable management took a bit of time as well, but it was really a treat to do this with the P3 case because all the cables are hidden behind the back panel of the chassis. It was so easy to route cables under the case and over the top of the motherboard to connect the CPU power cables too. I finally completed the PC in a little over three weeks.
The build process was pretty straightforward –the main decisions were the case orientation (wall mounted, horizontal or vertical standing), graphics card and power supply orientation (two options for both) and where I wanted to mount the hard drive and radiator for the AIO cooler. The case has many extra parts, which enable you to change the case’s configuration to accommodate different layouts.
One of the final additions I made to the P3 case was creating and printing custom hat rack brackets for the back of the chassis. I own quite a few baseball caps, and the back of the case seemed pretty bare, so the hat racks are very functional.
Custom PC: Are you completely happy with the end result, or do you wish you’d done some of it differently?
Steve: I’m around 80 percent happy with the overall design to be honest. I’m thinking about creating some custom graphics that will be etched into the tempered glass panels. I’d also like to add some extra RGB lighting to light up each glass panel and bring out the etched graphics too.
In addition, I’d like to install a custom water-cooling system, because the closed-loop AIO system I chose is limited in many ways. I’d like to add hard, clear tubing and change the color of the liquid to match the case. I’ve seen some awesome custom reservoirs and waterblocks that could look great in this PC.
I also want to add more custom sleeving to the rest of the power supply cables, fan cables, SATA cables and RGB header cables. Lastly, I’m going to 3D-print a custom PSU cover using the silk red filament to match up all the hardware with the P3 case color scheme.
Thermaltake P3 BioShock PC build specs
- CPU: AMD Ryzen 5 5600X
- Case: Thermaltake P3
- GPU: Nvidia GeForce RTX 3060 Ti Founders Edition
- Storage: 500GB WD Blue SN550 M.2 NVMe SSD (for Windows), 2TB Mushkin Pilot-E M.2 NVMe SSD (game storage), 2TB WD Enterprise 7,200rpm 3.5-inch SATA hard drive (secondary storage)
- Memory: 32GB (4 x 8GB) G.Skill TridentZ RGB F4-3200C16-8GTZR
- Motherboard: Asus ROG Strix B550F-Gaming WiFi
- PSU: Corsair RM750x
- Cooling: NZXT Kraken Z63 all-in-one liquid cooler with 2 x Zalman SF140 140mm RGB fans
The PC builder
- Name: Steve Grever
- Age: 44
- Occupation: Web content Strategist
- Location: Cibolo, Texas, USA
- Main uses for PC: Work, gaming, photo/video editing, crypto mining
- Likes: Gaming, motorcycles, and specialty coffee
- Dislikes: BSODs, Starbucks coffee, and burnt popcorn
You’ve personalized this PC really well with your custom 3D-printed fiery touches around the CPU cooler pump and graphics card Steve – the red filament matches the theme perfectly, and this is a really distinctive build.
What do you think of this fiery open-air rig? Join the conversation to discuss this PC build with our 375,000+ strong member Custom PC Facebook group, where you can also submit your own PC build or gaming setup for consideration. If you want to see more outstanding custom PCs and gaming setups, check out our massive guide to the best PC builds.
